


Our first Sage X3 blog and what better way to start with. Here is a step by step procedure towards installing Sage X3 ERP v6 for the Sage X3 community.
Installing Sage X3 v6 is very well simplified. The installation guide gives you a step by step process for a smooth installation. Below are a few tips that you need to perform to ensure that the Installation process is faster and to save the users from the hassle of re-installation:
- Create a local windows user. This user should have the following permissions
- This user must be in local “Administrators” Groups
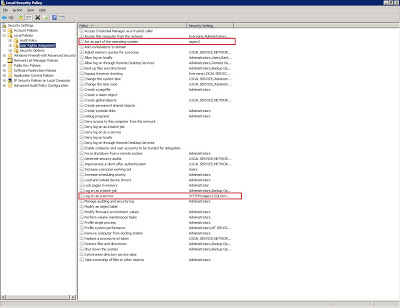
- Provide the following rights (Local Security Policy Settings -> Users right assessments)
Check Product: Sage X3 Development Services
i. Act as part of the Operating System
ii. Log on as a Service
-
When installing Microsoft SQL Server, create a new instance (Do not use the default instance). The Microsoft SQL Server default instance is not named and Sage X3 does not identify instances which are not named instances of SQL Server. So when installing Microsoft SQL Server ensure that you create a named instance. If you already have default instance installed you need to install another SQL Server instance for Sage X3 and it would be wise to create a separate and exclusive instance for Sage X3.
-
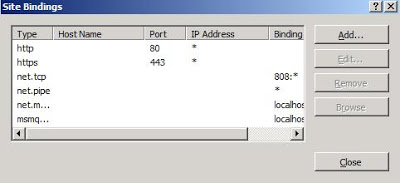
If you have IIS installed on the Sage X3 Application server then you will need to change the Port from “80” to some other port. When installing the Apache HTTP Server, it installs on port “80”, so if Port “80” is already being used it is not able to start the Apache service. The other alternative is to stop “World Wide Web Publishing” Service before installing the Apache HTTP Server. After the Apache HTTP Server is installed you can configure it to use some other port so that it does not conflicts with the default port “80” which is used by IIS.
Note: To change IIS Port in IIS 7 and Windows Server 2008 – Start IIS Manager – Right Click on Sites and select Edit Bindings from the context menu
-
Before installing the Safe X3 Web Server, you must login to Sage X3 using Sage X3 Client. When you connect to the Sage X3 Client it creates the folders.xml which is required when configuring Safe X3 Web Server. Note: If you do not log in to Sage X3 you may receive the error “Error when loading the list of folders”, File Not Found. It actually refers to the folders.xml
Apart from this do follow the Installation guide and we are sure you will be sailing safe through the installation process, it will be much faster and you will save quite a lot of time.