


Automated Data Collection (ADC) in Sage X3 provides efficient solutions addressing staff efficiency in warehouse management, including accuracy and timeliness.
Sage X3 comes with numerous ADC screens that can be accessed through RF terminals. However, in some scenarios, it is desired to have custom/new ADC screen that can be accessed through RF terminal or Web Server.
New Stuff: Accessing Sage ERP X3 using RF (Radio Frequency) Devices / VT220 Terminals
So, this blog will take through a short journey of creating an ADC screen in Sage X3.
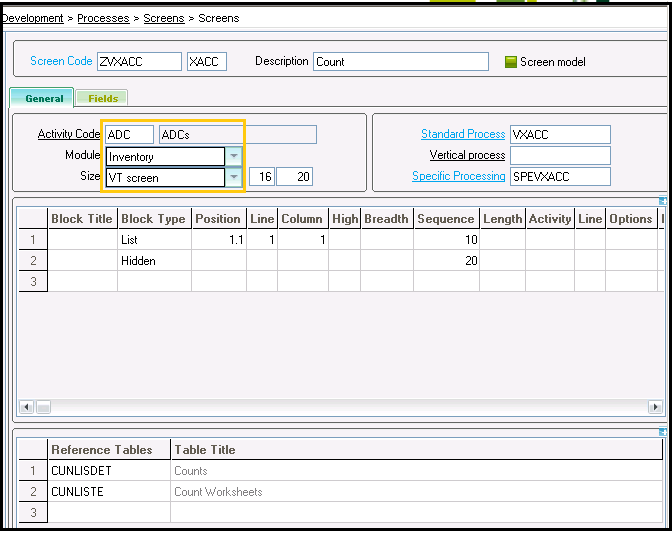
- Create a copy of an existing ADC screen, generally one that starts with ‘V’ and has size set to ‘VT Screen’. This would save a lot of configuration task on this screen.
- Make sure that the Activity code is set to ‘ADC’ and Size is set to ‘VT Screen’.
- Add fields and code as required for the screen.
- Now let us create the Window for the VT Screen. Select the ‘Active’ and ‘VT Window’ option. Select the respective module and Window type.
- Set the Header screen to ‘AVTENT’ by default.
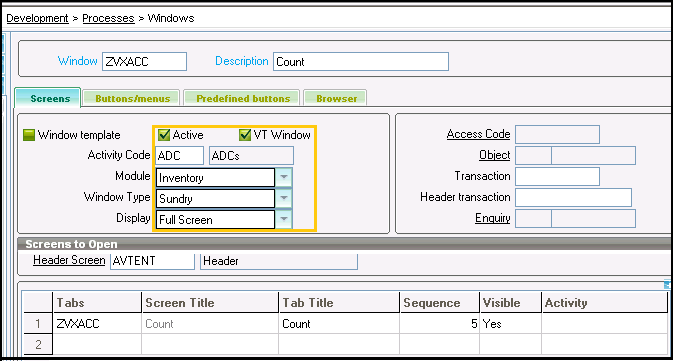
- Add the VT Screen that we have created. Finally add buttons if required.
- Now create an Action that would call load up the VT Window. Set the Main window to The VT Window we created.
- Finally create a Function with Parent Menu set to ‘VXADI’ and Action code set to the action we just created.
- Run ‘Menu Validation’ from ‘Development > Utilities > Dictionary > Validations > Menus’ and restart Sage X3 client. You should see the newly added ADC screen under ‘ADC’ module.
- Now confirm if the screen is functioning as expected and then we can make it visible on the RF Terminal screen.
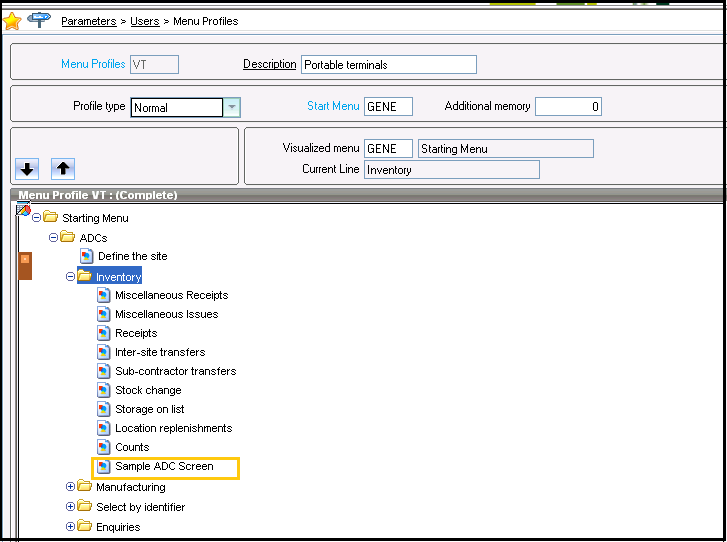
Following are the steps to make an ADC screen visible in RF terminals:
- Go to ‘Parameters > Users > Menu Profiles’ and right click on the node to which the newly created ADC window is to be added.
- Click on ‘Add a Function’ and select the Function corresponding to the ADC window.
Click on save and check if the RF terminal and you should see the newly added option under the respective node.
 Hope this blog was helpful and we will be exploring and writing more on ADCs in Sage X3.
About Us
Greytrix – a globally recognized Premier Sage Gold Development Partner is a one-stop solution provider for Sage ERP and Sage CRM needs. Being recognized and rewarded for multi-man years of experience, we bring complete end-to-end assistance for your technical consultations, product customizations, data migration, system integrations, third-party add-on development and implementation expertise.
Greytrix caters to a wide range of Sage Enterprise Management (Sage X3) offerings – a Sage Business Cloud Solution. Our unique GUMU™ integrations include Sage Enterprise Management (Sage X3) for Sage CRM, Salesforce.com and Magento eCommerce along with Implementation and Technical Support worldwide for Sage Enterprise Management (Sage X3). Currently we are Sage Enterprise Management Implementation Partner in East Africa, Middles East, Australia, Asia. We also offer best-in-class Sage X3 customization and development services, integrated applications such as POS | WMS | Payment Gateway | Shipping System | Business Intelligence | eCommerce and have developed add-ons such as Catch – Weight and Letter of Credit for Sage Enterprise Management to Sage business partners, end users and Sage PSG worldwide.
Greytrix is a recognized Sage Rockstar ISV Partner for GUMU™ Sage Enterprise Management – Sage CRM integration also listed on Sage Marketplace; GUMU™ integration for Sage Enterprise Management – Salesforce is a 5-star app listed on Salesforce AppExchange.
For more information on Sage X3 Integration and Services, please contact us at x3@greytrix.com. We will be glad to assist you.