Configuring Custom Field in Sage Intacct

Configuring Custom Field in Sage Intacct-banner-img

Configuring Custom Field in Sage Intacct

  • To support your specific business practices, many activities related to Customization Services require data that is captured in custom fields. These fields are unique to your organization and are used to capture business-specific data in Sage Intacct. If a particular object does not have the field you need, you can create custom fields to capture the data. Once created, you can add these fields to standard forms, such as Customer Master or Sales Order, to access and utilize the data.
 
  • Define Custom Fields: – Make Sage Intacct work for your business by easily adding custom transaction fields with a wizard.

Pre-requisites:

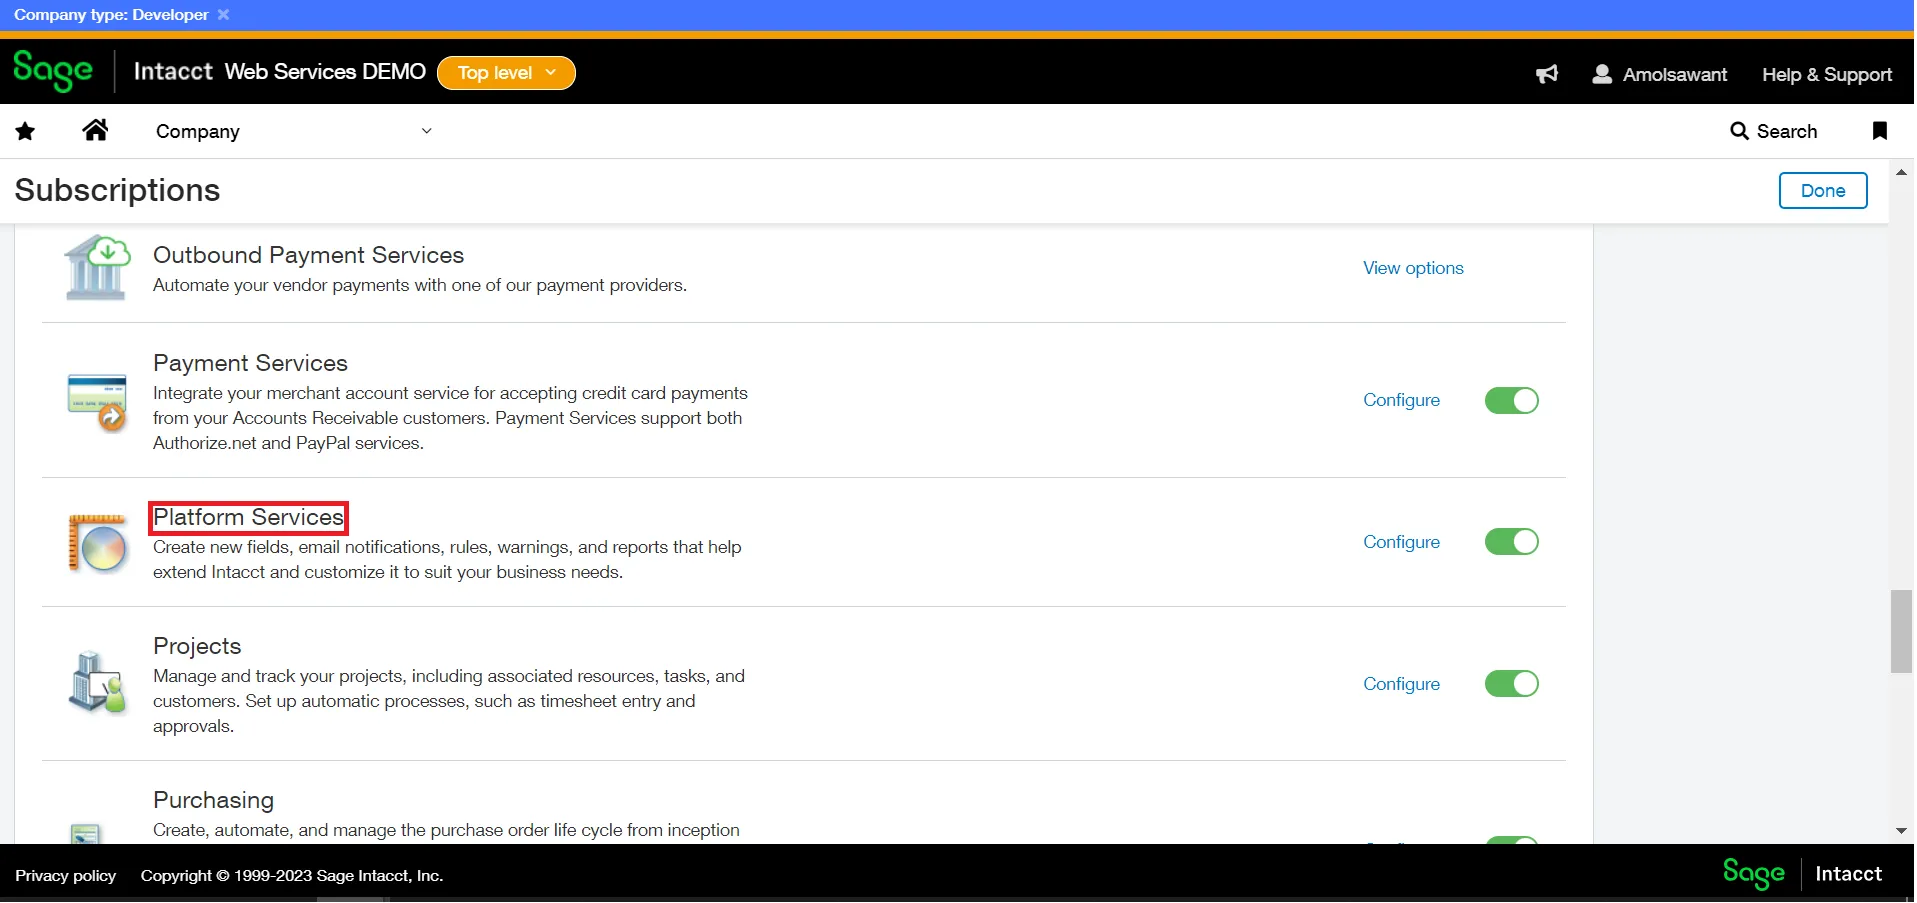
  • Subscription: – Customization Services or Platform Services. Please find the below screenshot of the module to configure the same.
Configuring Custom Field in Sage Intacct-img
  • Scenario: – Let’s take an example; while adding a new customer, we need to define a custom field as “Customer Bank Name” where the user must put the bank’s name for reference. However, to achieve the above requirement, we need to add the customize field on the customer master.
Here are the steps you should follow to initiate the process:
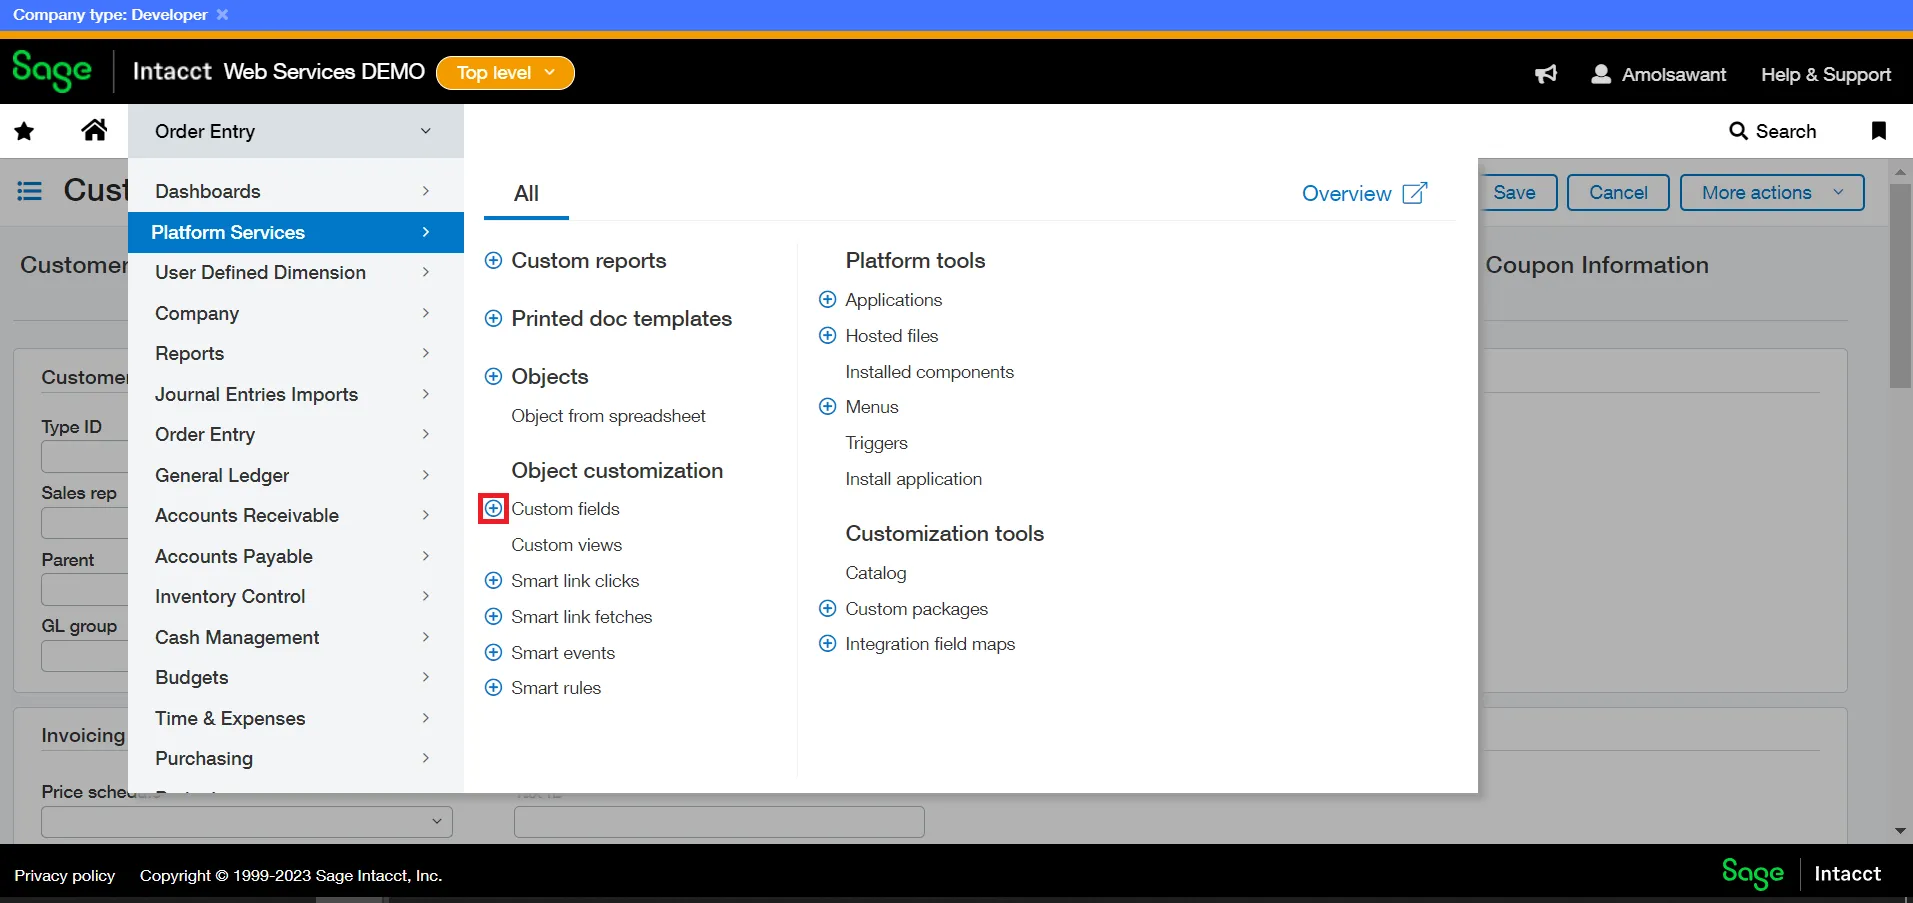
  • Step 1: – Go to Application >> Platform Service >> then click on + Icon besides custom field
Configuring Custom Field in Sage Intacct-img
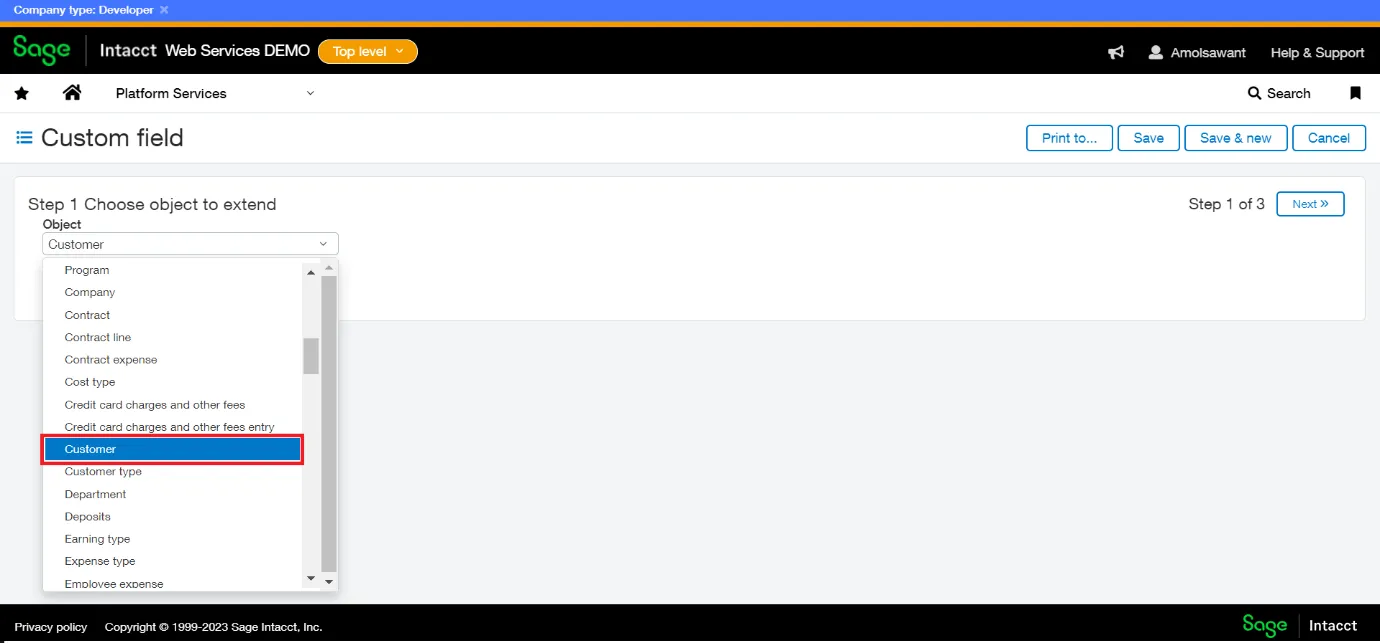
  • Step 2 : – The below window will flash on your screen. Select the appropriate object/transaction from the list where you need to add the custom field; in the current scenario, we will select Customer as we need to add a custom field as “Customer Bank Name” on the Customer Master and select “Next.”
Configuring Custom Field in Sage Intacct-img
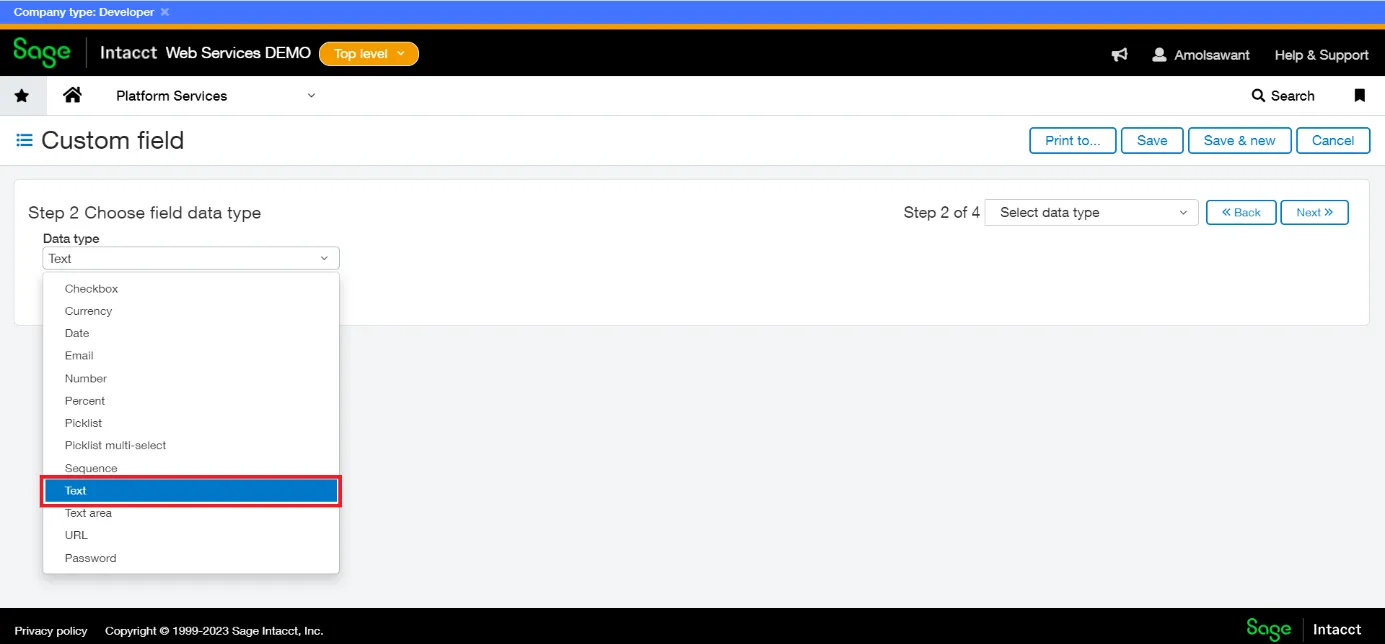
  • Step 3 : – After appearing on the below screen, Select the appropriate data type for the field. We will select the “Text” data type as our custom field consists of alphanumeric characters. And then, Click on “Next.”
Configuring Custom Field in Sage Intacct-img
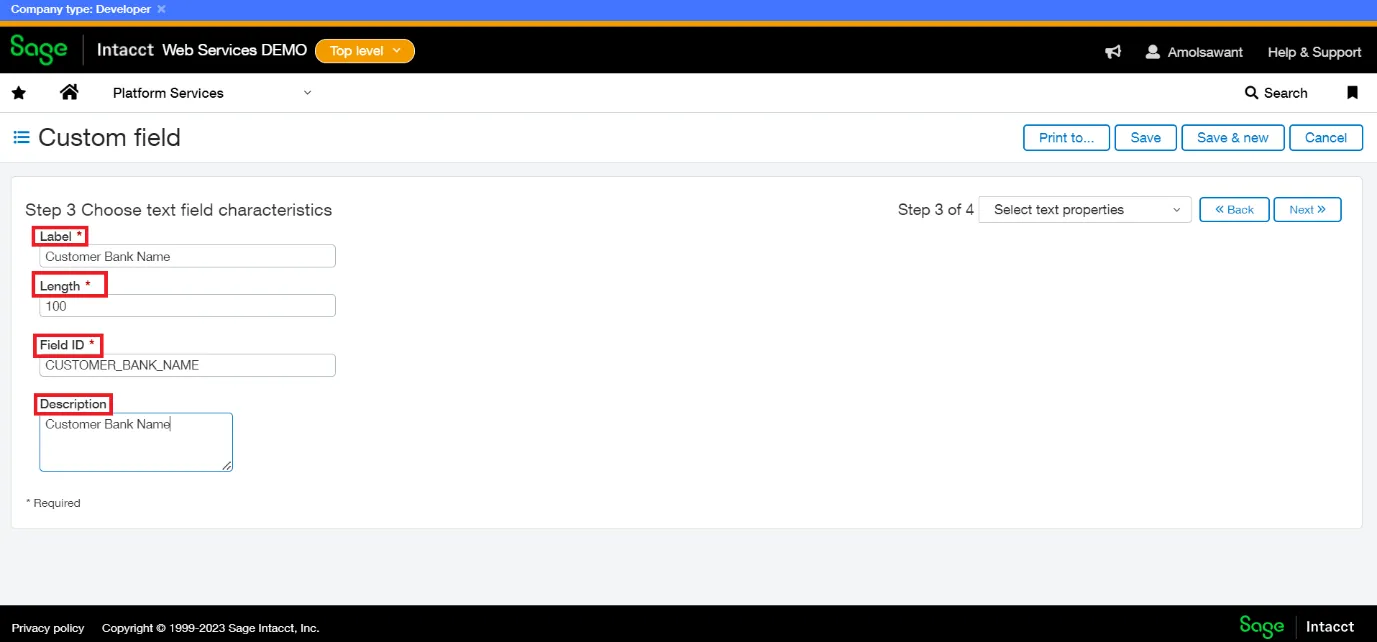
  • Step 4 : – Field Characteristics: In the below section, give the proper Field label, Length, Field Id, and Description, which will help the user to understand what type of data to enter. Click on “Next.”
Configuring Custom Field in Sage Intacct-img
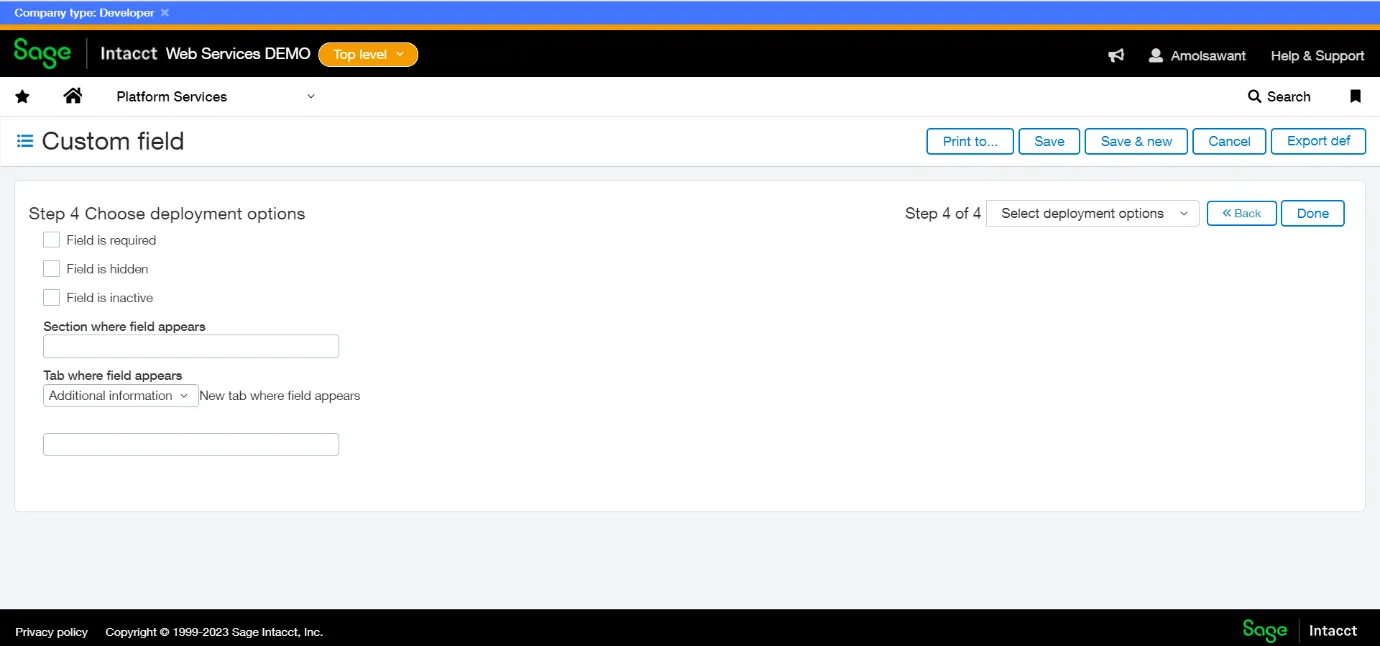
  • Step 5 Choose Deployment option : – This will help to analyze where the field needs to appear on the screen and also helps to mark it as mandatory, Hidden, and Inactive.
Configuring Custom Field in Sage Intacct-img

Please find the below deployment option for your perusal:

  1. Field is required : – Makes the field required. Depending on the field type, the user must enter a value or select an option to save the object.
  2. Field is hidden : – Hides the field so that it is not displayed on the page. This option is primarily used by developers
  3. Field is inactive : – Hides and deactivates the field but retains any data previously saved in the field. Select this option if you no longer use the field but want to maintain data once entered in the field.
  4. Section where field appears : – Specifies the Section to which you want to add the field. If you need to include a new section in your document, you can either create a custom section or add a field to an existing one.

To add the field to an existing section:

  • For the Section where the field appears, enter the name of the section exactly as it appears on the page
  • For the Tab where field appears option, select the tab on which the section appears
To add the field to a new section:
  • For the Section where the field appears, enter the name that you want to use for the section
  • For the New tab where field appears option, select an existing tab or enter a new name to place the section on a new tab
  1. Tab where field appears : – Specifies the Tab on which the field appears. You have the option to either choose an existing tab or enter a name for a new tab.
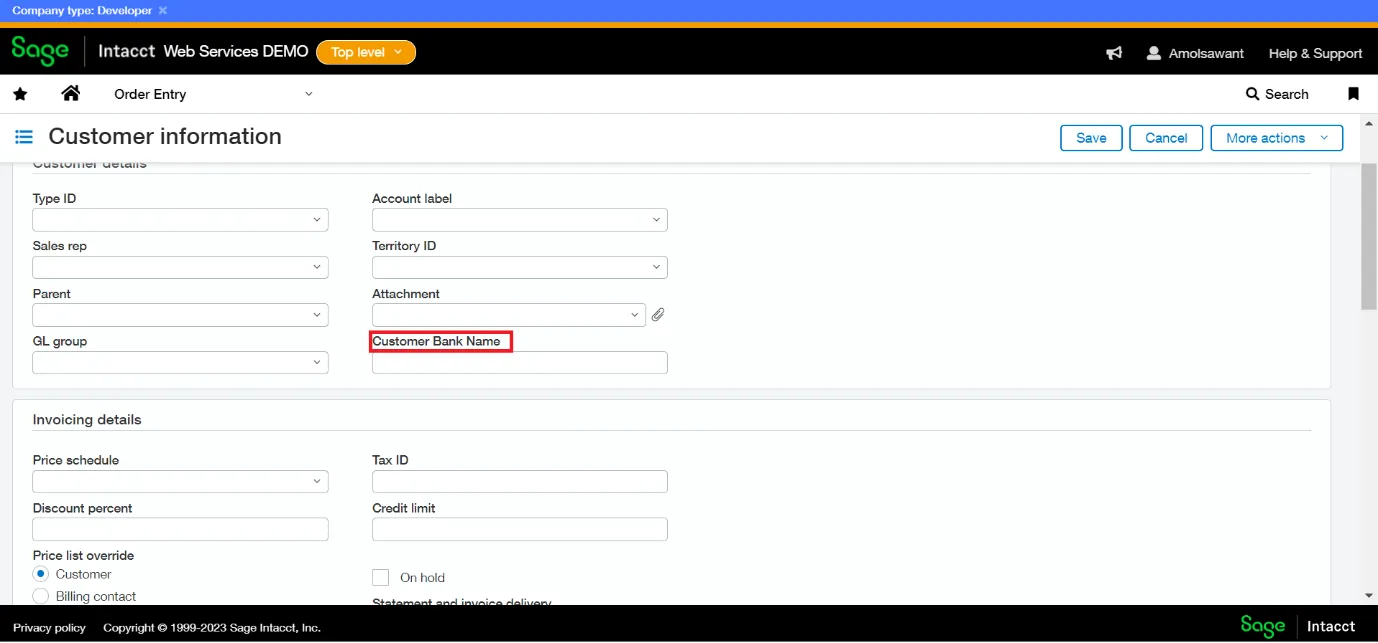
After setting up the custom field, you can put the “Customer Bank Name” of the particular Customer, as shown below in the screenshot.
Configuring Custom Field in Sage Intacct-img
As per the above scenario, we understand that setting up the custom fields will help us meet the basic requirements in any business transaction. Users can create multiple fields without code through the front end to meet your requirements.

About Us

Greytrix Africa is a leading Sage business partner and ISV Partner offering Consulting, Implementation, and development services for Sage X3, Sage 300, Sage 300 People (HRMS), Sage CRM, and Sage Intacct, which covers East Africa, West Africa, SADC, and Middle East region. We offer professional services such as Implementation and Configuration, Business Process Analysis, Project Management, Integrations and Migrations, and Technical & Functional Support, along with enhancements within Sage X3, Sage 300 People (HRMS), Sage 300, Sage CRM, and Sage Intacct across various industry verticals like Process Manufacturing (Food & Beverages, Chemical), Discrete manufacturing (Automotive, Textile & Apparel), Non-Profit, Health-care Industry and Services Industry (Financial, Software & Engineering), Distribution (Transportation & Logistics), and Agriculture.

Our Partners

Get In Touch

Get In Touch

Thank you for contacting us.

Be ready to explore some leading business management solutions that will help shape the future of your business!

Our team will get in touch with you shortly.