Introduction
Salesforce provides various features to enhance collaboration among team members. One such feature is the Account Team, which allows multiple users to work together on a single account by defining roles and access levels. The Account Team Member object plays a crucial role in this functionality by enabling administrators and users to assign different team members specific responsibilities within an account.
This blog will explore the Account Team Member object, its purpose, and a step-by-step guide to implementing it in Salesforce.
Purpose of the Account Team Member Object
The Account Team Member object assigns multiple users to an account with specific roles and permissions. This feature is beneficial for organizations that require collaboration across different departments, such as Sales, Support, and Customer Success.
Key Benefits
- Enhances teamwork and collaboration on account records.
- Allows defining different roles for team members.
- Controls access to account-related data through defined permissions.
- Improves sales and service efficiency by clearly assigning responsibilities.
How to Implement Account Team Members in Salesforce
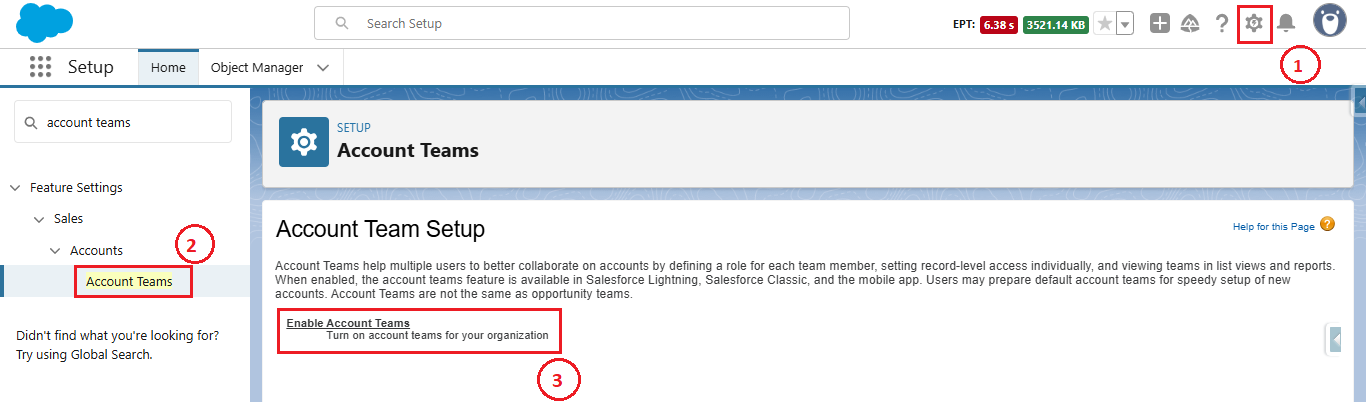
Step 1: Enable Account Teams in Salesforce
By default, the Account Team feature is not enabled in Salesforce. To use it, follow these steps:
- Navigate to Setup → Enter “Account Teams” in the Quick Find box.
- Click Account Teams Settings.
- Check the box for Enable Account Teams.
- (Optional) Enable Account Teams in Lightning Experience. Click Save.
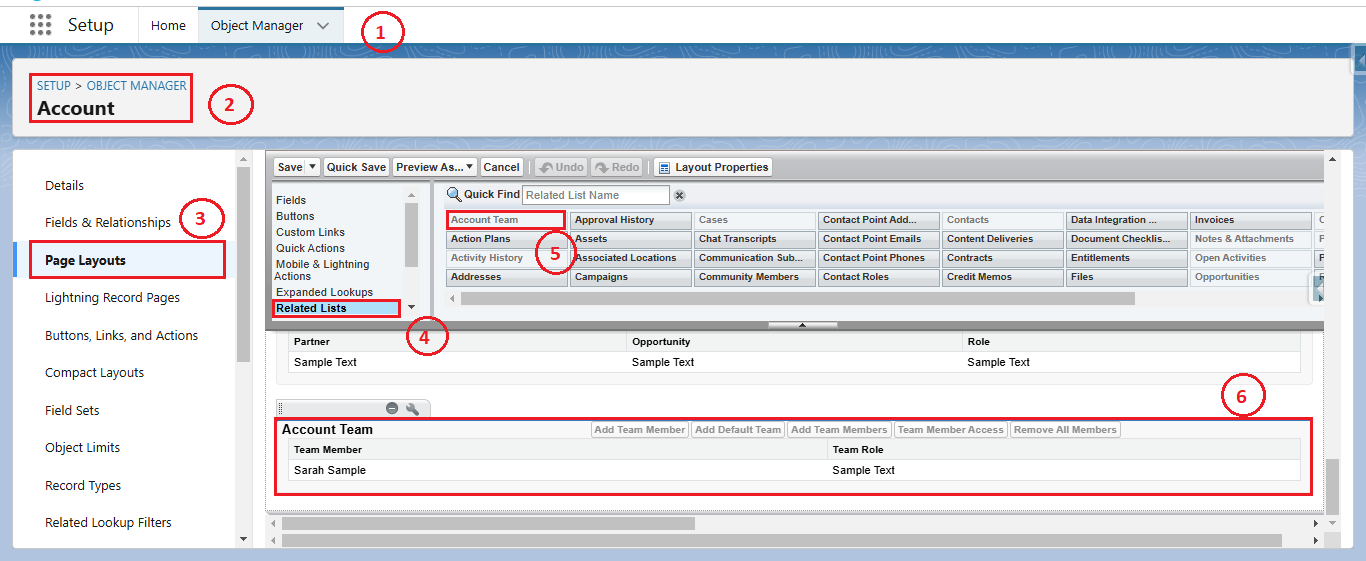
Step 2: Add the Account Team Related List to the Account Page Layout
To allow users to add team members to an account, you need to modify the page layout:
- Go to Setup → Object Manager.
- Select Account → Click Page Layouts.
- Choose the layout you want to edit.
- Drag the Account Team-related list onto the page layout. Click Save.
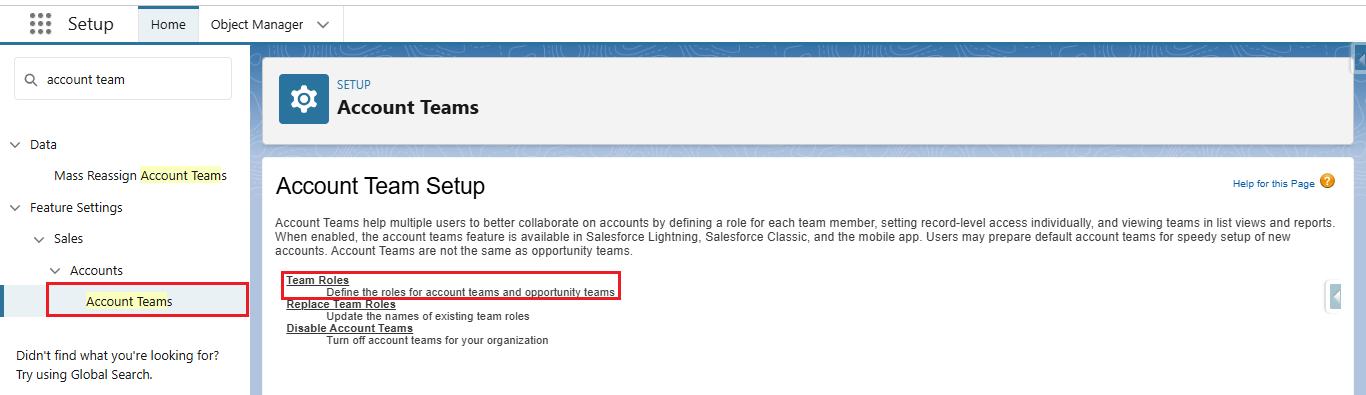
Step 3: Manage Account Team Roles
Salesforce allows defining custom roles for account team members:
- Go to Setup → Enter “Roles” in the Quick Find box.
- Click Team Roles.
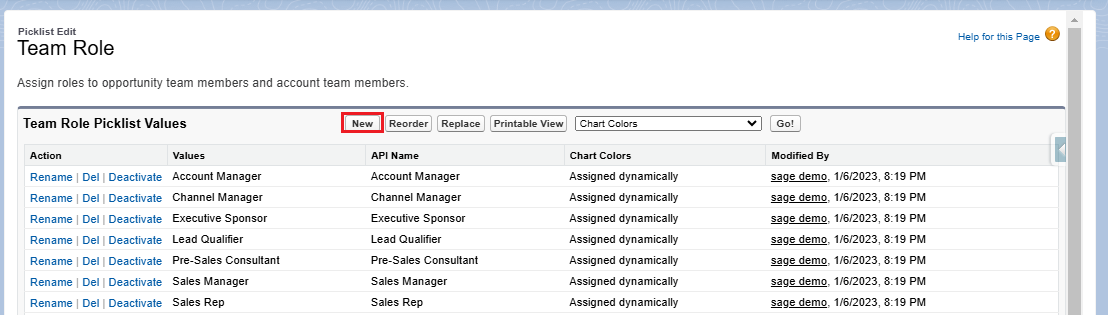
- Click on New Role and enter the role name (e.g., Sales Manager, Support Rep). Click Save.
- Now, when adding team members to an account, these roles will be available for selection.
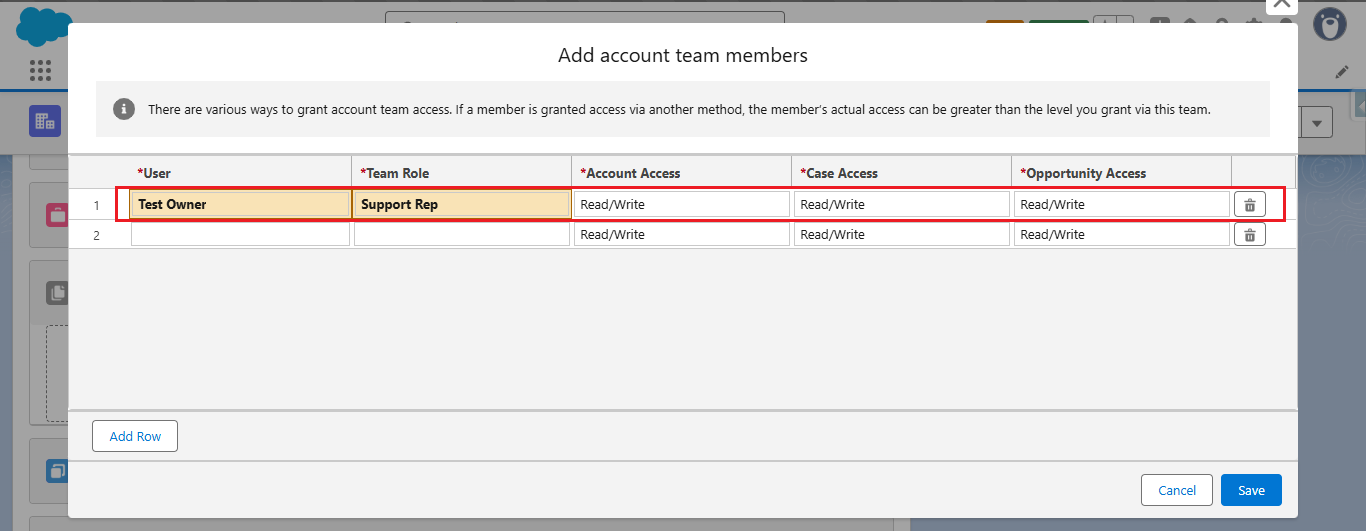
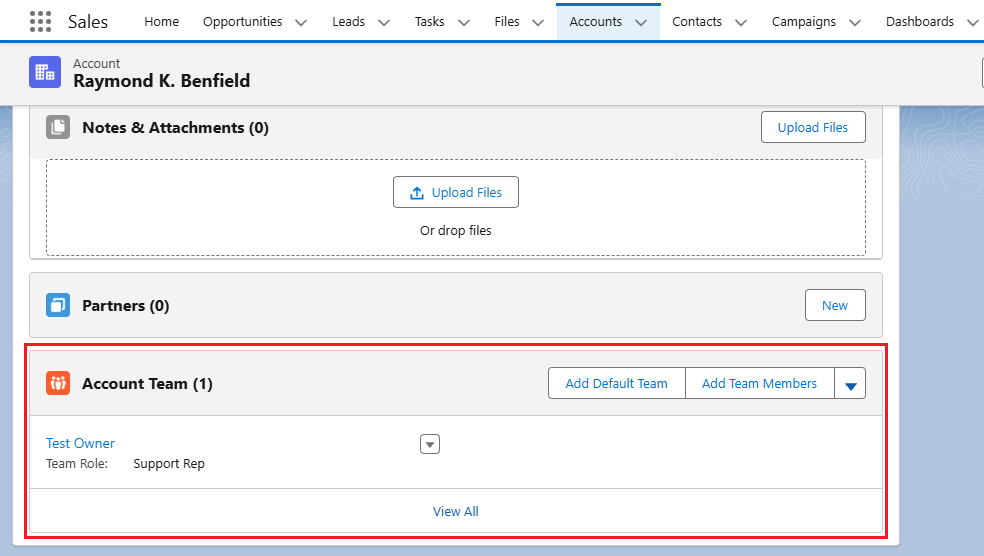
Step 4: Add Account Team Members to an Account
To assign team members to a specific account:
- Open an Account record.
- Locate the Account Team-related list.
- Click Add Team Members.
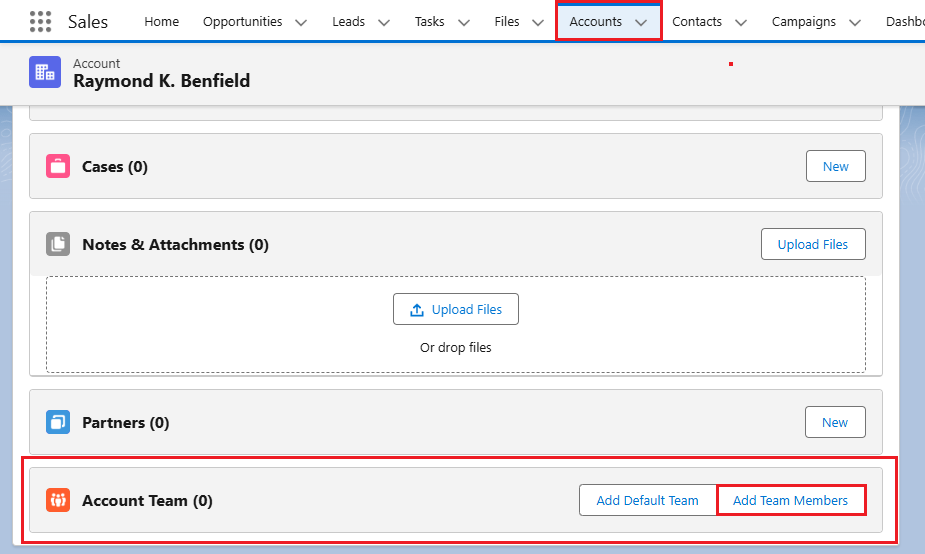
- Select users and define their roles.
- Set their access levels (Read-Only, Read/Write, etc.). Click Save and then you will see the Team Member added to the Account Team.
Conclusion
The Account Team Member object in Salesforce is a powerful feature that enhances collaboration among different team members working on an account. By implementing Account Teams, organizations can streamline their sales and support processes, ensuring the right team members have appropriate access to account-related data.
By following the above blog instructions, you will be able to learn “Account Team Member Functionality in Salesforce: A Complete Guide“. If you still have queries or any related problems, don’t hesitate to contact us at salesforce@greytrix.com. More details about our integration product are available on our website and Salesforce AppExchange.
We hope you find this blog resourceful and helpful. However, if you still have concerns and need more help, please contact us at salesforce@greytrix.com.
About Us
Greytrix – a globally recognized and one of the oldest Sage Development Partner and a Salesforce Product development partner offers a wide variety of integration products and services to the end users as well as to the Partners and Sage PSG across the globe. We offer Consultation, Configuration, Training and support services in out-of-the-box functionality as well as customizations to incorporate custom business rules and functionalities that require apex code incorporation into the Salesforce platform.
Greytrix has some unique solutions for Cloud CRM such as Salesforce Sage integration for Sage X3, Sage 100 and Sage 300 (Sage Accpac). We also offer best-in-class Cloud CRM Salesforce customization and development services along with services such as Salesforce Data Migration, Integrated App development, Custom App development and Technical Support business partners and end users. Salesforce Cloud CRM integration offered by Greytrix works with Lightning web components and supports standard opportunity workflow. Greytrix GUMU™ integration for Sage ERP – Salesforce is a 5-star rated app listed on Salesforce AppExchange.
The GUMU™ Cloud framework by Greytrix forms the backbone of cloud integrations that are managed in real-time for processing and execution of application programs at the click of a button.
For more information on our Salesforce products and services, contact us at salesforce@greytrix.com. We will be glad to assist you.
Related Posts