Managing Salesforce user access manually can lead to security gaps, compliance risks, and unnecessary administrative effort. Salesforce User Access Policies offer a powerful, no-code solution to automate user access provisioning and de-provisioning without relying on Flows, Apex, or custom automation.
This feature helps administrators centrally manage permissions while ensuring users always have the right level of access at the right time.
What You’ll Learn
After reading this blog, you’ll be able to:
- Automate Salesforce user access using User Access Policies
- Assign Permission Sets, Permission Set Groups, and Licenses automatically
- Manage Public Group and Queue membership effortlessly
- Grant Package Licenses dynamically
- Maintain security and compliance by revoking access automatically when conditions change
Use Case
When a user is created with the role Eastern Sales Team, Salesforce should automatically grant:
- Permission Set License: Field Service Dispatcher
- Permission Set Group: Eastern Sales Team
- Public Group: Sales Team Eastern
This ensures users receive all required access immediately without manual intervention.
Step 1: Enable User Access Policies
Before creating policies, the feature must be enabled in Salesforce Setup.
- Navigate to Setup
- Search for User Management Settings
- Enable the following options:
- User Access Policies
- Enhanced Interface for User Access Policies
- Save the changes

Once enabled, Salesforce allows access automation without any custom code.
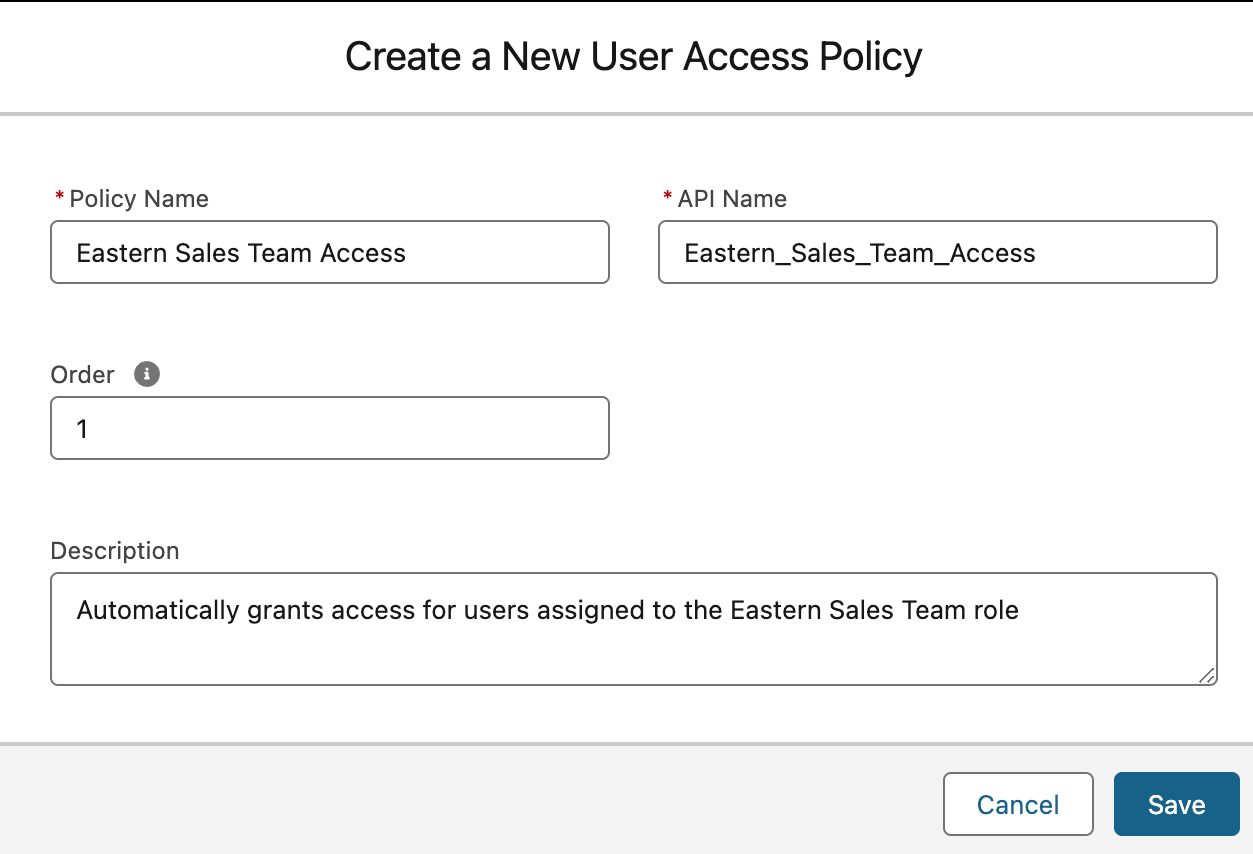
Step 2: Create a User Access Policy
Next, create a policy to control how access is assigned.
- Go to Setup → User Access Policies
- Click New User Access Policy
- Provide the following details:
- Name: Eastern Sales Team Access
- Order: 1
- Description: Automatically grants access for users assigned to the Eastern Sales Team role
- Save the policy
Step 3: Define User Criteria
Set conditions so the policy applies only to relevant users.
- Open the Eastern Sales Team Access policy
- Click Edit Criteria
- Under Define User Criteria, configure:
- Resource: Role
- Operator: Equals
- Value: Eastern Sales Team
- Save the criteria
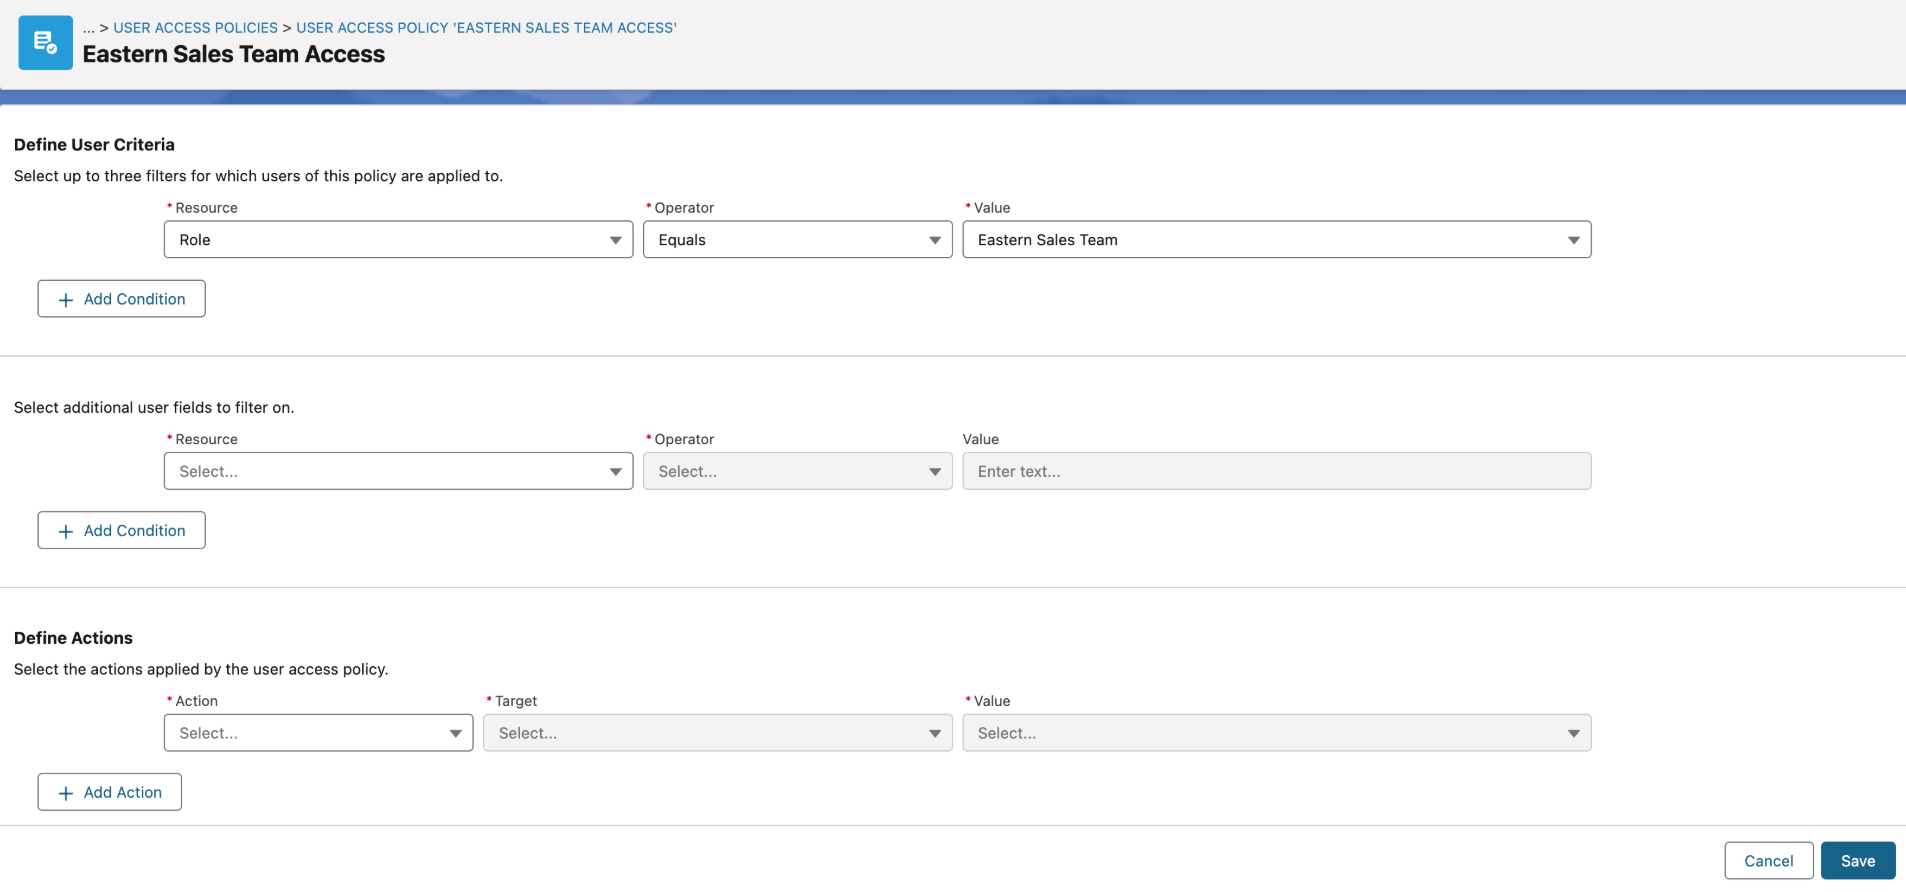
This ensures the policy triggers only when the correct role is assigned.
Step 4: Configure Access Assignments
Now define what access should be granted when the criteria are met.
- In the same policy, navigate to Define Actions
- Add the following access grants:
- Grant → Permission Set License: Field Service Dispatcher
- Grant → Permission Set Group: Eastern_Sales_Team
- Grant → Group: Sales_Team_Eastern
- Save the actions
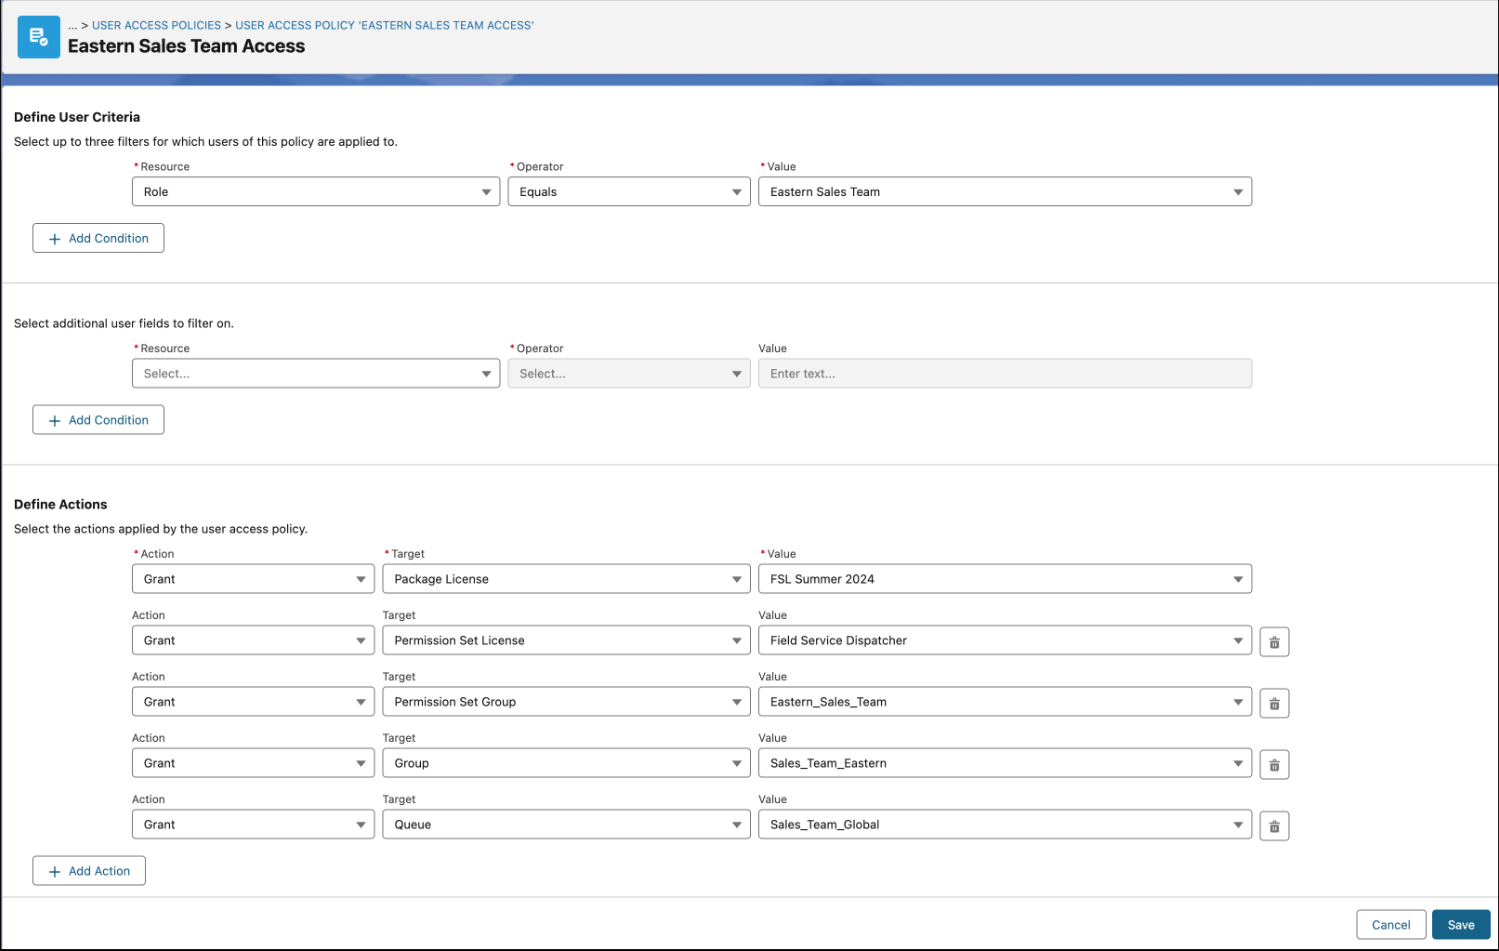
All access is now centrally managed and automatically applied.
Step 5: Automate and Activate the Policy
Activate the policy to make it effective.
- Navigate to Automate Policy
- Select Only when a user is created
- Click Activate
Salesforce will now automatically grant or revoke access based on the user’s role, ensuring consistency and compliance across the org.
Conclusion
Salesforce User Access Policies simplify access management by eliminating manual assignments and reducing security risks. By automating permission sets, licenses, and group memberships based on user attributes like role, administrators can maintain compliance, improve efficiency, and ensure users always have appropriate access. This no-code approach makes user management scalable, secure, and easy to maintain in growing Salesforce organizations.
By following the above blog instructions, you will be able to learn “Automate Salesforce User Access with User Access Policies (No Code Required)”. If you still have queries or any related problems, don’t hesitate to contact us at salesforce@greytrix.com. More details about our integration products are available on our website and Salesforce AppExchange.
We hope you may find this blog resourceful and helpful. However, if you still have concerns and need more help, please contact us at salesforce@greytrix.com.
About Us
Greytrix – a globally recognized and one of the oldest Sage Development Partner and a Salesforce Product development partner offers a wide variety of integration products and services to the end users as well as to the Partners and Sage PSG across the globe. We offer Consultation, Configuration, Training and support services in out-of-the-box functionality as well as customizations to incorporate custom business rules and functionalities that require apex code incorporation into the Salesforce platform.
Greytrix has some unique solutions for Cloud CRM such as Salesforce Sage integration for Sage X3, Sage 100 and Sage 300 (Sage Accpac). We also offer best-in-class Cloud CRM Salesforce customization and development services along with services such as Salesforce Data Migration, Integrated App development, Custom App development and Technical Support business partners and end users. Salesforce Cloud CRM integration offered by Greytrix works with Lightning web components and supports standard opportunity workflow. Greytrix GUMU™ integration for Sage ERP – Salesforce is a 5-star rated app listed on Salesforce AppExchange.
The GUMU™ Cloud framework by Greytrix forms the backbone of cloud integrations that are managed in real-time for processing and execution of application programs at the click of a button.
For more information on our Salesforce products and services, contact us at salesforce@greytrix.com. We will be glad to assist you.
Related Posts