In our previous blog, we explained Kit Assembly what is it. How it simplifies bundling and how it’s useful across various industries. Now we understand the concept and the benefits. Let’s Move on ahead.
This blog provides a step by step process to perform Kit Assembly in Acumatica ERP– From Creating Kit Inventory Item with Components, Kit specification to executing the assembly and sell the final kit.
See the below Steps,
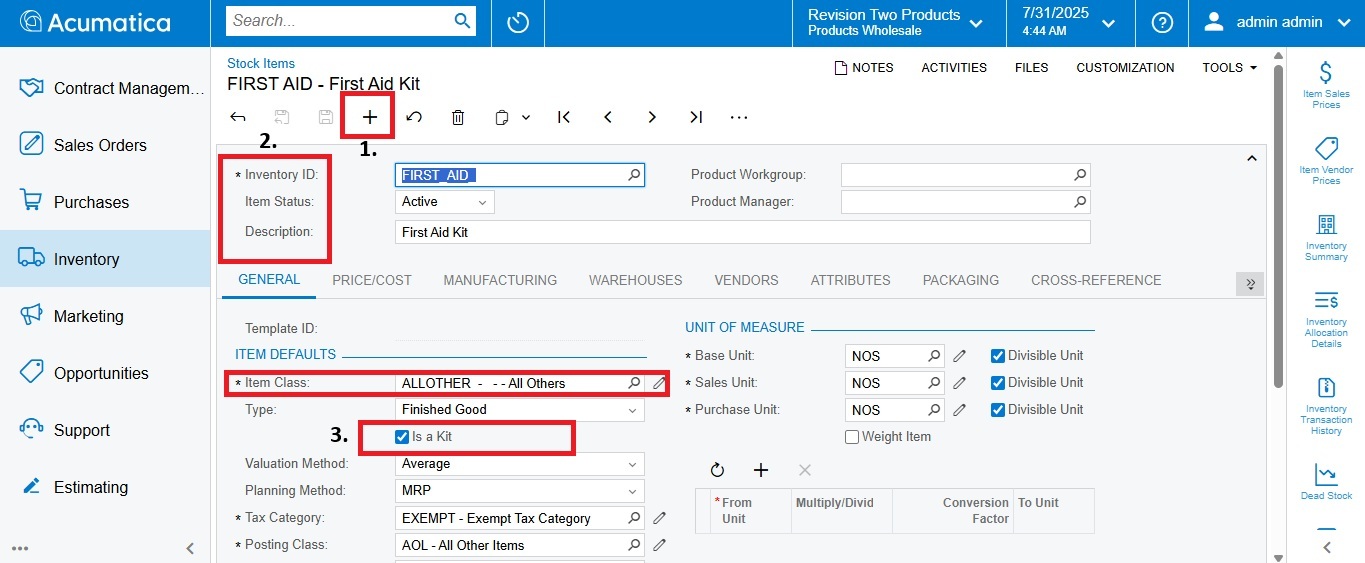
Step 1: Create a Kit Inventory Item.
Navigation: Inventory → Stock Items (or Non-Stock Items)
- Click + New Record
- Fill In below details,
-Mention Inventory ID:
-Mention Item Status:
-Mention Description:
-Mention Item Class:
3. Under the General Setting Tab → Item Defaults:
Set = Unable Kit Assembly
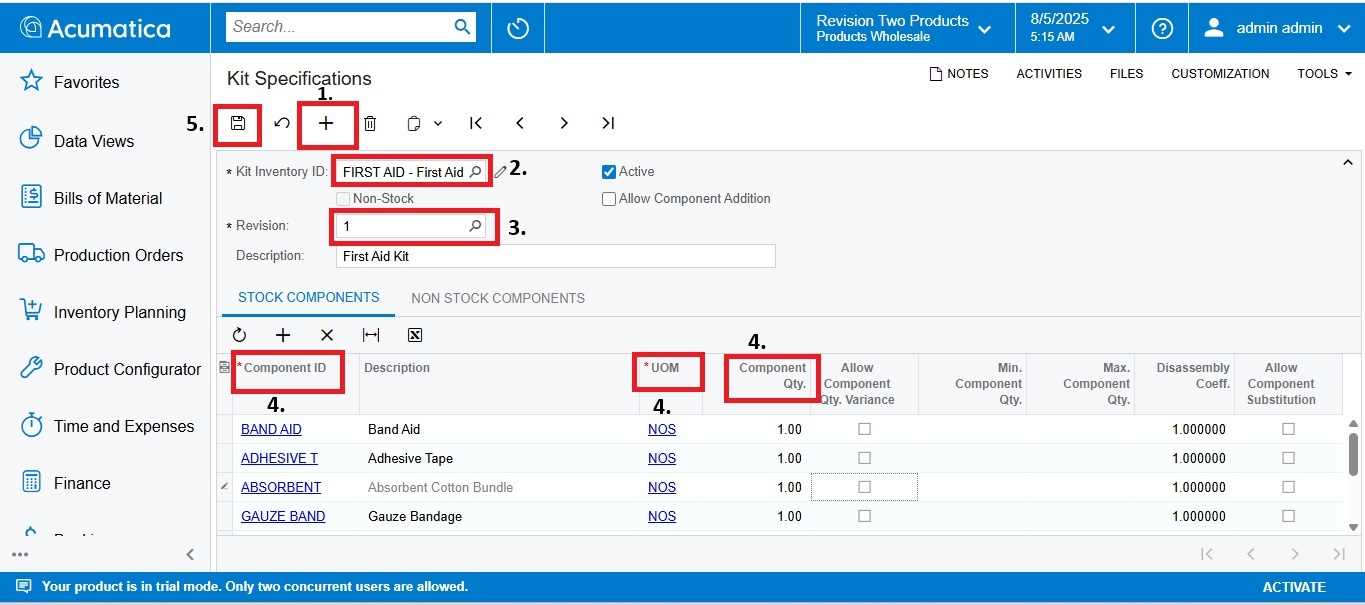
Step 2: Define Skit Specification.
Navigation: Inventory → Kit Specifications
- Click + New Record
- Select Your Kit Inventory
- Enter Revision Id
- In the Component Tab:
- Add Each Component Item
- Enter Qty, UOM, and Position if Required
- Save the Record
Screenshot: Kit Specification Setup
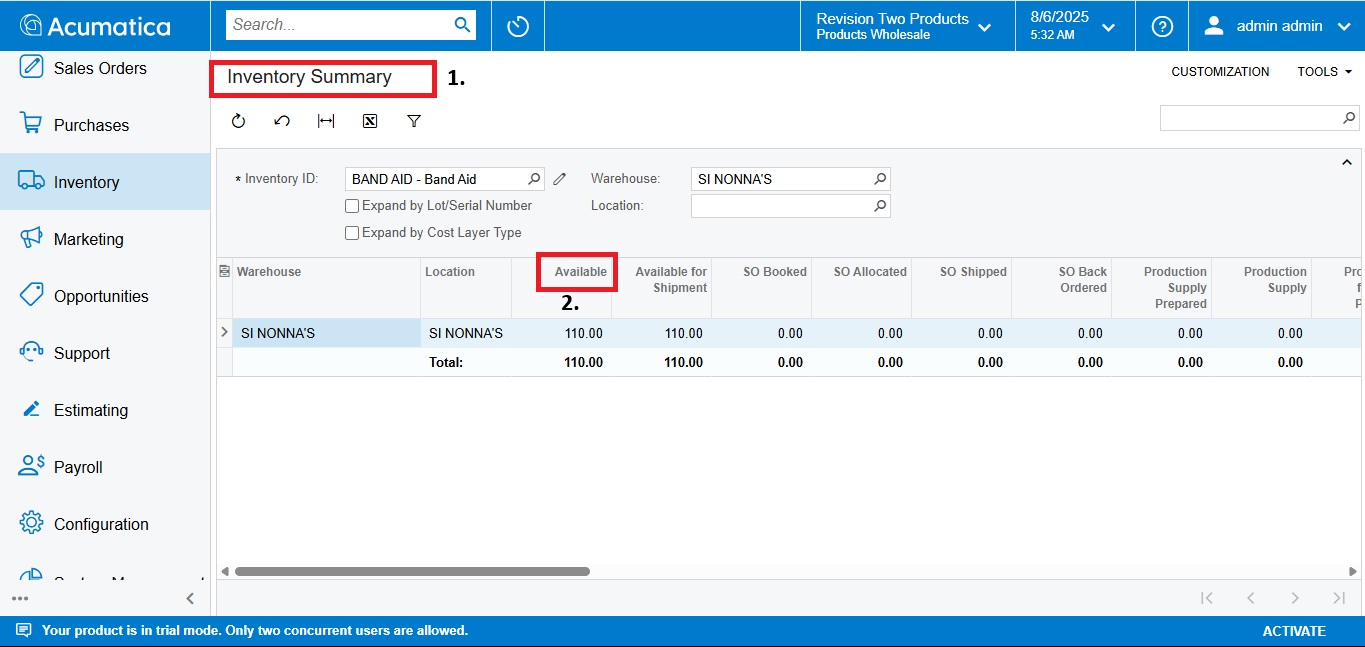
Step 3: Verify Component Inventory Availability.
Navigation: Inventory → Inventory Summary
Action:
- Search for each component Item
- Review Quantity Available and On Hand


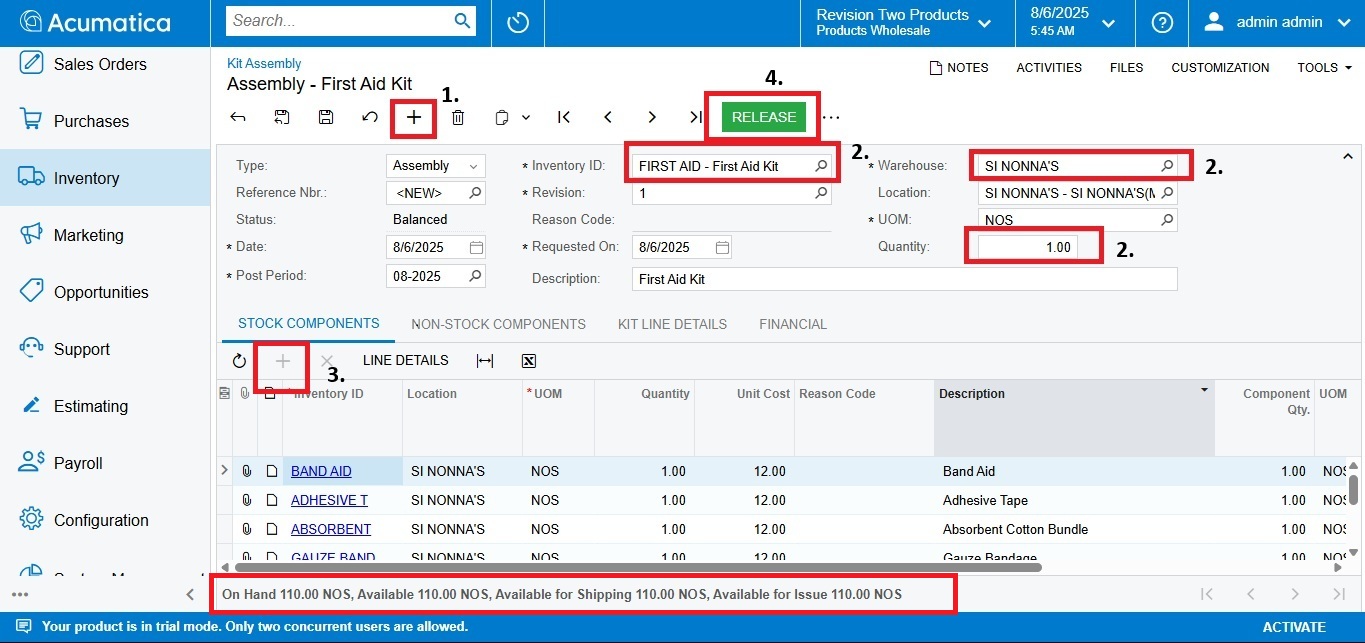
Step 4: Perform Kit Assembly.
Navigation: Inventory → Kit Assembly
Action:
- Click + New Record
- Select:
-Mention Kit Inventory Id
-Mention Warehouse
-Mention Assembly Quantity
3. Click Add Kit Assembly Line Item
4. Click on Release.

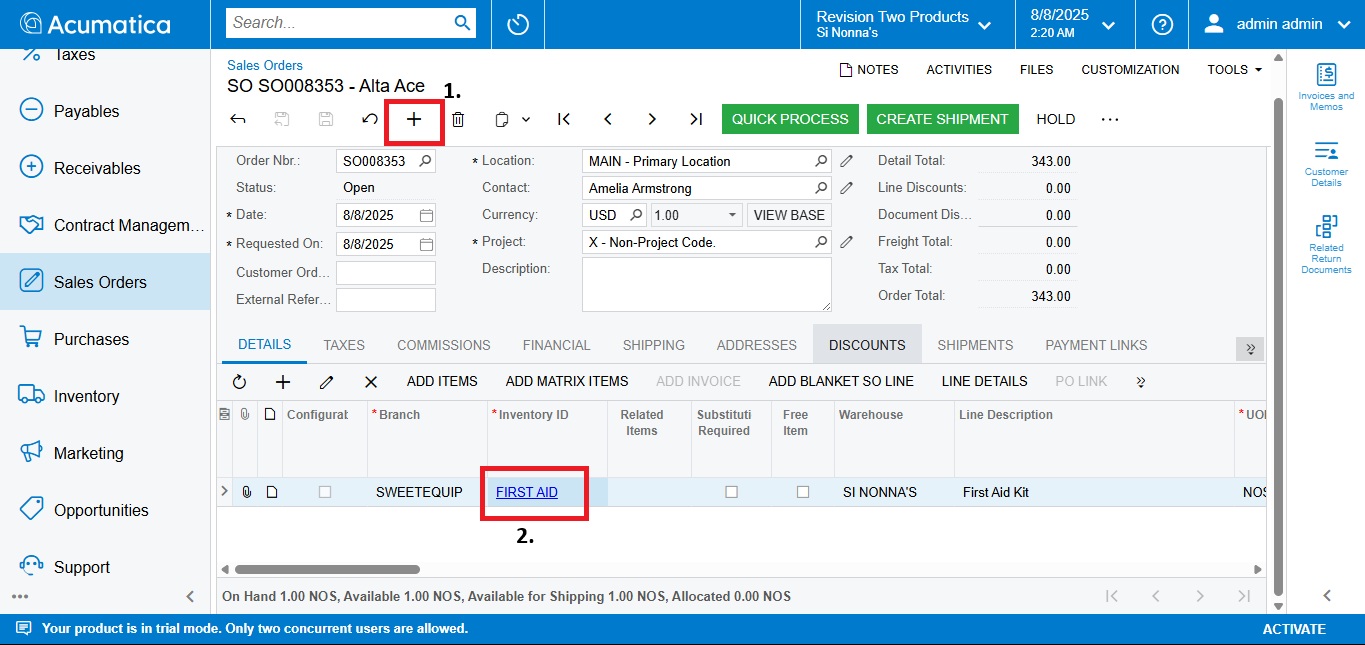
Step 5: Use the Kit Id in Sale Order.
Action:
- Create Sale Order
- Add the Kit Item
- Mention Quantity.
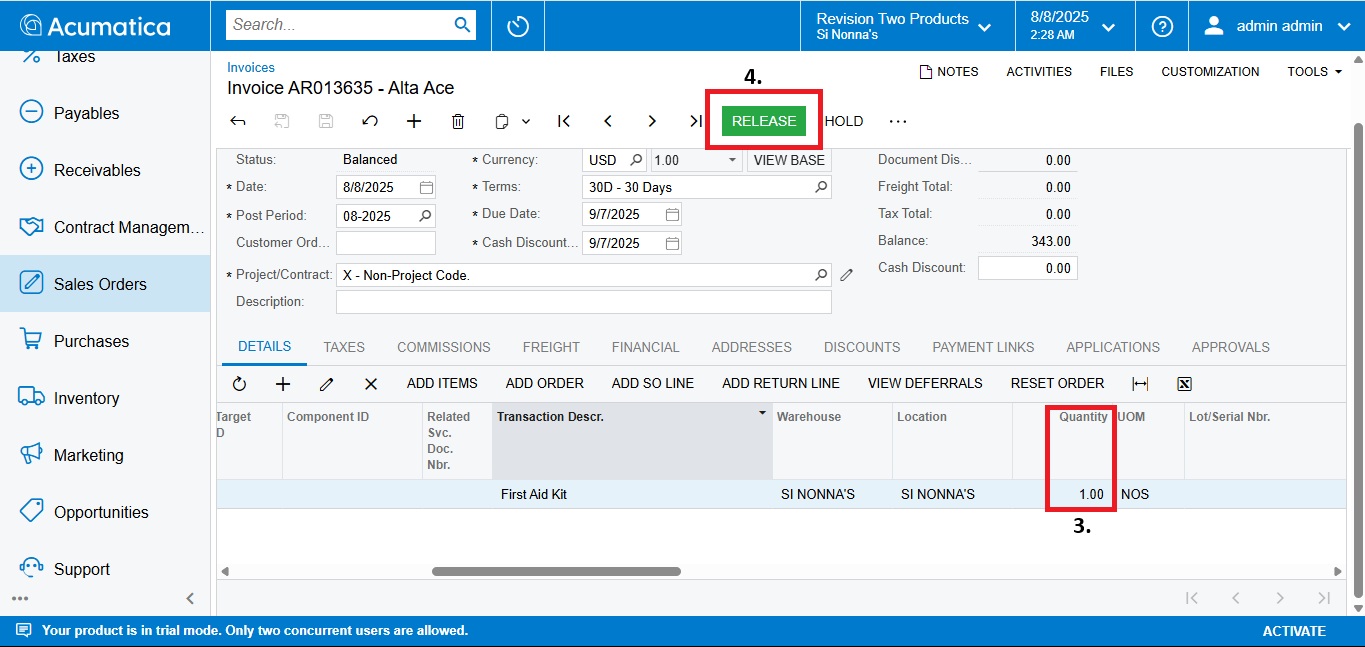
- Click on Release.
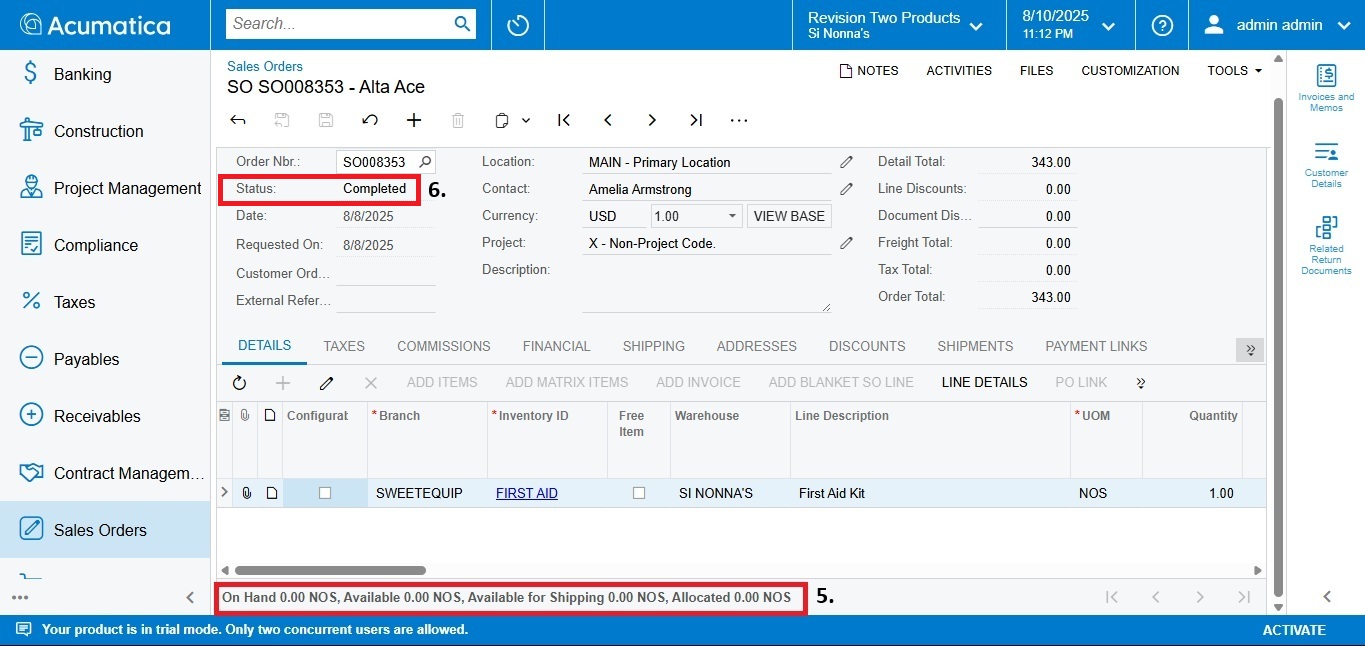
- Then After Successfully Payment and status Closed, the on-hand quantity, Available quantity will be “0’
- And Sale Order Stats will be “Completed”
Conclusion: Kit Assembly step by step process is simple and powerful, giving business a simplest way to packed product without using complex manufacturing.