
- Enable Migration Mode
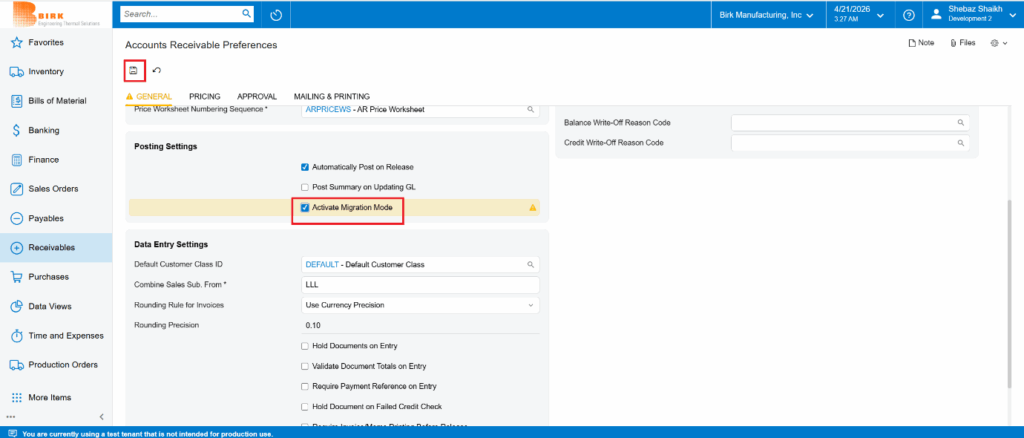
Ensure that Migration Mode is enabled by following these steps:
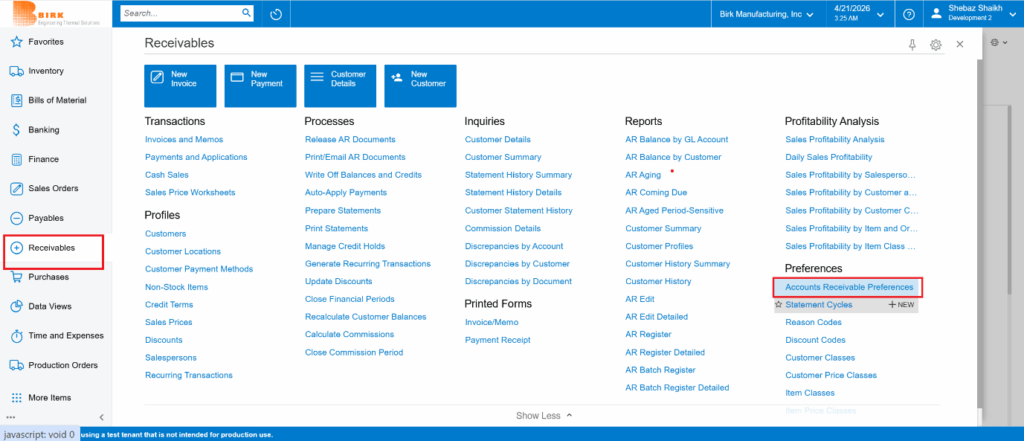
- Navigate to Receivables
- Go to Preferences
- Open Accounts Receivables Preferences
- Enable Migration Mode
- Click Save
- AR Invoice Import – Excel Sheet Guidelines
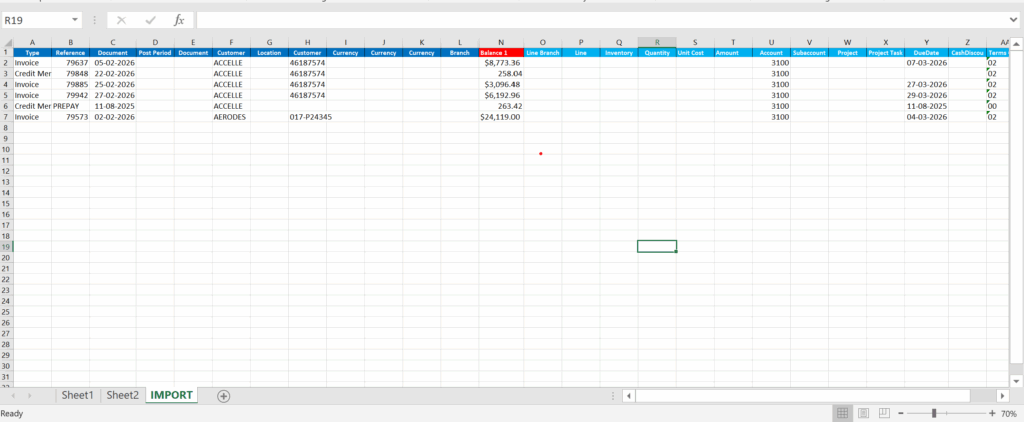
- Refer to the prescribed AR Invoice Import Excel sheet format.
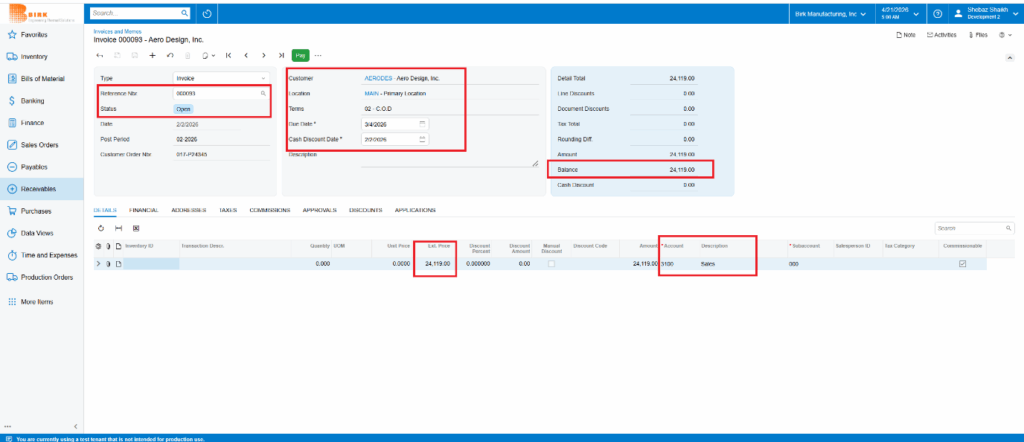
- In Migration Mode, all imported Invoices will be created in Open status.
- The Type field must be one of the following:
- Invoice
- Debit Memo
- Credit Memo
- Credit WO
- The Reference Number:
- Can be any value
- Must be unique for each record
- After import, the system will generate the AR Invoice Number in sequence
- Ensure the following details are correctly populated:
- Customer ID
- Customer Reference (Invoice Number)
- Currency, Currency Rate Type, and Currency Rate (if applicable)
- The Balance Amount and Document Amount must be the same.
- Provide the appropriate Account and Subaccount details.
- Enter the Terms Code (based on which the system will calculate the Due Date).
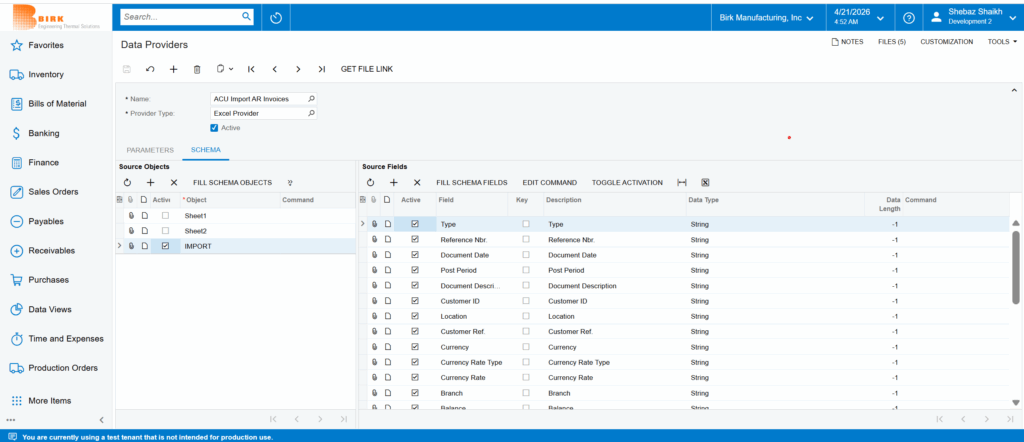
- Data Provider – ACU Import AR Invoice
- Import Scenario – ACU Import AR Invoice.
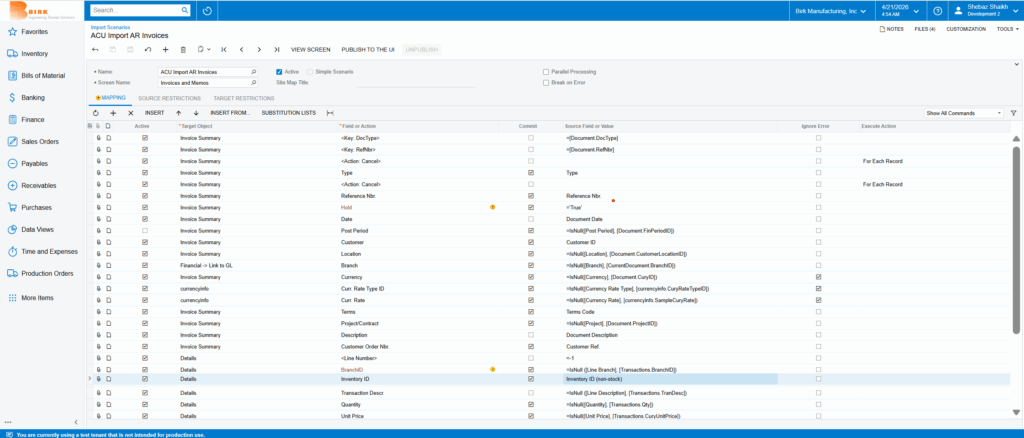
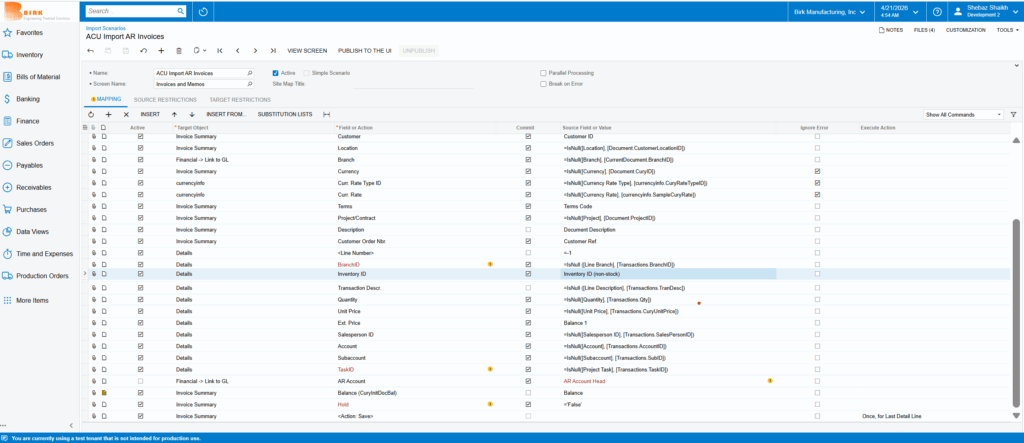
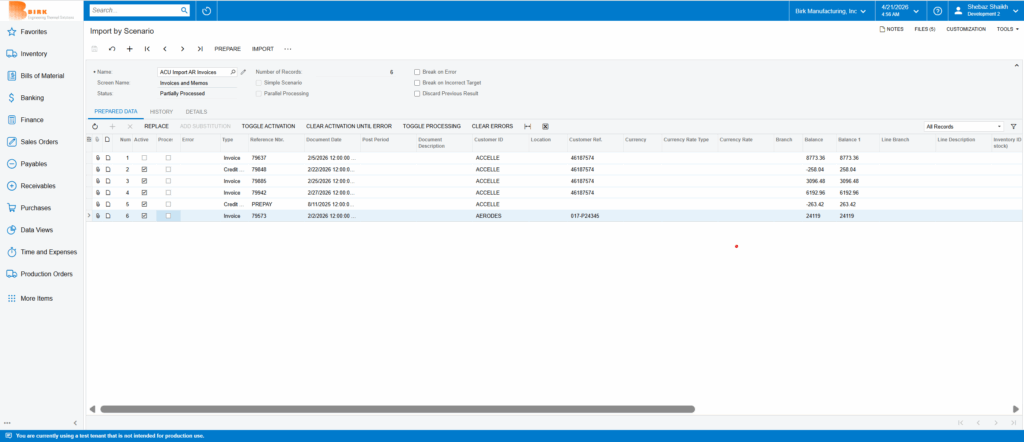
- Import by Scenario – ACU Import AR Invoice
- Click the Prepare button to validate the data.
- Click the Import button to upload the file.
- The Invoice will be generated in Open status.
- See the below Invoice and Memos Screen
Conclusion
Importing AR invoices into Acumatica through Migration Mode makes the migration process simple and organized. By following the required Excel format and using the correct Data Provider and Import Scenario, invoices can be imported accurately and efficiently. Once imported, the invoices are created in Open status and can be reviewed from the Invoice and Memos screen in Acumatica.