Effective lead management is the foundation of any successful sales process. Salesforce provides robust tools to customize lead creation, assignment, validation, and capture so that your sales teams can focus on converting prospects into customers.
In this blog, we’ll walk through how to configure default lead settings, enforce data quality, and set up Web-to-Lead forms — with practical steps and outcomes.
Why Customize Lead Management ?
By default, Salesforce gives you standard lead handling. However, customizing lead settings helps you:
- Ensure leads always have an owner (no leads left unassigned).
- Ensure data quality by making key fields mandatory.
- Capture website leads instantly with Web-to-Lead forms.
- Prevent duplicates for cleaner CRM data.
Step 1: Configure Lead Settings
Go to Setup → Quick Find → Lead Settings. Here you’ll find two main areas to configure:
1. Lead Queue Settings
- Define a default lead owner (User or Queue).
- This owner will get the lead when:
- No active assignment rule applies.
- A lead is captured online (e.g., via Web-to-Lead) without matching criteria.
In our case, we set User = gt testing as the default lead owner.
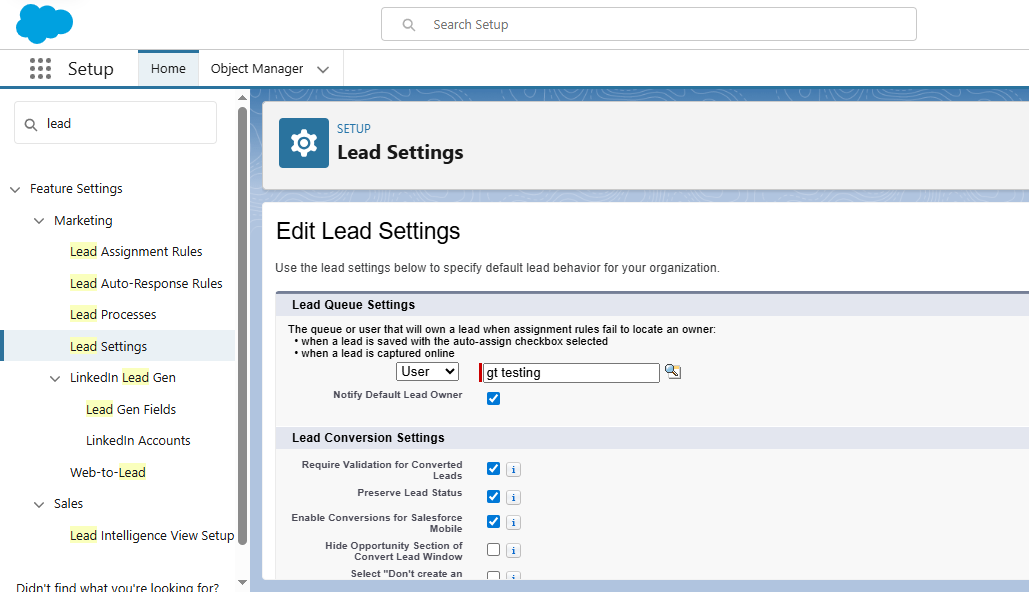
You can also check Notify Default Lead Owner to ensure the owner gets an email whenever a new lead is assigned to them.
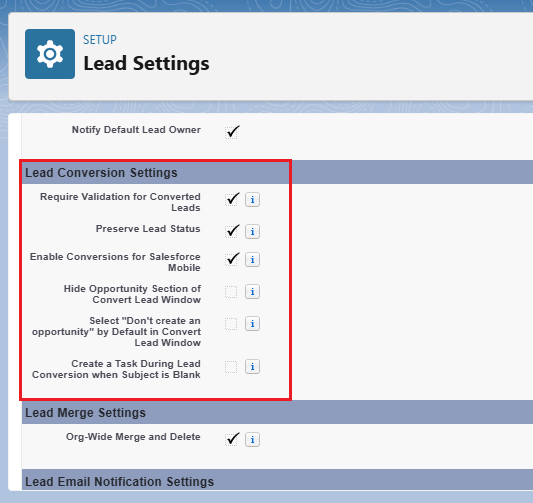
2. Lead Conversion Settings
- Require Validation for Converted Leads → Enforces validation rules even at the conversion stage.
- Preserve Lead Status → Keeps the lead status value unchanged when converting.
- Enable Conversions for Salesforce Mobile → Allows conversion directly from the Salesforce mobile app.
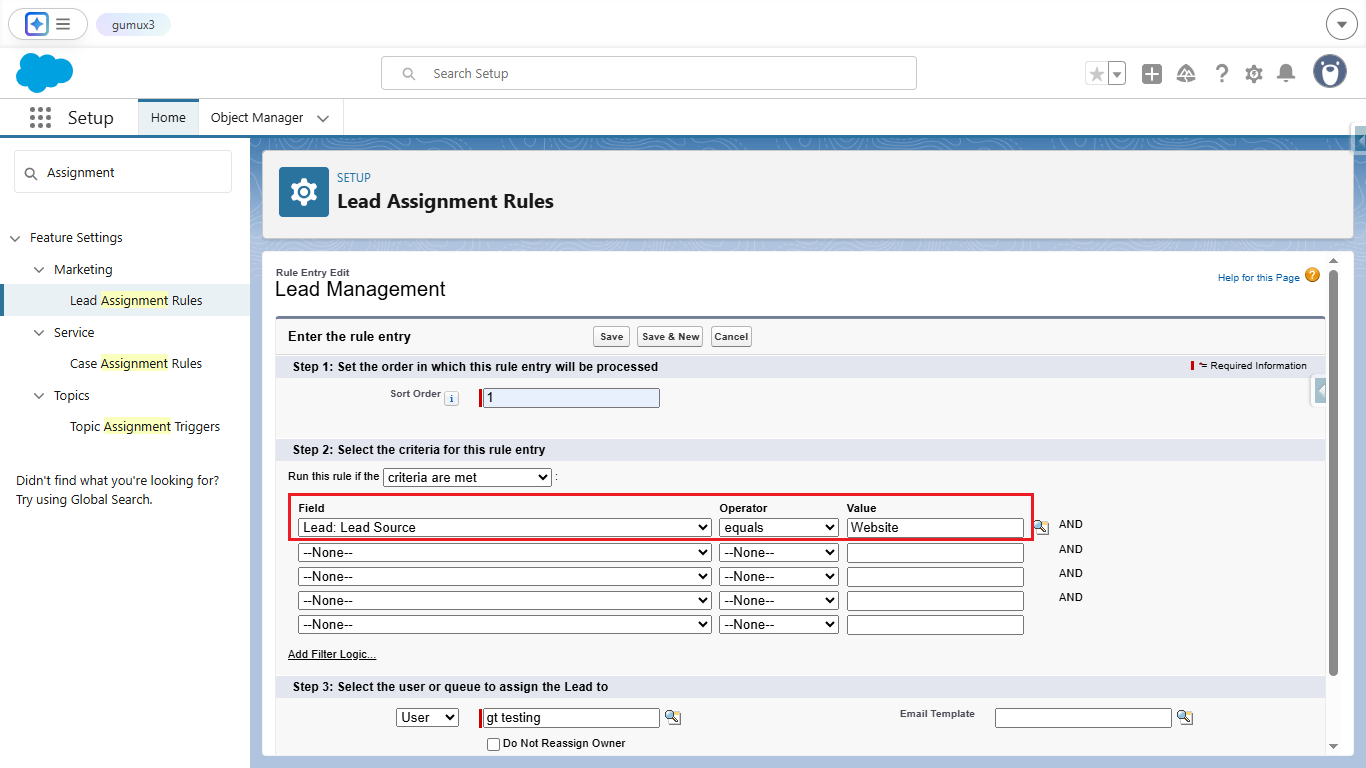
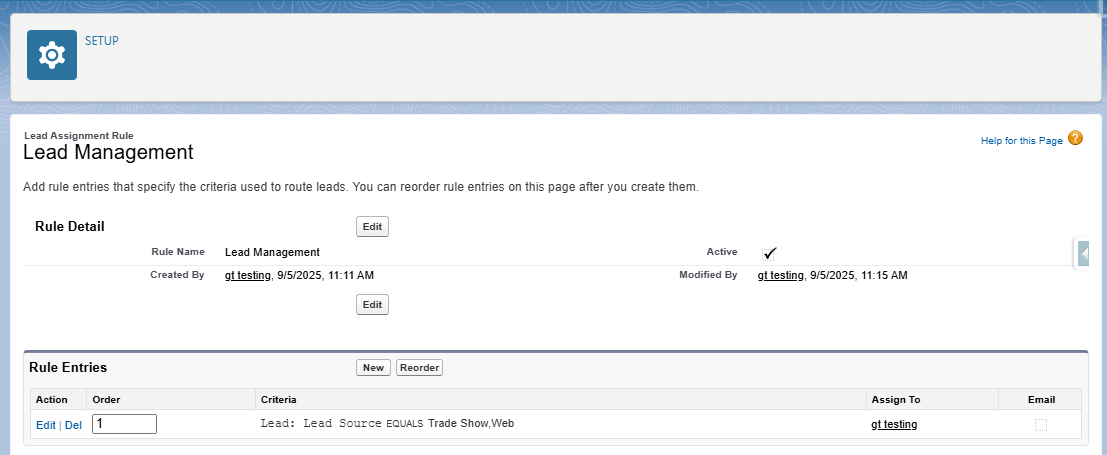
Step 2: Automate Lead Assignment
- In Setup → Assignment Rules → Lead Assignment Rules, create a new rule.
- Add criteria (e.g., Lead Source = Website).
- Assign to a specific User or Queue.
- Activate the rule.
Step 3: Enforce Required Fields
To ensure leads are complete:
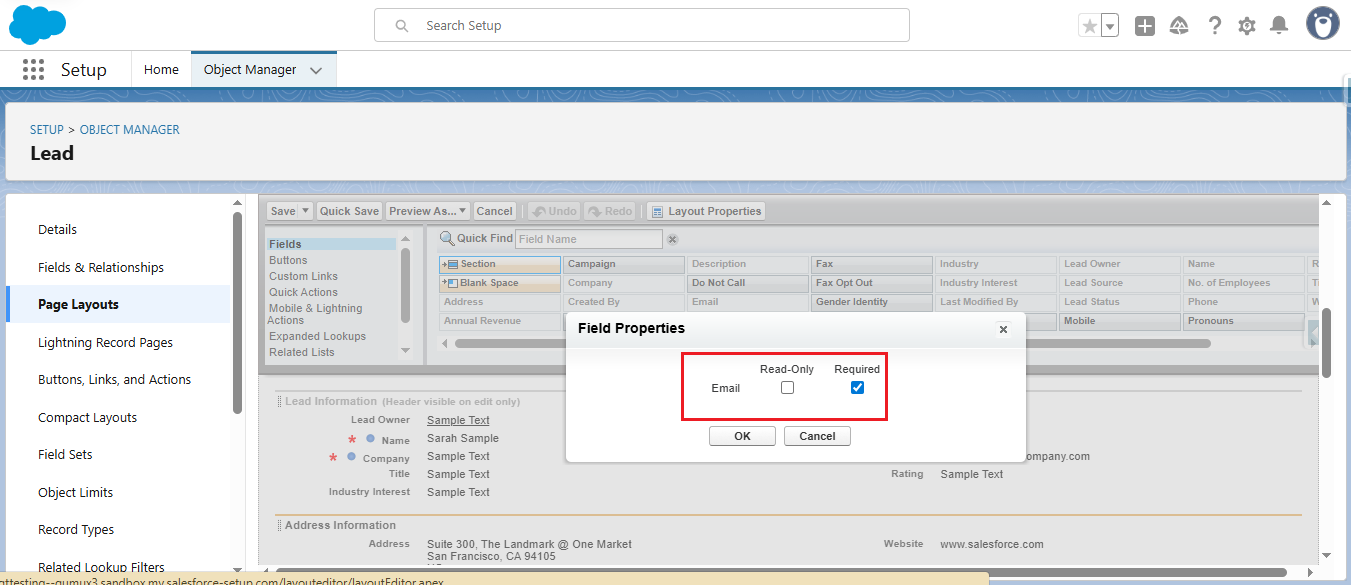
- Go to Setup → Object Manager → Lead → Page Layouts.
- Edit the layout → Click on the field (e.g., Email).
- Mark it as Required.
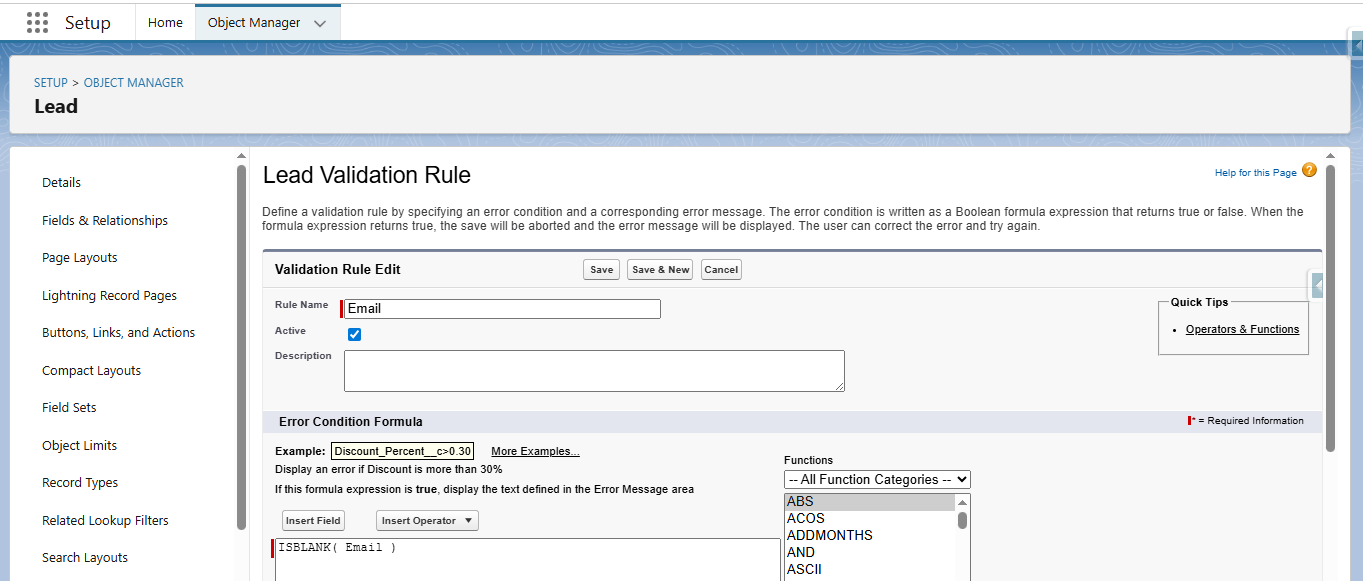
- Alternatively, create a Validation Rule to enforce conditions, e.g.: ISBLANK(Email)
- This ensures that Email cannot be left empty.
Step 4: Add Default Field Values
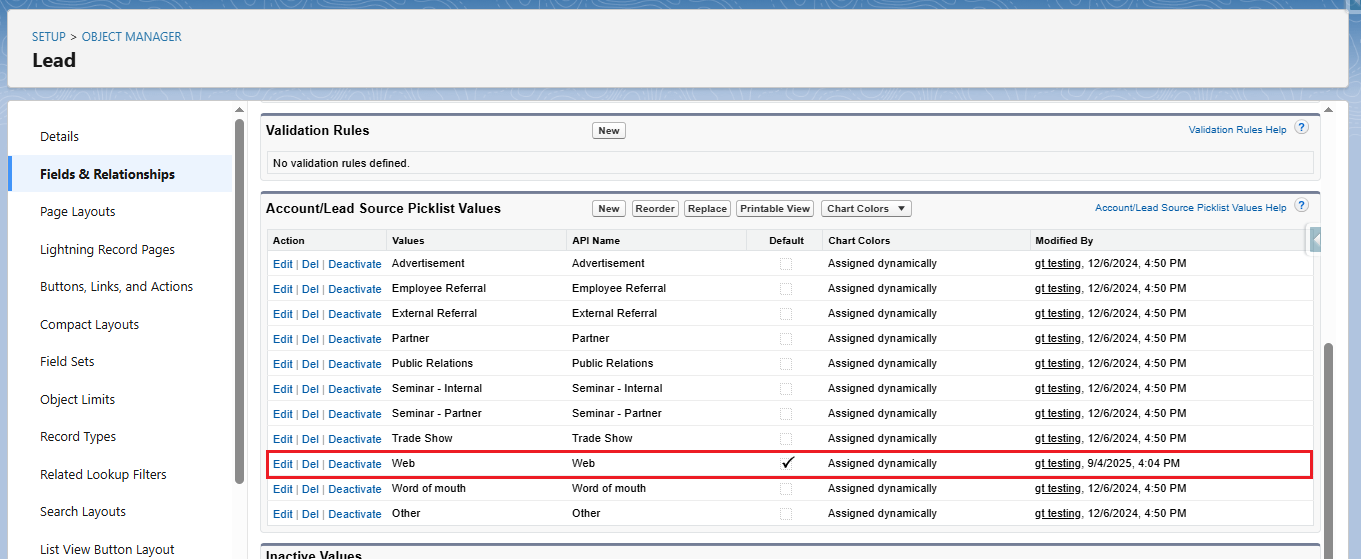
Sometimes you want a field (like Lead Source) to always have a default. You can:
- Set a default value directly in the field definition.
- Or use Flows to auto-populate based on conditions.
Step 5: Set Up Web-to-Lead (Optional)
Web-to-Lead allows you to capture up to 500 leads per day directly from your website.
- In Setup → Web-to-Lead, click Create Web-to-Lead Form.
- Select the fields (Name, Company, Email, Phone, etc.).
- Generate HTML code.
- Embed this code in your website’s contact page.
Now, every form submission creates a new Lead in Salesforce.
After these configurations, our Lead Management process is now:
- Automated → Leads go directly to the right owners.
- Clean → Mandatory fields and duplicate checks ensure quality data.
- Efficient → Website leads flow into Salesforce without manual effort.
This streamlines sales processes and gives teams more time to engage with qualified prospects instead of managing messy data.
Customizing lead management in Salesforce isn’t just about setup — it’s about building a scalable, automated sales funnel. By configuring assignment rules, required fields, and Web-to-Lead, you ensure every lead is captured, routed, and tracked with minimal manual effort
By following these detailed steps, you can effectively learn how to Configuring Lead Management in Salesforce ensuring smooth and efficient operations in Salesforce.
If you still have queries or any related problems, don’t hesitate to contact us at salesforce@greytrix.com. More details about our integration product are available on our website and Salesforce AppExchange.
We hope you may find this blog resourceful and helpful. However, if you still have concerns and need more help, please contact us at salesforce@greytrix.com.
About Us
Greytrix – a globally recognized and one of the oldest Sage Development Partner and a Salesforce Product development partner offers a wide variety of integration products and services to the end users as well as to the Partners and Sage PSG across the globe. We offer Consultation, Configuration, Training and support services in out-of-the-box functionality as well as customizations to incorporate custom business rules and functionalities that require apex code incorporation into the Salesforce platform.
Greytrix has some unique solutions for Cloud CRM such as Salesforce Sage integration for Sage X3, Sage 100 and Sage 300 (Sage Accpac). We also offer best-in-class Cloud CRM Salesforce customization and development services along with services such as Salesforce Data Migration, Integrated App development, Custom App development and Technical Support business partners and end users. Salesforce Cloud CRM integration offered by Greytrix works with Lightning web components and supports standard opportunity workflow. Greytrix GUMU™ integration for Sage ERP – Salesforce is a 5-star rated app listed on Salesforce AppExchange.
The GUMU™ Cloud framework by Greytrix forms the backbone of cloud integrations that are managed in real-time for processing and execution of application programs at the click of a button.
For more information on our Salesforce products and services, contact us at salesforce@greytrix.com. We will be glad to assist you.
Related Posts
- Streamlining Lead Capture with Salesforce Web-to-Lead
- How to Programmatically Share and Unshare Case Records in Salesforce Using Apex
- How AI and Automation in Salesforce are Streamlining Supply Chain Workflows
- How to Implement Fault Paths in Salesforce Screen Flow
- How to Rename Object, Tab, and Field Labels in Salesforce