A Wiki is the collection of articles and enable digital content management specific to the business or the product. It consists of a set of interlinked web pages defined as articles organized logically within folders.
Acumatica Help WIKI acts like the user manual which provides the information about the functionality of specific process or the controls. Versioning and attachments in Acumatica WIKI facilitate to keep track of the changes in the documentation and associate the files to the articles for better visuals on the behavior of the process or to provide an example.
Features:
- Necessary Information on product features.
- Create Business specific pages.
- Sharing information with the users including the project teams and departments.
- Managing File attachment.
- Easy modification of the Help wiki.
- Based on User roles, assign multi-level access rights.
- Quick search with keyword or full text.
- Easily apply to Dashboards.
Creating the Wiki Article in Acumatica 2021 R2
Step1: Create Wiki Id
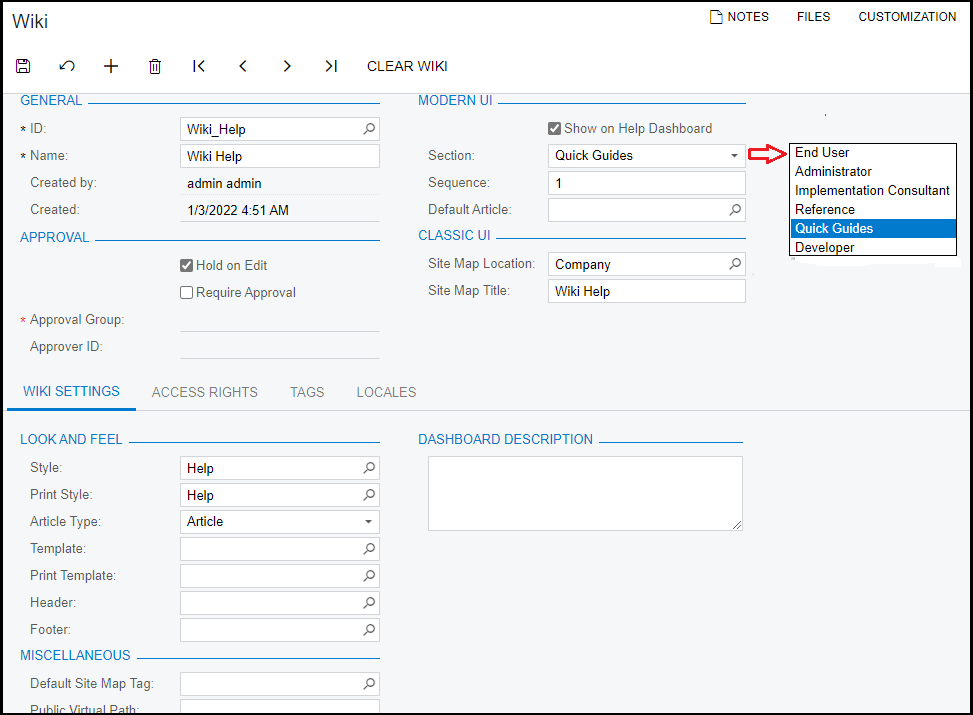
Navigate to the path to System Management > Wiki Preferences > Wiki.
Id: Give a unique name which is a mandatory
Name: Give the name for Identification which is a mandatory
Show on Help Dashboard: Check the Checkbox
Section: Select Quick Guides
Sequence: 1
Hold on Edit: Check the checkbox
Require Approval: Uncheck the checkbox
Click on the Save Button.
Step 2: Adding Wiki Content
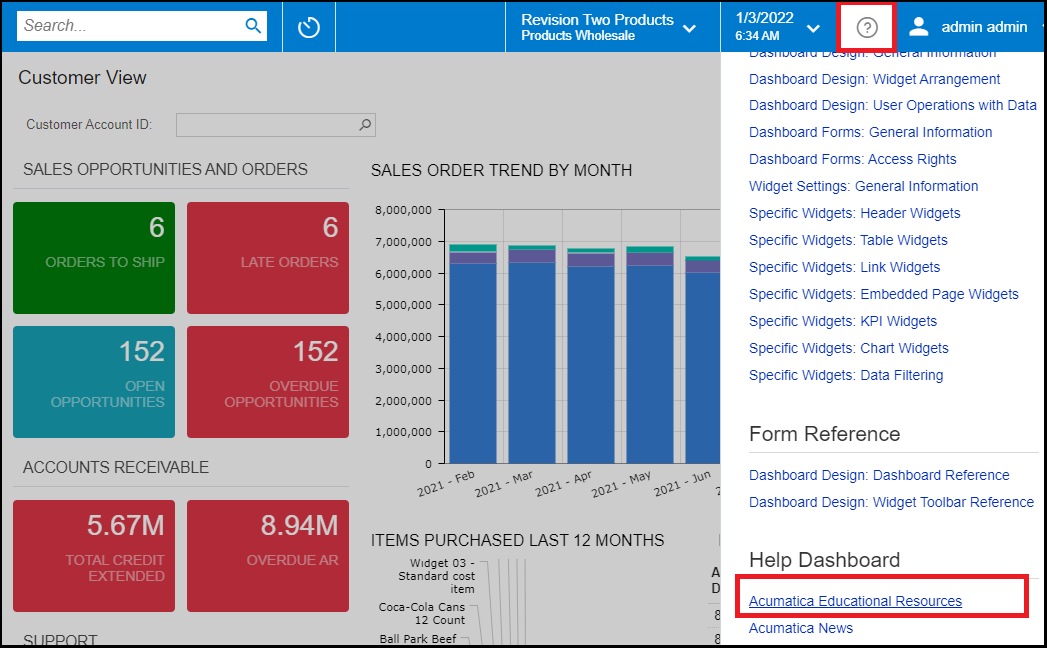
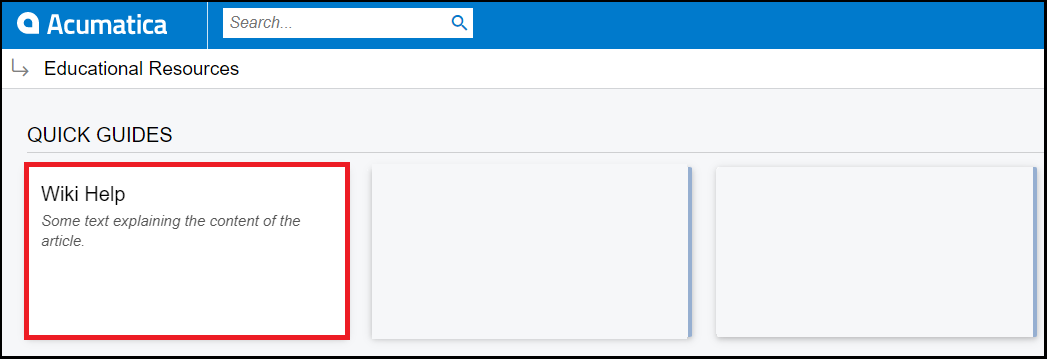
Navigate to Acumatica Educational Resources by clicking Open Help at top right side of Acumatica. Select created Wiki from Quick Guides.
Click on ‘+’ symbol to create a new article.
Step 3: Saving the Wiki Content
Enter Article Id, Name, Parent Folder and check Hold checkbox, Check Folder checkbox (Main Article), Article type as ‘WIKI’ and add the content and click on save button.
Creating Sub-Article:
Under content tab, enter Article Id, Name, Parent Folder and check Hold checkbox, Uncheck Folder checkbox (Sub Article), Article type as ‘WIKI’ and add the content and click on save button.
Step 4: Attaching Image and Save the image to Wiki
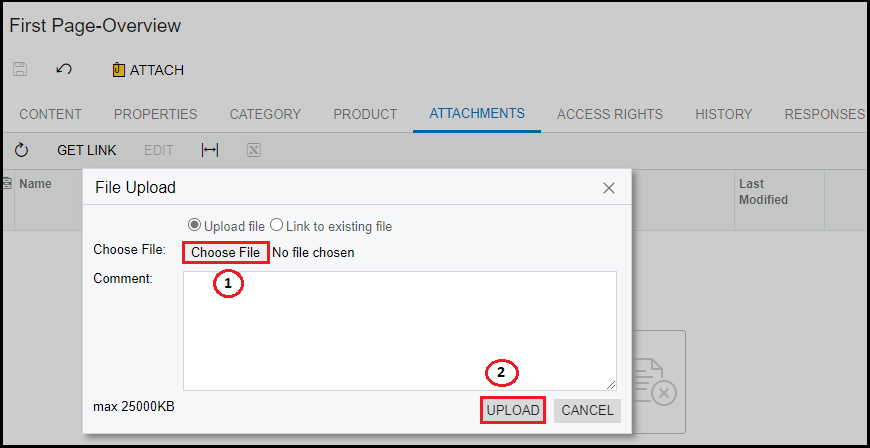
Under attachments tab, Click on Attach button and choose file and then upload the image file to the wiki.
Step 5: Display image on the content
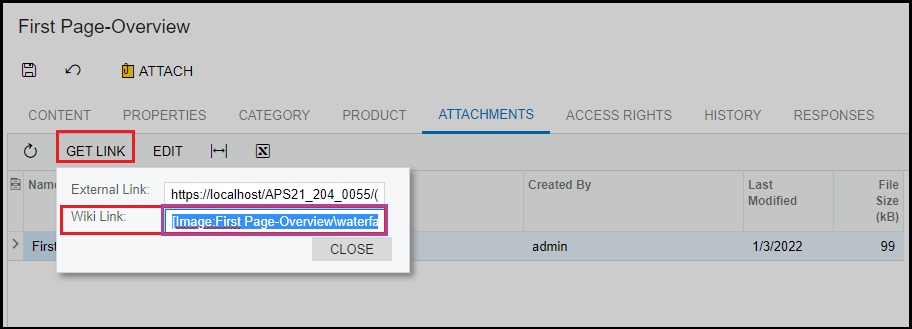
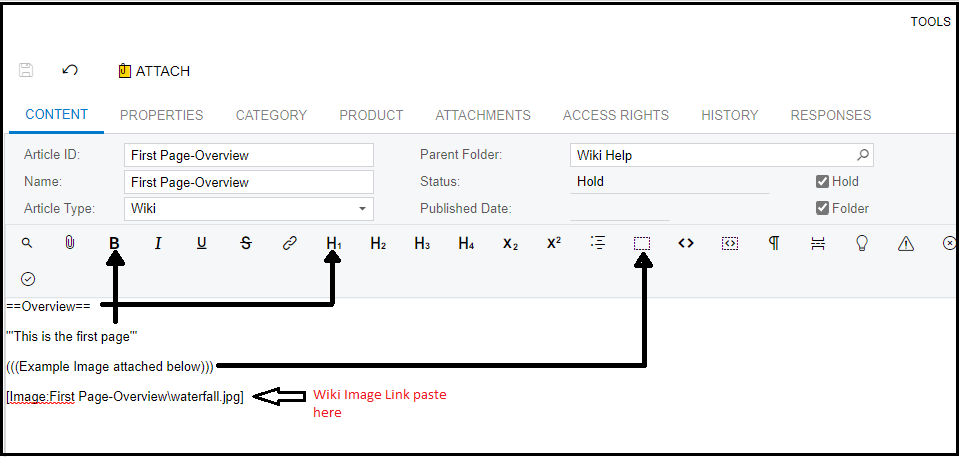
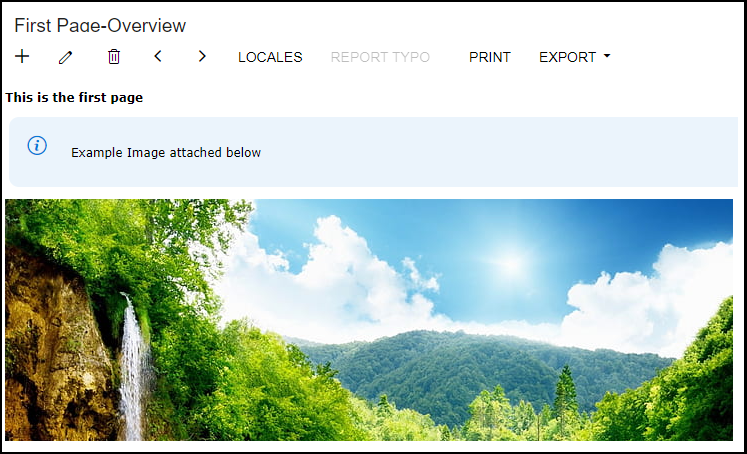
To add the image on the content. Click on Getlink from the attachment tab and copy the Wiki link and paste it in the content area of content tab.
Step 6: Rearranging the article sequence
To Rearrange the sequence of wiki Article.
Navigate to > System Management > Wiki Site map > Choose the Wiki Help > from left panel select the article to move and click on arrow up and down arrow to move accordingly and click on save button.
Step 7: Reload from database
Navigate to customization project > click on selected project.
Select Wikis from the left side list > Click on Reload from Database.
Step 8: Publishing the article
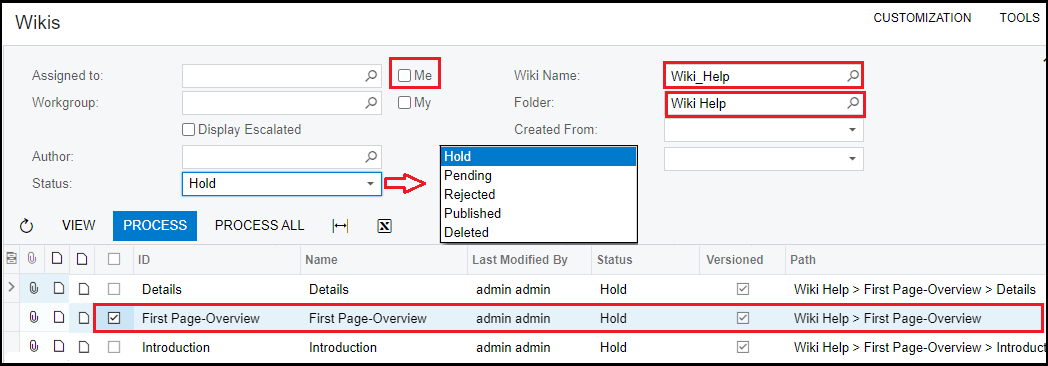
Navigate to System Management > Wiki Preference > Wikis
- Uncheck Me checkbox
- Enter wiki name
- Enter Folder Name
- Select Status as Hold
- All updated Wiki will display in the grid below to publish
- Select and click on process
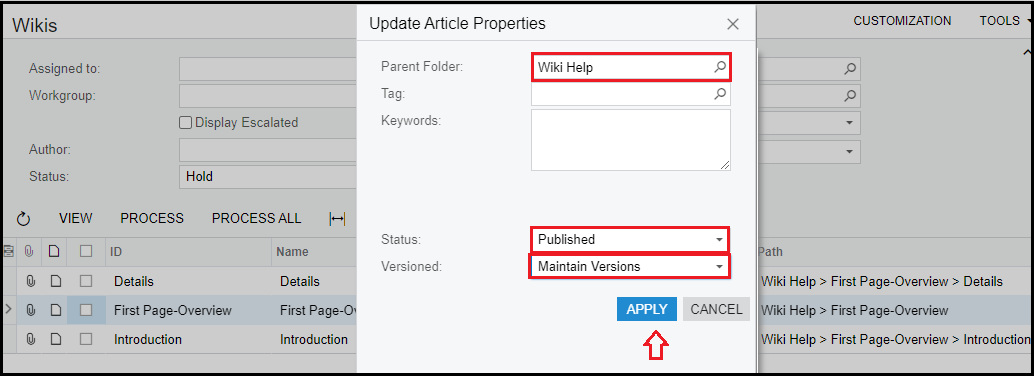
7. On Upload Article Properties: Choose the parent folder
8. Change the status to published
9. Version as maintain versions
10. And click on apply.
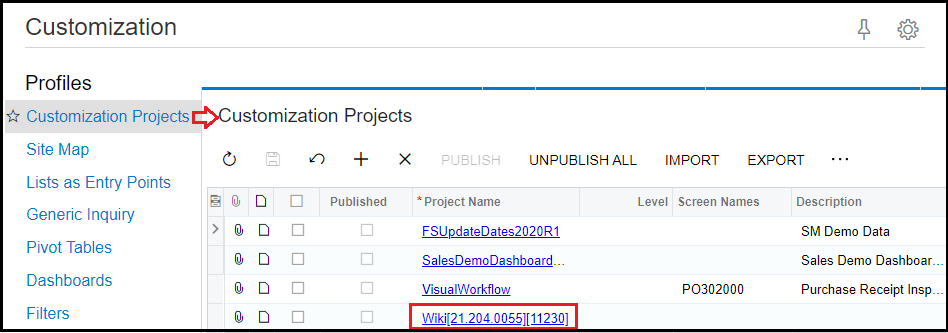
Step 9: Publishing the project: Publish the customization Project.
Navigate to Configuration > Customization > Customization Projects.
Updating the Wiki Article in Acumatica 2021 R2
Follow Step 2 to navigate to the Wiki article.
Select the article from left side and click on edit button and click on save button.
This blog helps us in adding and updating wiki article in Acumatica and in understanding the features of Wiki in Acumatica.

