GUMU™ for Sage CRM – Sage X3 integration is real time bi-directional integration which sync all the customer data (Customer/Address/Contact) from Sage CRM to Sage X3 and vice versa.
After installation of GUMU™ for Sage CRM – Sage X3 integration, there are some pre-requisite points which needs to be done prior to start using GUMU™ integration. Title code setting is one of those pre-requisite setting, this setting is important to synchronize contacts correctly from Sage CRM to Sage X3 and vice versa.
GUMU Sage CRM – X3 Integration Video | Blog | Demo Machine
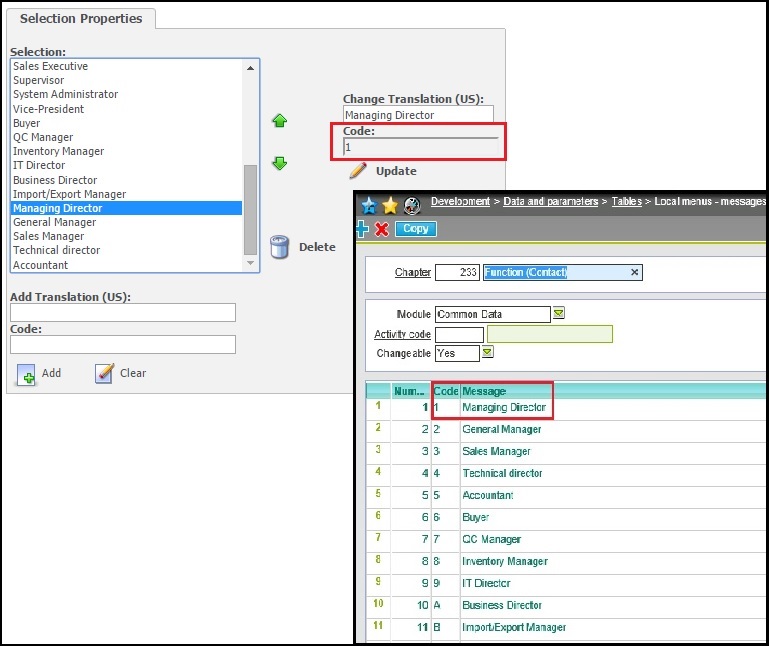
When we run GUMU Standard component, we bring all the values of Function from Sage X3(Refer below screenshot) to Title Code of Sage CRM for person entity. Please note that Title Code values in Sage CRM should matches with the Function of Sage X3.
New Stuff: Country code setting in GUMU™ for Sage CRM – Sage X3 integration
For setting up the code in Sage CRM, follow the below steps
1. Go to Administration –> Customization -> Person.
2. In the Fields Tab click on the selection field type for Title Code field.

Select a title. Its translation and code will be populated on the right hand side column. Refer the below image.
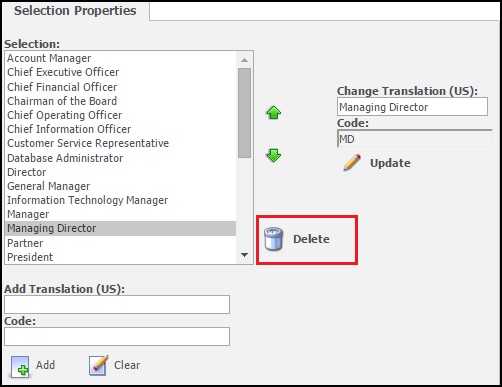
3. Since you cannot edit an existing translation you will have to delete the existing Title code and create a new one. Click on the Delete button. The title that you had selected will no longer be listed.
4. Now create a new title name by adding the code and translation. Here you need to be sure that the title code should matches with the one specified in Sage X3.
5. Click on Add to add the title in the list.
Once this is done , user will be able to update persons from Sage CRM to Sage X3 and vice versa using GUMU™ Sage CRM – Sage X3 integration.