Data entry screens are used to perform the transactions in Acumatica ERP. Maintenance screens stores the master data like Customer, Vendor, Items, etc. are used occasionally if there are any changes or new data needs to be added.
In ERP, Data Entry is the part that is used frequently in daily business processes and is responsible for operational and financial movements within the organization. A user has a defined role and the user gains access to a certain set of screens back and forth regularly. This makes the demand have some functionality which makes the task easier without navigating to the screens very often. Side Panel plays a vital role to overcome such situations where we can display other screens and pre-load the data based on currently opened transactions.
In our previous blog, we have seen the steps for adding a Side Panel in Generic Inquiries. In this blog, we will discuss the steps to add a side panel on the Data Entry screen as both processes are unique. We will consider a cases screen where a user is reviewing a case and need to investigate the related cases for the selected business account irrespective of its status (i.e., Open, Closed)
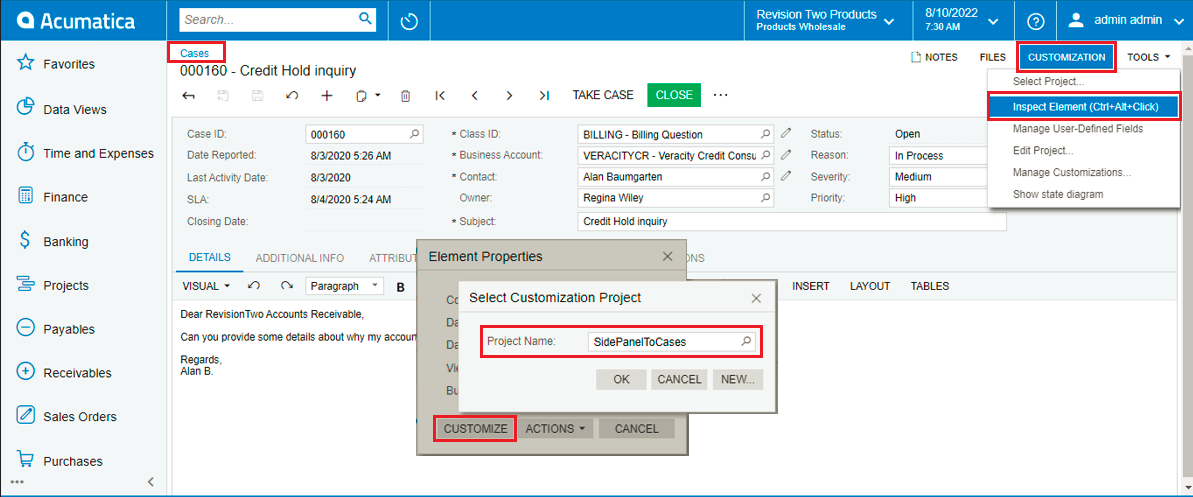
Navigate to Support > Activities > Cases Screen (CR306000). Create a customization project either from the Customization Projects screen (SM204505) or Navigate to the Customization menu on the top right corner and perform Inspect Element on the screen to create a new or select an existing project.
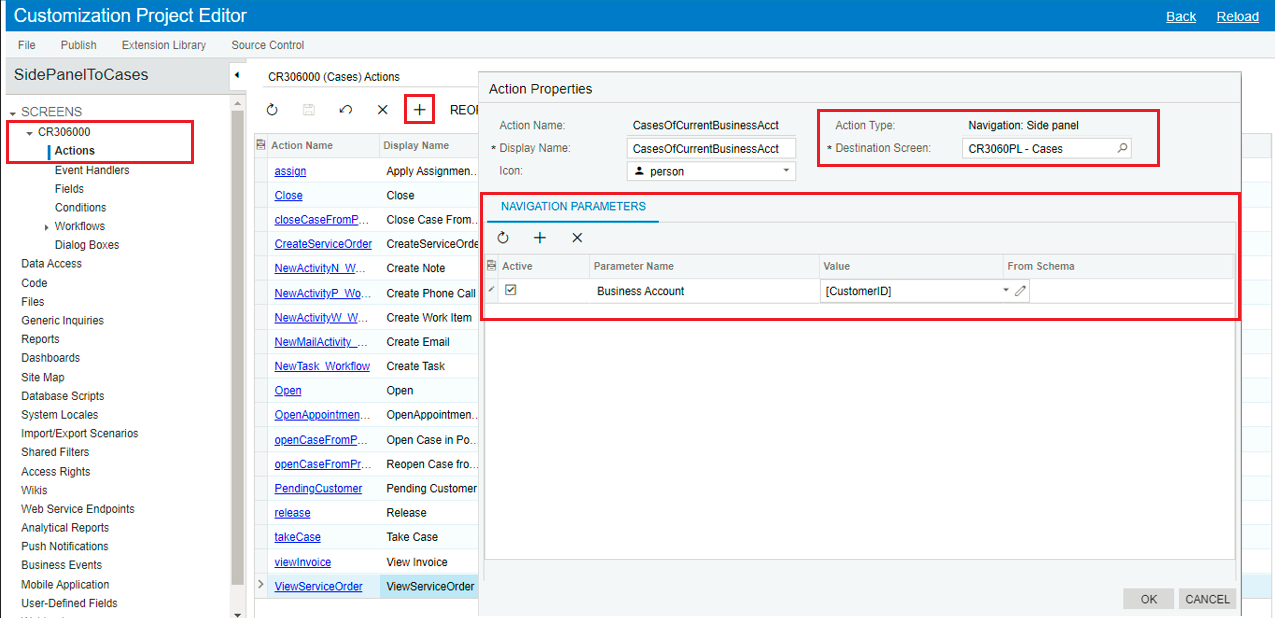
Once the screen is added to the customization project editor, expand the screen, go to Actions, and add new action (+).
In the Action properties, enter Action Name, Display Name, and Icon as preferred. Select Action Type as “Navigation: Side panel” and Destination Screen that needs to be opened on click of side panel. Generic Inquiry of Cases screen (CR3060PL) in our example.
Navigation Parameters are required to open the specific record or filter the records as per business requirement. We have passed the Business Account parameter to only show the matching cases available for the selected customer.
Save the changes and publish the project.Once published, refresh the cases screen to see the newly added side panels. Select any case record and click on side panel to view all the cases that matches the current Business Account irrespective of its status or any other parameters.
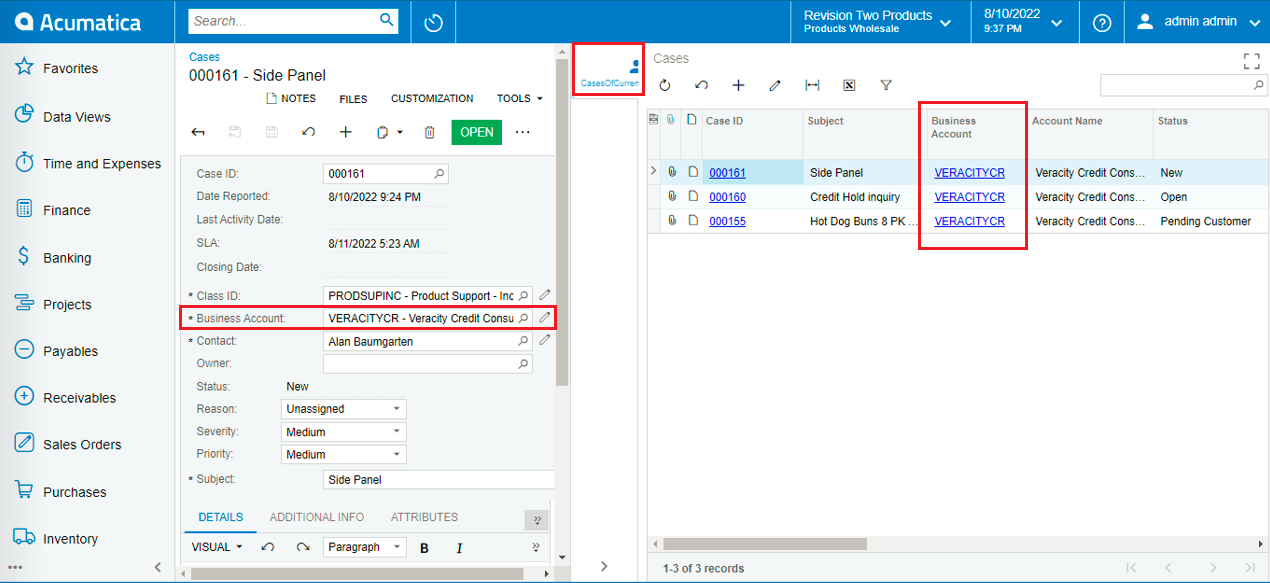
Hence, a user can see all the cases of the customer without navigating or switching to another screen or tab. The example we have considered is useful for situations when a user is over the call for a particular case and the customer needs information on his/her other cases. This saves time and makes data available very quickly.