Acumatica ERP provides a simple to use functionality to quickly copy the complete or partial data of the company and make it available elsewhere to have a cloned system. This is achieved by creating a snapshot and restoring the snapshot to an instance of Acumatica.
In this blog, we will be discussing the steps involved to create an Acumatica snapshot and restore it in a new instance.
Create a Snapshot
Navigate to System Management > System Maintenance > Tenants Screen (SM203520).
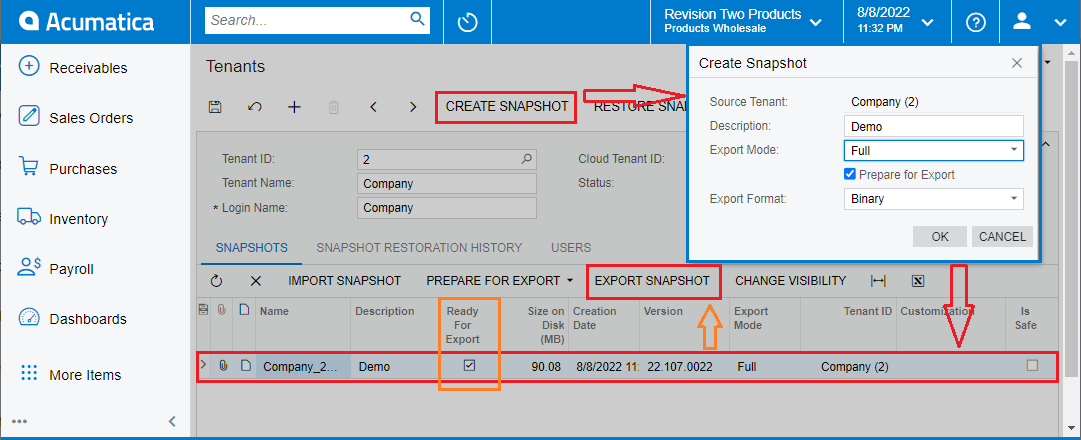
Clicking on “CREATE SNAPSHOT” Action button will open a dialog box to enter the details for the snapshot. Provide the proper description and select the appropriate options for export mode and format.
- Export Mode: has various options for selection and are self-explanatory by their description. We will consider a “Full” to export all the data in the tenant.
- Prepare for Export: Based on the selection of the checkbox, the data will be prepared for export. You can either select to prepare while creating the snapshot or first create a snapshot and then prepare it later using “PREPARE FOR EXPORT” action button on top of the Grid.
- Export Format: Acumatica Provides XML and Binary format in which the data will be exported. File extension for XML format will be xml and for Binary format it will be adb.
Create snapshot and Prepare Export Data:
This step will create a snapshot and prepare the data to export as a single process. Here, you can see in the grid of the SNAPSHOT tab, the checkbox of Ready For Export is selected and the Size of the export data is also available.
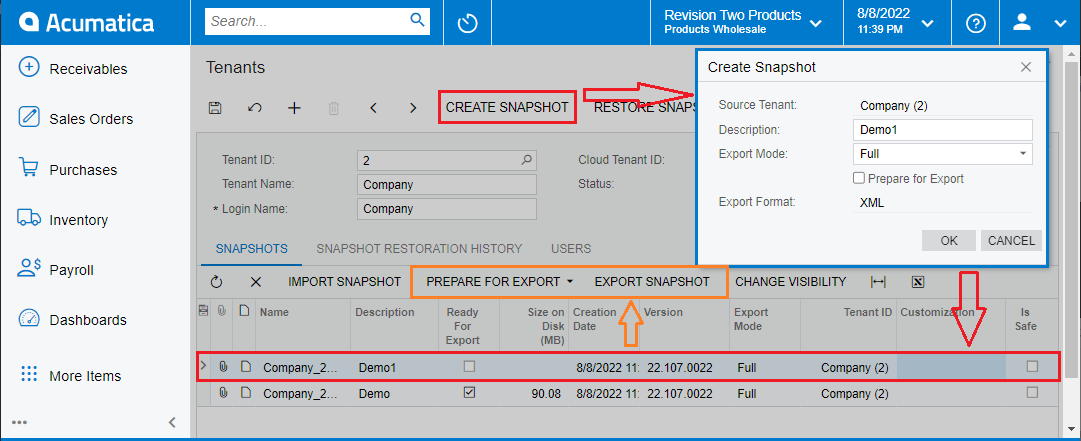
Create snapshot and then Prepare Export Data
This is 2 step process where first only a snapshot is created and then at later point of time the data is prepared using “PREPARE FOR EXPORT” action by selecting either Binary or XML format. Once the data preparation is complete, Ready For Export checkbox is selected and the export size is displayed.
Export the Snapshot
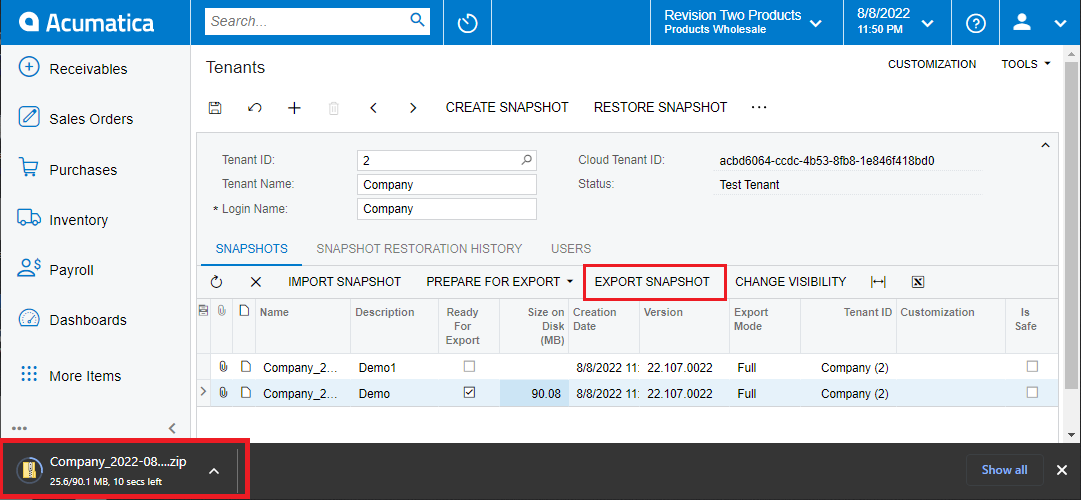
The data can only be exported for the snapshot whose “Ready For Export” is selected. If snapshot is not ready, on click of “EXPORT SNAPSHOT” the error will be displayed as “The snapshot is not prepared for downloading”. For the valid snapshot, the zip file will be downloaded in the browser under the downloads path of the browser.
The data can only be exported for the snapshot whose “Ready For Export” is selected. If snapshot is not ready, on click of “EXPORT SNAPSHOT” the error will be displayed as “The snapshot is not prepared for downloading”. For the valid snapshot, the zip file will be downloaded in the browser under the downloads path of the browser
Once the data is restored, open the “Acumatica ERP Configuration Wizard” and follow below steps
- Select Deploy New Application Instance.
- Enter the appropriate Database Server Connection details.
- Create a new database from Database Configuration.
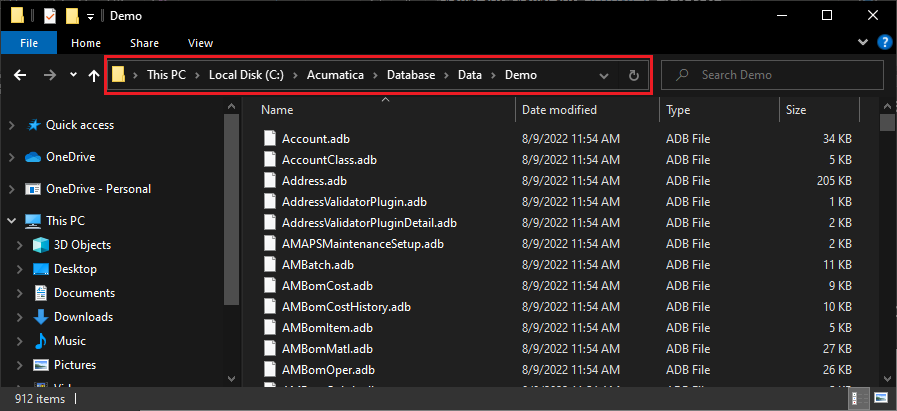
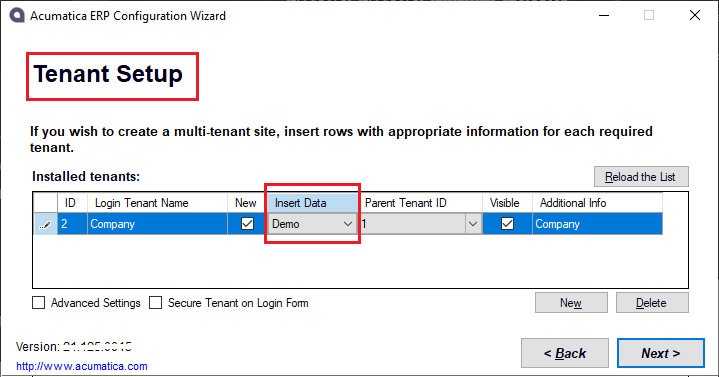
- Perform a Tenant Setup with Insert Data as “Demo”. You can see all the databases that are restored on the Database/Data directory of the Acumatica Installation path
- Setup a Database Connection, Instance Configuration and Web Site Configuration.
- Once the Configuration is confirmed, Click Finish.
- You will see the progress of Acumatica Installation and restoration of the selected database.
- On completion, a brand-new Acumatica instance will be available with the required data that was exported by creating the snapshot.
This is how we can create and restore the Acumatica snapshots.
Hence, we can use the snapshots to migrate the data, store a backup (Weekly, Monthly, …) as per business necessity, create a copy for development and UAT purpose, and restore the data back to the original system in case of data corruption.

