Acumatica have built in functionality that allow user to add a custom SQL view into Acumatica Reports and GI. Importing SQL views into Acumatica is quite easy. All you need is to create views and create the data access class in Acumatica.
In this blog we will learn how to add views in Acumatica systems how to create a SQL view and link it to an Acumatica data access class (DAC) so that it may be used by Acumatica reporting tools.
Link the SQL view in the Acumatica application using Acumatica customization tools Generate reports using the SQL view we created.
Example: Here, we take a customer whose invoice item range is greater than 10 to display total product quantity and total amount.
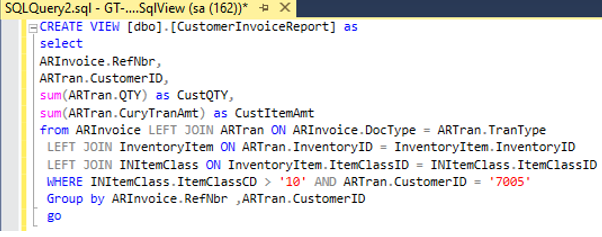
Step 1: SQL View creation
The SQL statement below are accustomed select facts that may be to the purpose in producing a Customer Invoice Report text record. It is an honest idea to make SQL view, during this we are able to get the total quantity total amount and we can extract data from multiple tables.
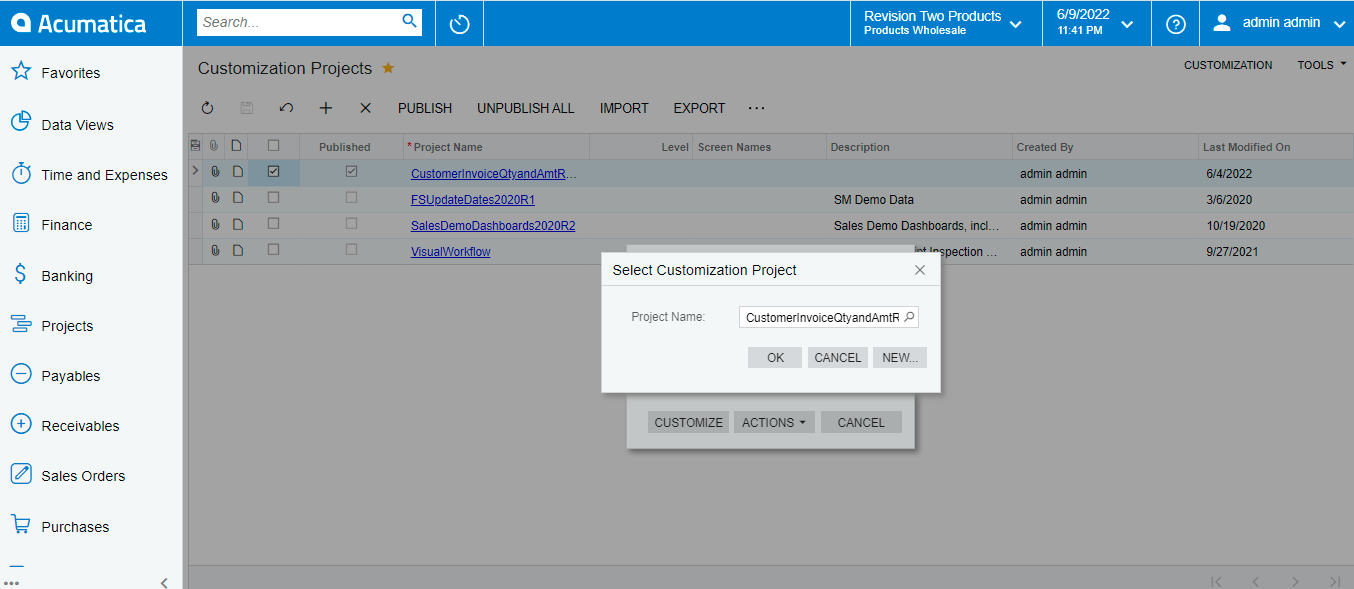
Step 2: SQL view Link in Acumatica
1. Create Customization Project: Click the customization button in the upper right c
The SQL statement below are accustomed select facts that may be to the purpose in producing a Customer Invoice Report text record. It is an honest idea to make SQL view, during this we are able to get the total quantity total amount and we can extract data from multiple tables.
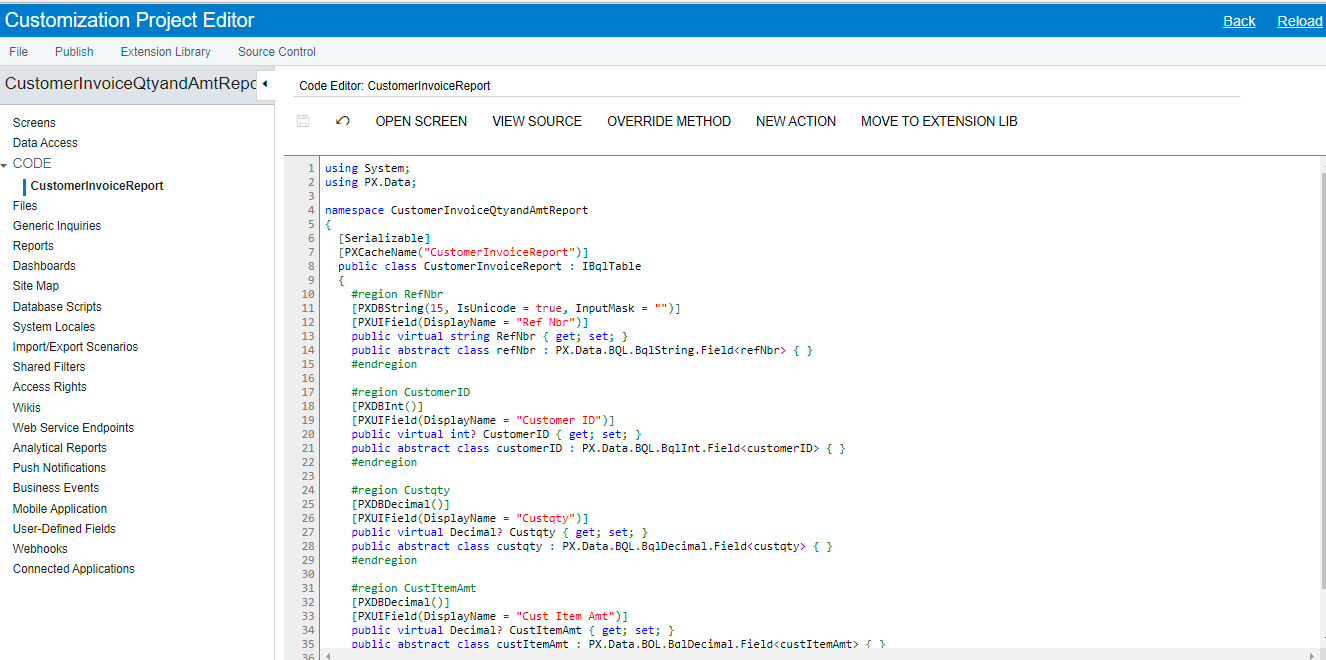
2. Open customization project editor
3. within the customization project editor, create a new code file using the template New DAC as below:
Select code click on plus (+) button add a new object
Select New DAC as the File Template
Enter the name of your View that you created in the prior step. The class name must match the name of the view you created.
Check the box to come up with members from the database. this feature will cause Acumatica to automatically create a code file that supports the weather within the table you just created.
The result’s the code that you simply see below:
After completing your customization, Publish the customization project. To do that, within the main menu of the Customization Project Editor, select
Publish > Publish Current Project
Example:
Open generic inquiry (SM208000) and click on plus (+) button to create a record as below enter title, select the new table that you created.
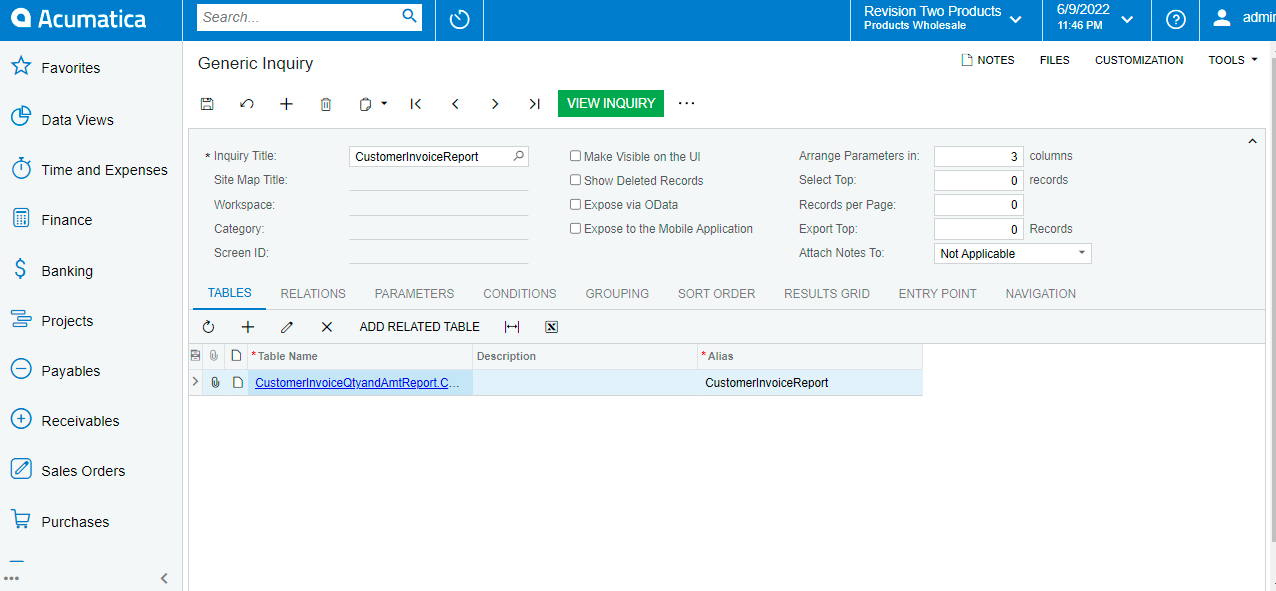
Click on RESULTS GRID select Object name select Data Field On the form toolbar, click Save
Click on view inquiry
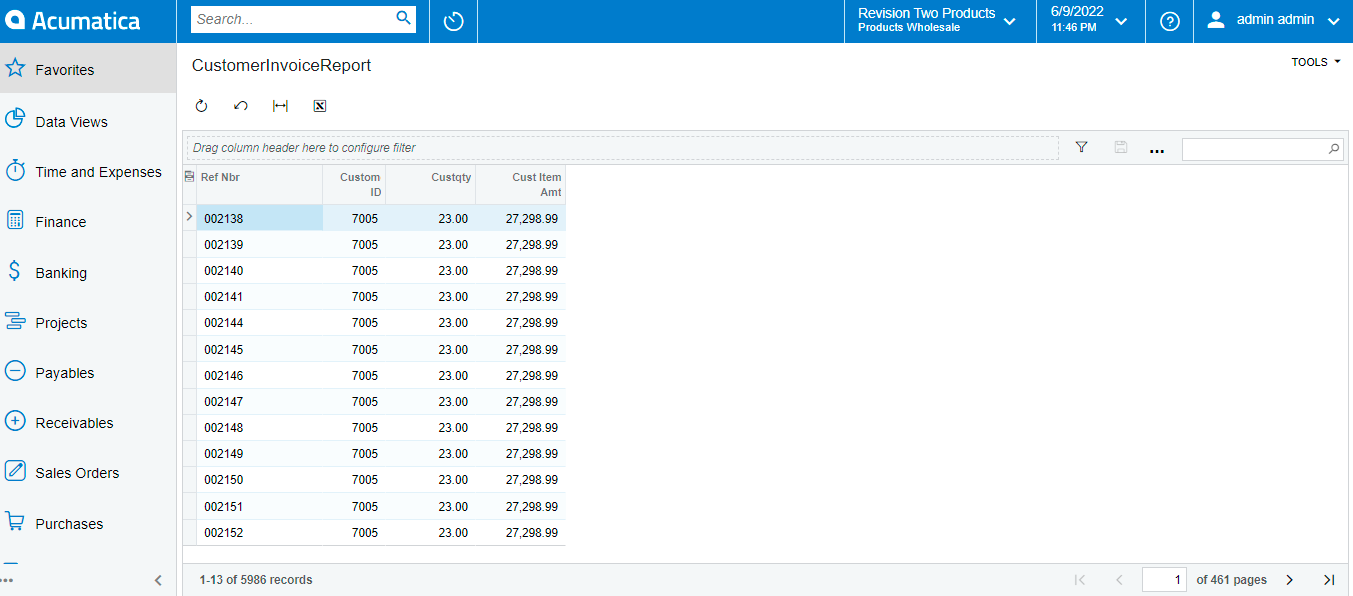
Example 2: include SQL view in report designer
In Acumatica report designer using SQL view
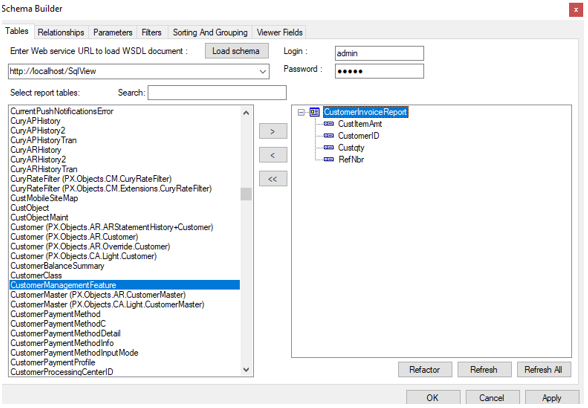
Open the Report Designer
Select the Build Schema Button
Enter your URL, login, password and click Load Schema
Select your SQL view in report object.
This blog makes it easy to include external data into Acumatica reports.
Hope this blog helps you to feature a SQL view to Acumatica.