All the ERP systems has a capability to store the additional information using user-defined fields for certain entities based on the business process. Acumatica provides the flexibility by defining Attributes that can be created by a normal user with no technical skills. The feature becomes vital as it handles additional properties without customizing any screens.
Acumatica attributes supports various control types including Text, checkbox, combo-box, Date-Time, and selector. The selector control improves the user experience and reduces inconsistent data by providing ability to select the data within ERP system. Attributes are assigned at the class level and the values are provided at entry level.
The attributes can be defined for business accounts, customers, vendors, employees, stock and non-stock items, account groups, and many more. In this blog, we will be looking into creating, assigning, and using an attribute to a customer.
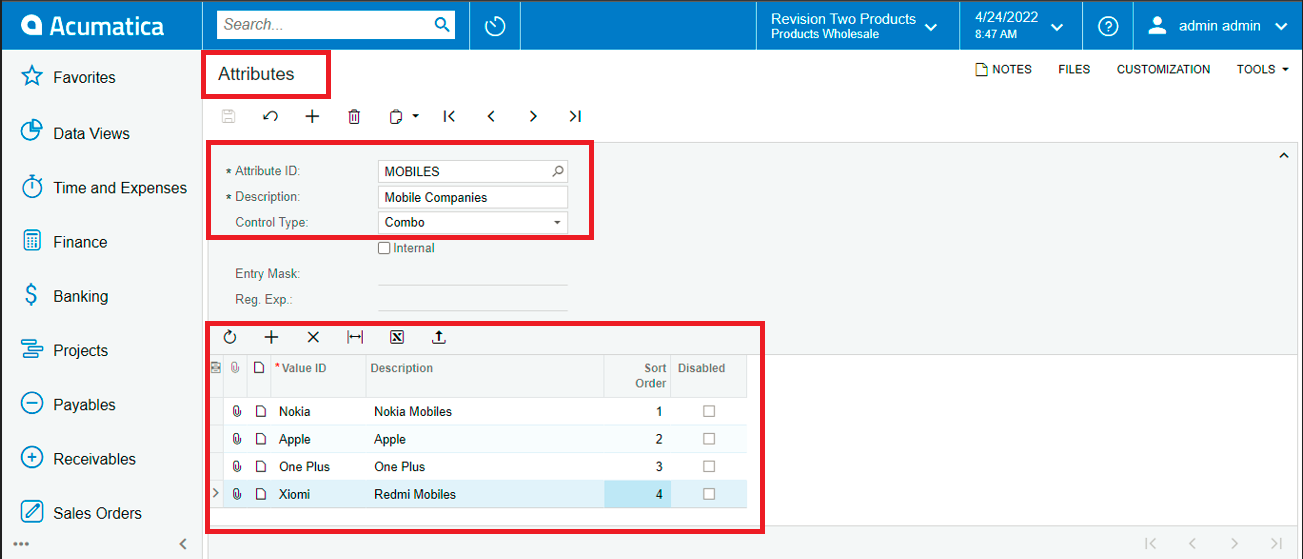
Creating an Attribute: The attribute in Acumatica is created only once and can be defined for multiple entities. Navigate to Configuration > Common Settings > Attributes screen (CS205000).
Attribute ID: Identifier of the control to ensure uniqueness.
Description: User readable name of the control to identify the purpose.
Control Type: Type of the control on User Interface that allows the user to store/select the data. The available types are self-explanatory and can be selected depending on the possible values. Based on the type selected, the other related properties are available.
We have considered an attribute with Combo control and assigned values in the gird. Sorting and disabling option are available to make it user friendly.
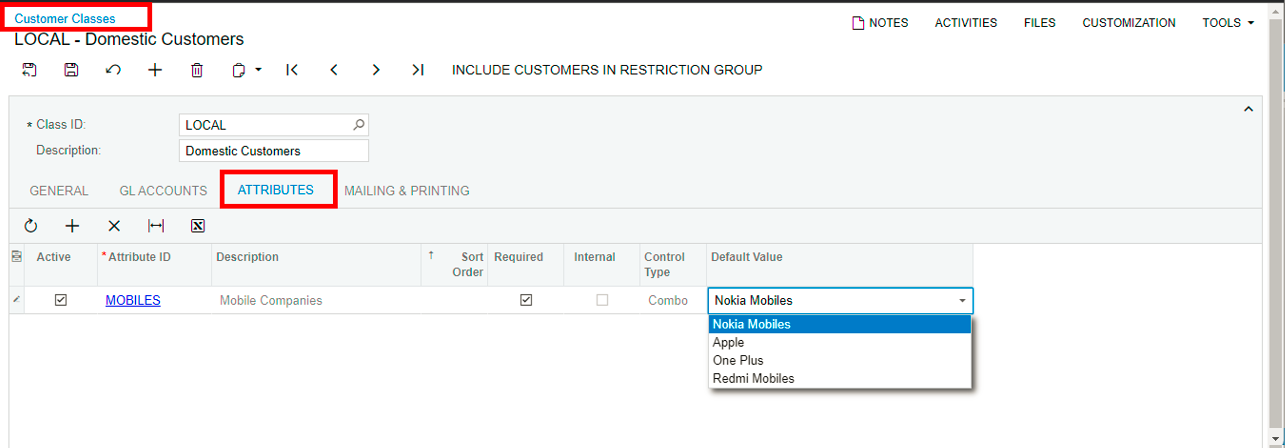
Assigning an Attribute: Acumatica has provision to assign an attribute at class (category) level so that at entry level, only applicable attributes are accessible.
Navigate to Receivables > Preferences > Customer Classes screen (AR201000) > Attributes tab.
Select a customer class and under Attributes tab, add the desired list of attributes, and its default values. Marking the attribute as required ensures that it has the values when used at customer (entry) level.
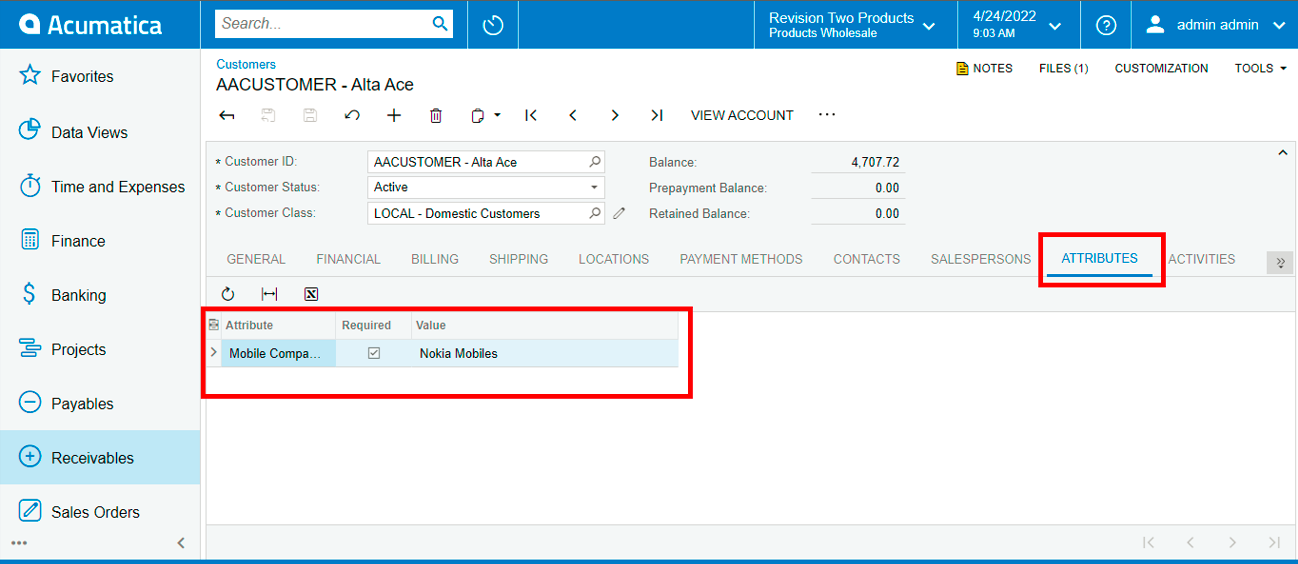
Using an Attribute: The maintenance or data entry screens stores the actual information, and the values are assigned to available attributes.
Navigate to Receivables > Profiles > Customers screen (AR303000) > Attributes tab.
Open the customer record with customer class for which the attribute is assigned or set the appropriate customer class. Once done, go to Attributes tab and set the value to the attributes and save the changes.
The attributes can be used on reports, generic inquiries and create UDFs. Attributes also plays important role in storing the data without investing for any customizations and handling the customization projects for different version upgrades.


