If you have ever made a configuration change in your live Acumatica environment and immediately regretted it, you are not alone. Testing directly in production is one of those habits that feels harmless right up until it is not. A sandbox environment is essentially a copy of your live Acumatica environment that you can use freely without affecting real business data. It mirrors your company’s configuration, master data, and transaction history, and it exists to give you a safe place to work without that risk in Acumatica.
Why Do You Need One?
There are some genuinely good reasons to have a sandbox set up before you need it, rather than after. A sandbox lets your team work through any process properly without touching live data or disrupting daily operations.
It is also useful for training. New users can learn the system, make mistakes, and get comfortable with Acumatica in an environment where nothing they do has any major consequences.
Sandboxes are valuable whenever customizations or upgrades are involved. Before any change gets pushed to production, testing it against a realistic copy of your data gives you a much clearer picture of what will happen when it goes live.
How to Take a Snapshot
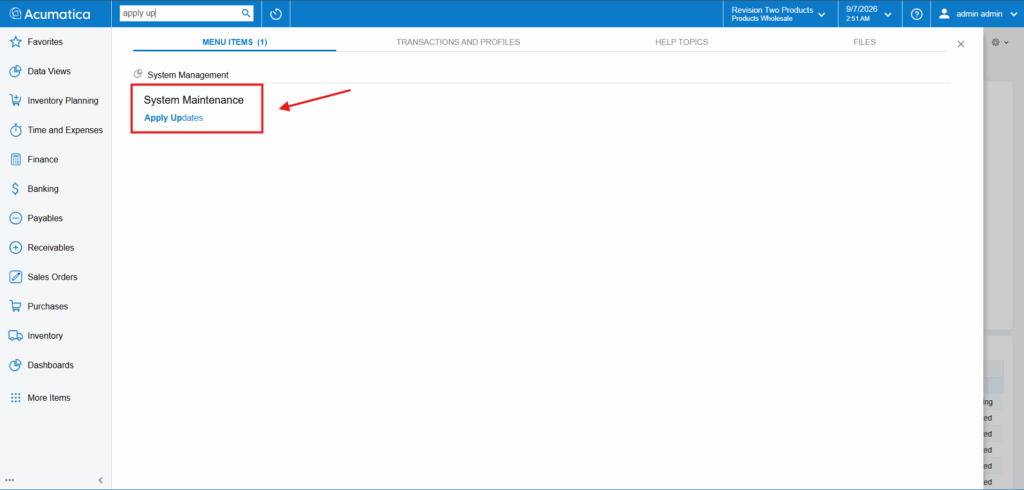
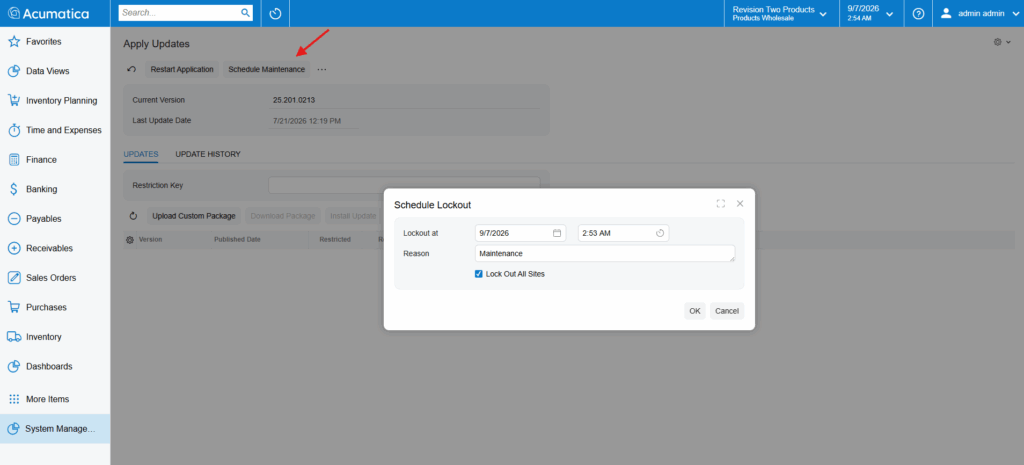
The first step in setting up a sandbox is taking a snapshot of your company’s current data. A snapshot in Acumatica is a packaged copy of your tenant’s data that can be exported and restored elsewhere. Think of it as a save point that captures everything exactly as it is at that moment. It’s crucial to put the system in maintenance mode before taking the snapshot. This locks out other users temporarily and ensures that no one is making changes to the data while the snapshot is being taken. To enable maintenance mode, navigate to System Management, then System Maintenance, and open Apply Updates. From there, click Schedule Maintenance and set a time. Once the lockout is active, any users still logged in will be prompted to finish up, and new logins will be blocked until you lift it
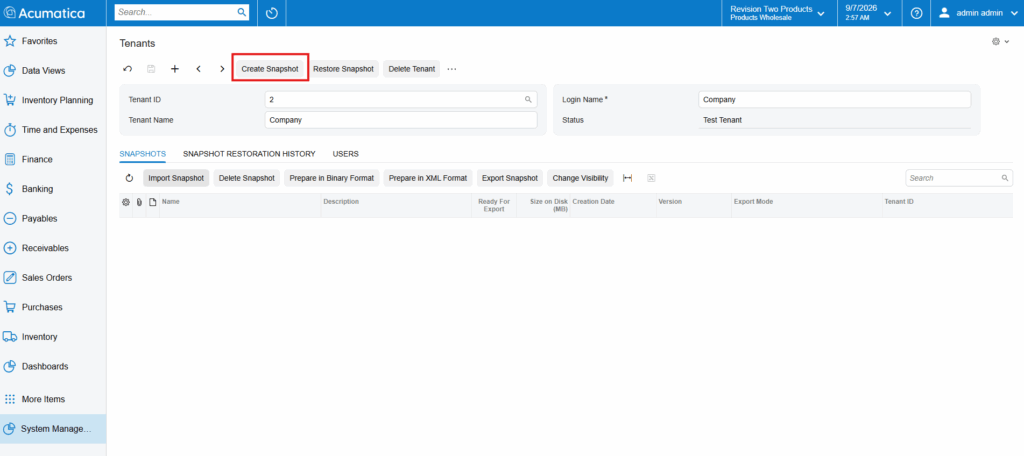
With the system locked, head to System Management and open the Tenants screen. Select the tenant you want to snapshot, then click Create Snapshot from the toolbar. A dialog box will appear asking for a few details. Give the snapshot a name, set the Export Mode to Full to capture all company data and make sure to check the Prepare for Export checkbox and select Binary as the format. Checking that box means the snapshot will be prepared and ready to export in the same step, rather than having to come back and prepare it separately afterward. The Binary format produces an .adb file, which is generally faster and more reliable for larger datasets.
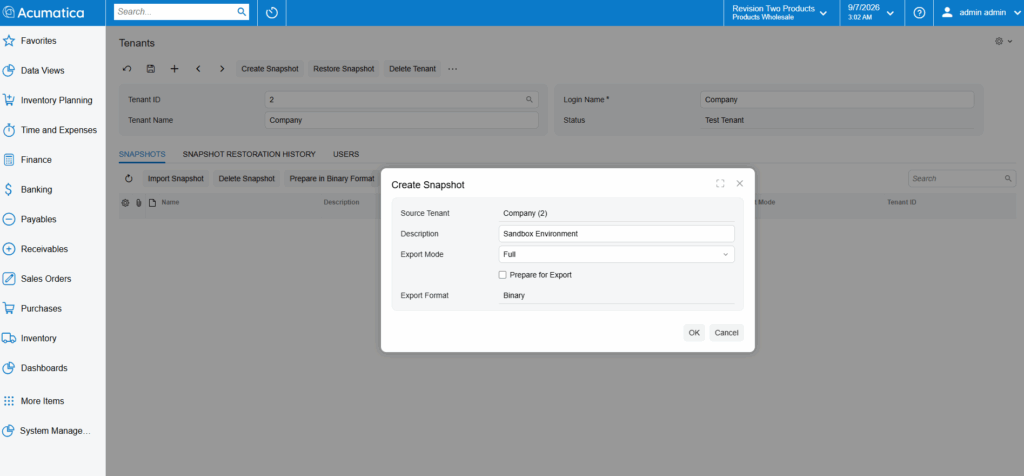
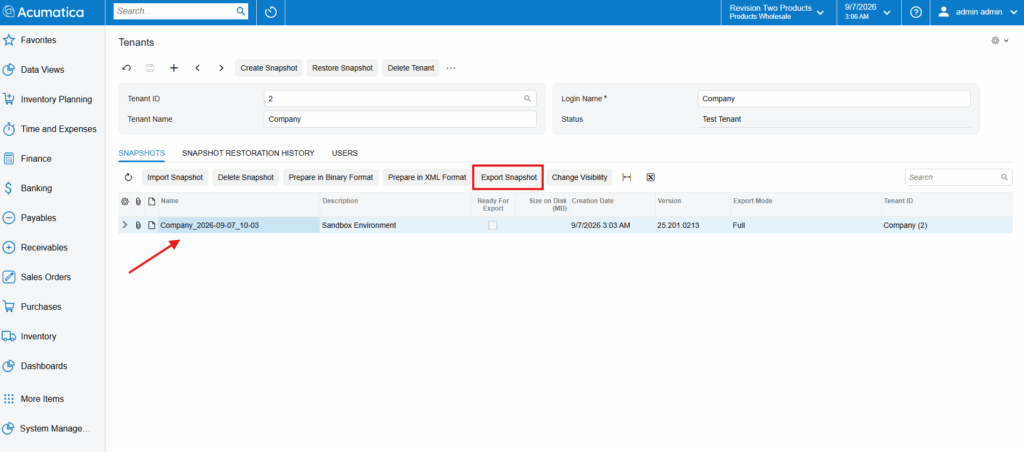
Once the snapshot finishes processing, you will see it listed in the Snapshots tab of the Tenants screen with the Ready for Export column checked. At that point, you can export the file and save it somewhere accessible, and do not forget to go back and lift the maintenance lockout from the Apply Updates screen so your team can get back in.