By using the webhook configuration we can easily send POST requests to Acumatica ERP. From this we can keep update of records that are Created, Deleted. To do this, you need to create a new custom project for instance Webhooks Configuration and Publish it.

On Publish of the customization Project need to create an Extension Library.
Once the Extension library get created in the “Webhook Configuration” project we need to create a class that will implement the Iwebhook Handler interface. In our case, this is Test Webhook class. Also, note that the access modifier for the class must be “Public”.
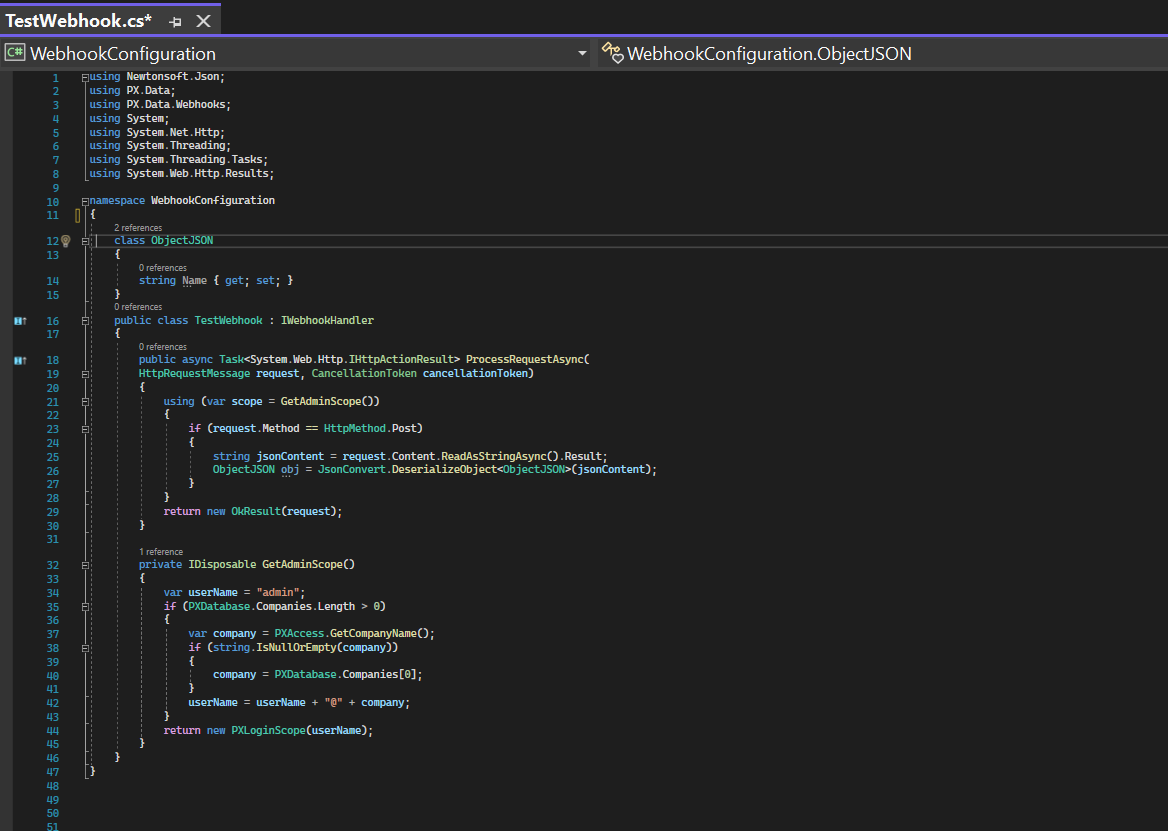
After we have created a class that implements the “Iwebhook Handler” interface. Build the project.
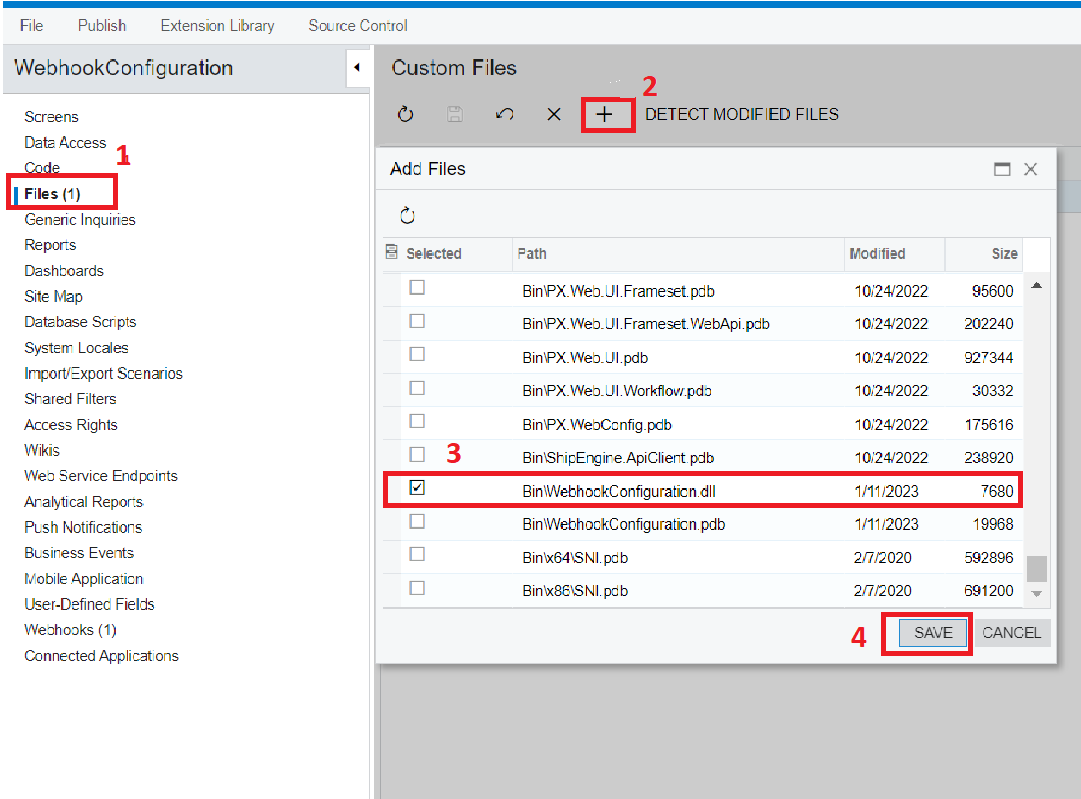
Then go to customization -> Files -> Add New Record -> and select the project which contains your Iwebhook Handler class. Save and click Publish Current Project.
Next, go to the SM304000 (WebHooks) page.
In the WebHook Name field, enter a name. In our case, I named it webhooksconfig. In the Implementation Class selector select your class. Here, you can see it is called WebhookConfiguration. TestWebHooks.
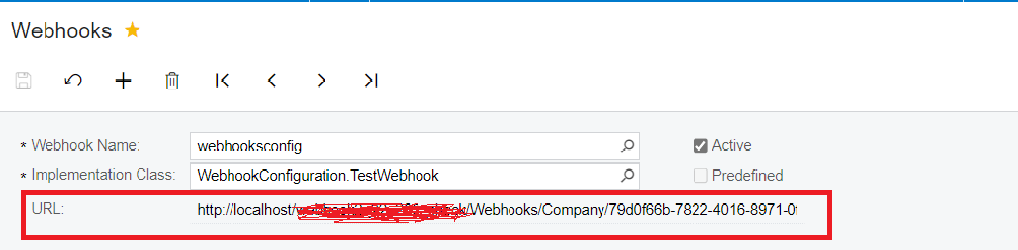
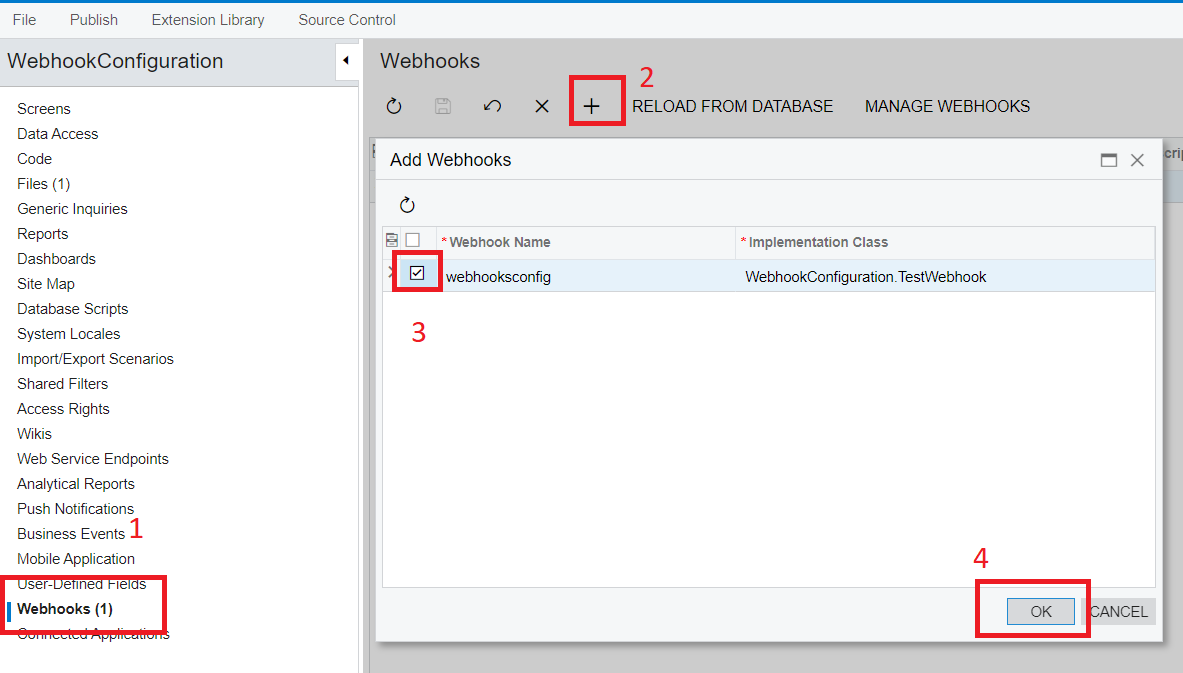
On the click of Save, Acumatica will generate the URL for you to access. Go to customization -> Webhooks -> Add New record and select your newly created WebHook. Check the Predefined checkbox and click Ok and Publish Current Project.
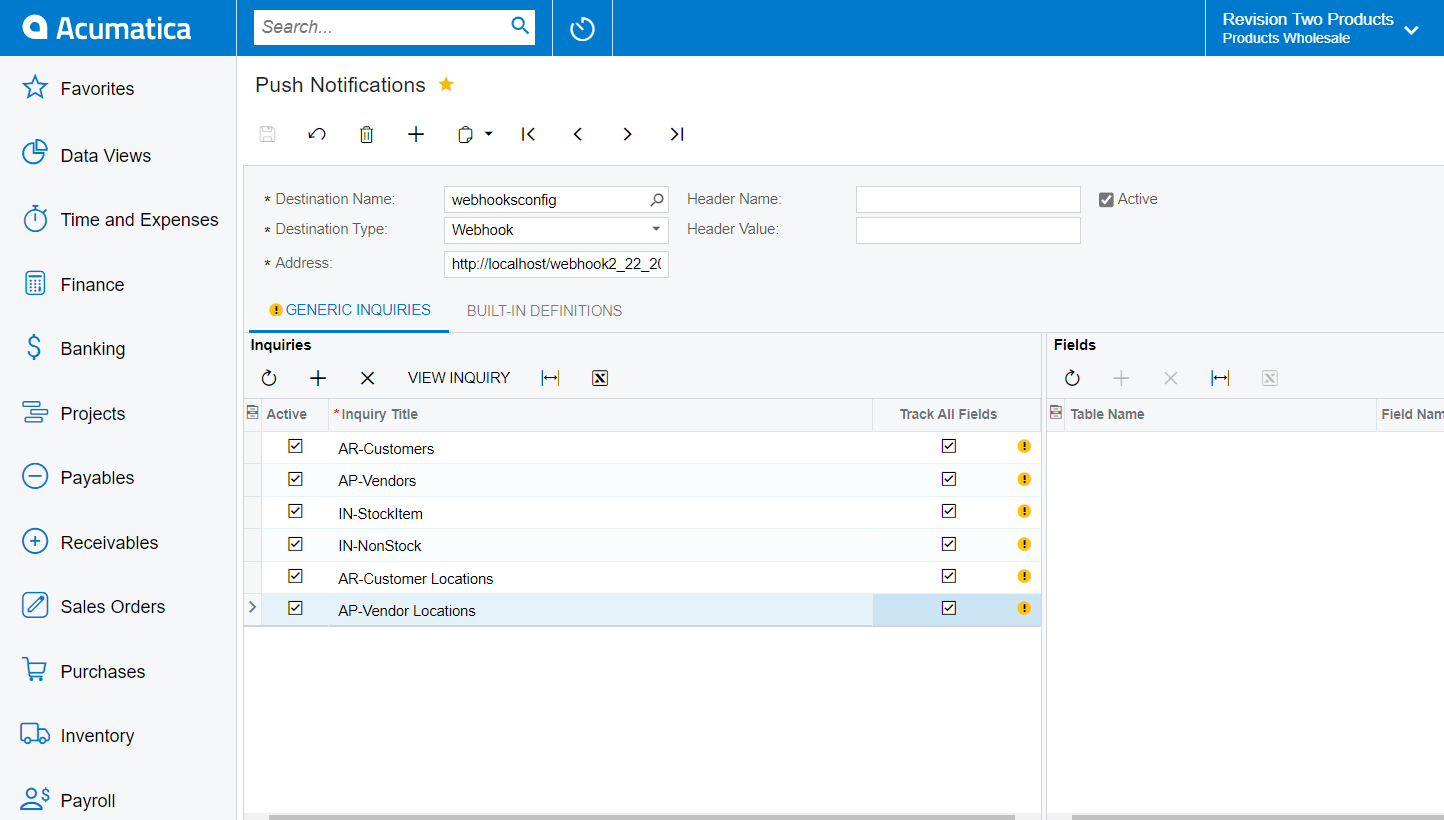
In the Push Notifications Screen in the field of Destination Name selector select the webhooksconfig and Destination Type as webhook and in Address Past the URL which is created in the Webhook Screen.
In the Generic Inquiries tab->Add the inquiries screen in which we want to see the data notification on creation, deletion and update.
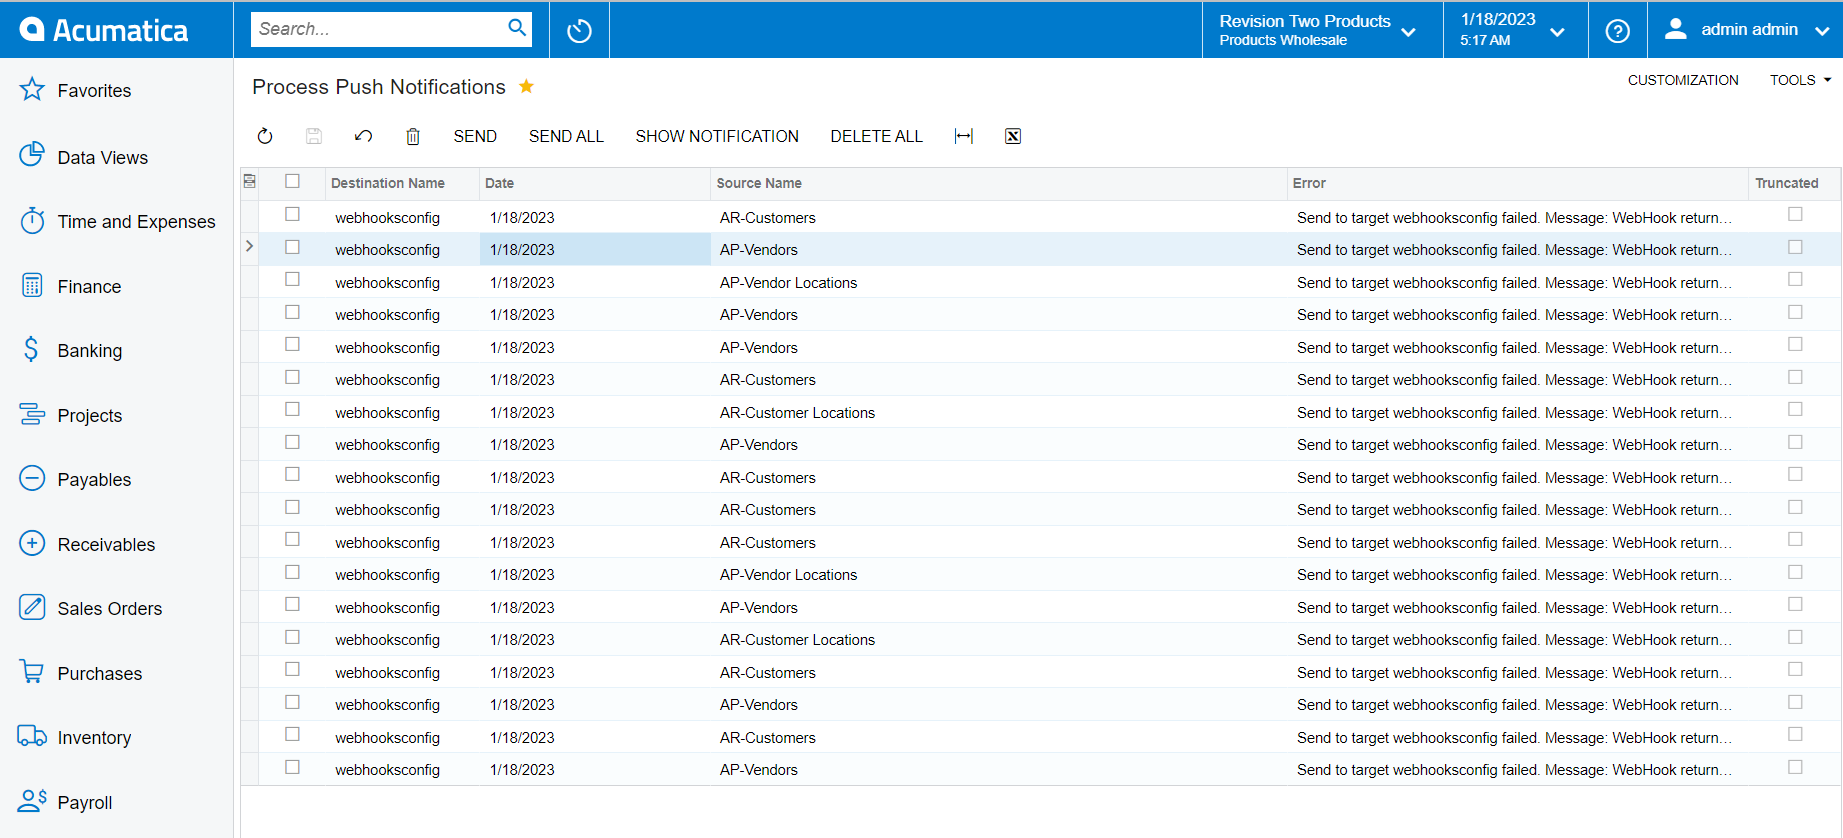
On the Process Push Notification Screen, now you can able to get all details of records which are deleted, created .
.