In this blog post, we will understand the impact on functionality to set the Customer No field as Not Required field on Account Promotion. For Account promotion from Salesforce to the ERP, the “Customer No” field in the ERP system must be set to AutoNumber.
Activating the Customer Number (Not Required) field is the prerequisite to promote the account from Salesforce to the ERP system to disable the “Customer No” input field during promotion, in order to set the Customer No field as Not Required. Usually, this field is the required field to promote the customer to the ERP system but if the Customer Number field in the ERP system follows auto numbering then the user can disable this field in the Salesforce org during the Account promotion.
This functionality enables the users to auto-assign the Customer Number to the Account once it gets promoted to Sage.
Steps to set the Customer No field as Not Required
- Login to Salesforce.
- In Setup navigate to the Home tab.
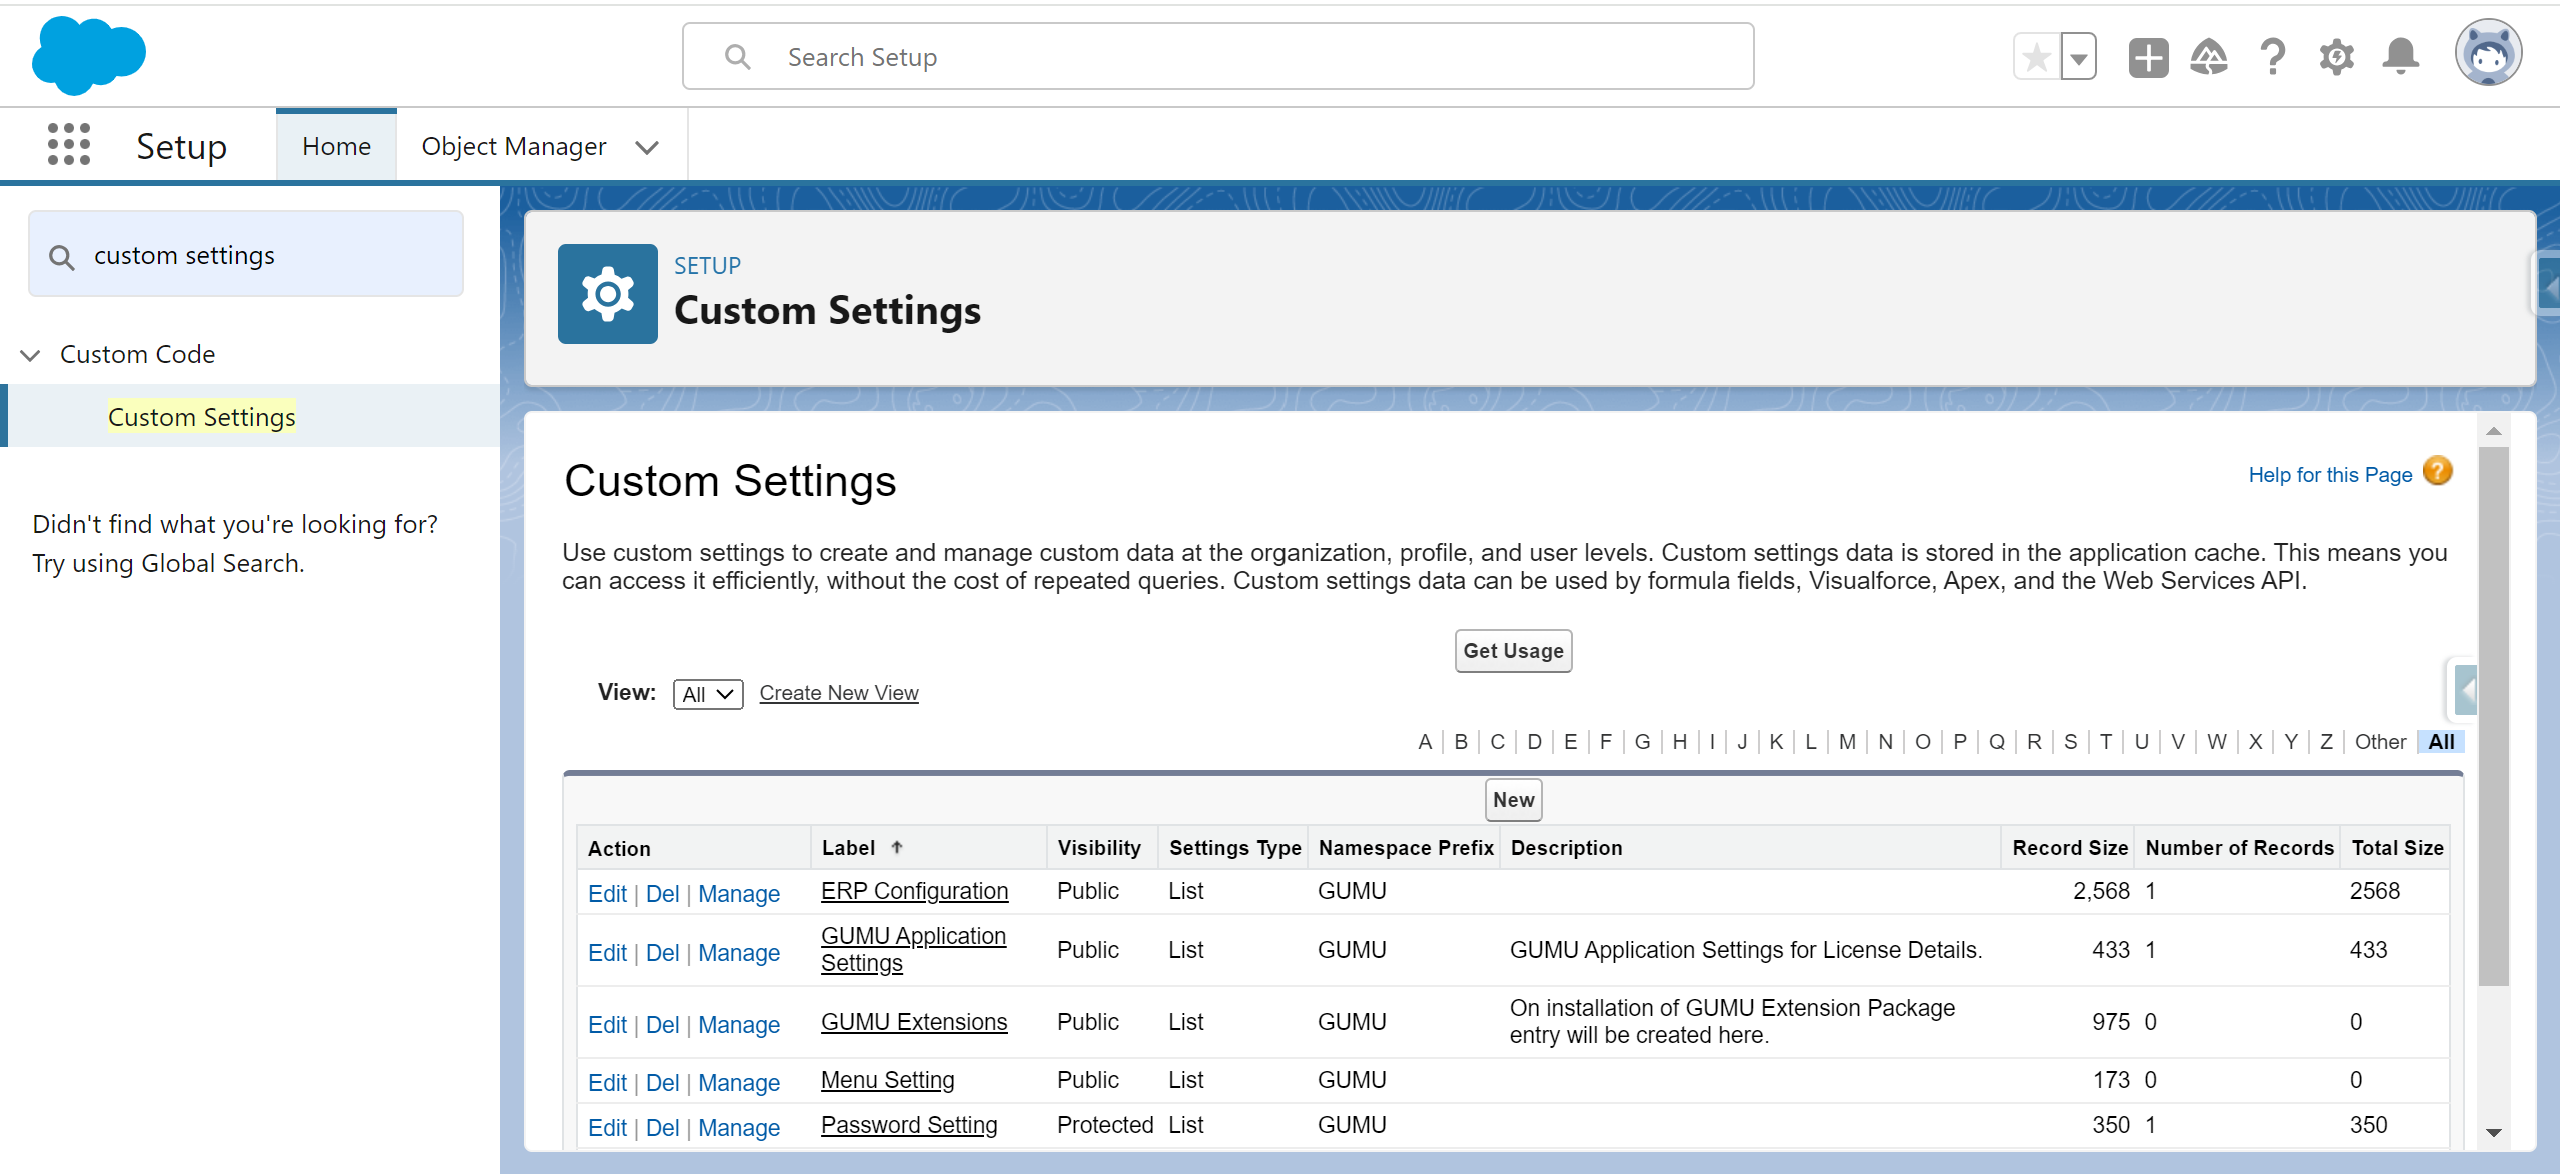
- Search for “Custom Settings” in the Quick Find box located at the top in the left side panel to set the Customer No field as Not Required.
- Click on the Custom Settings.
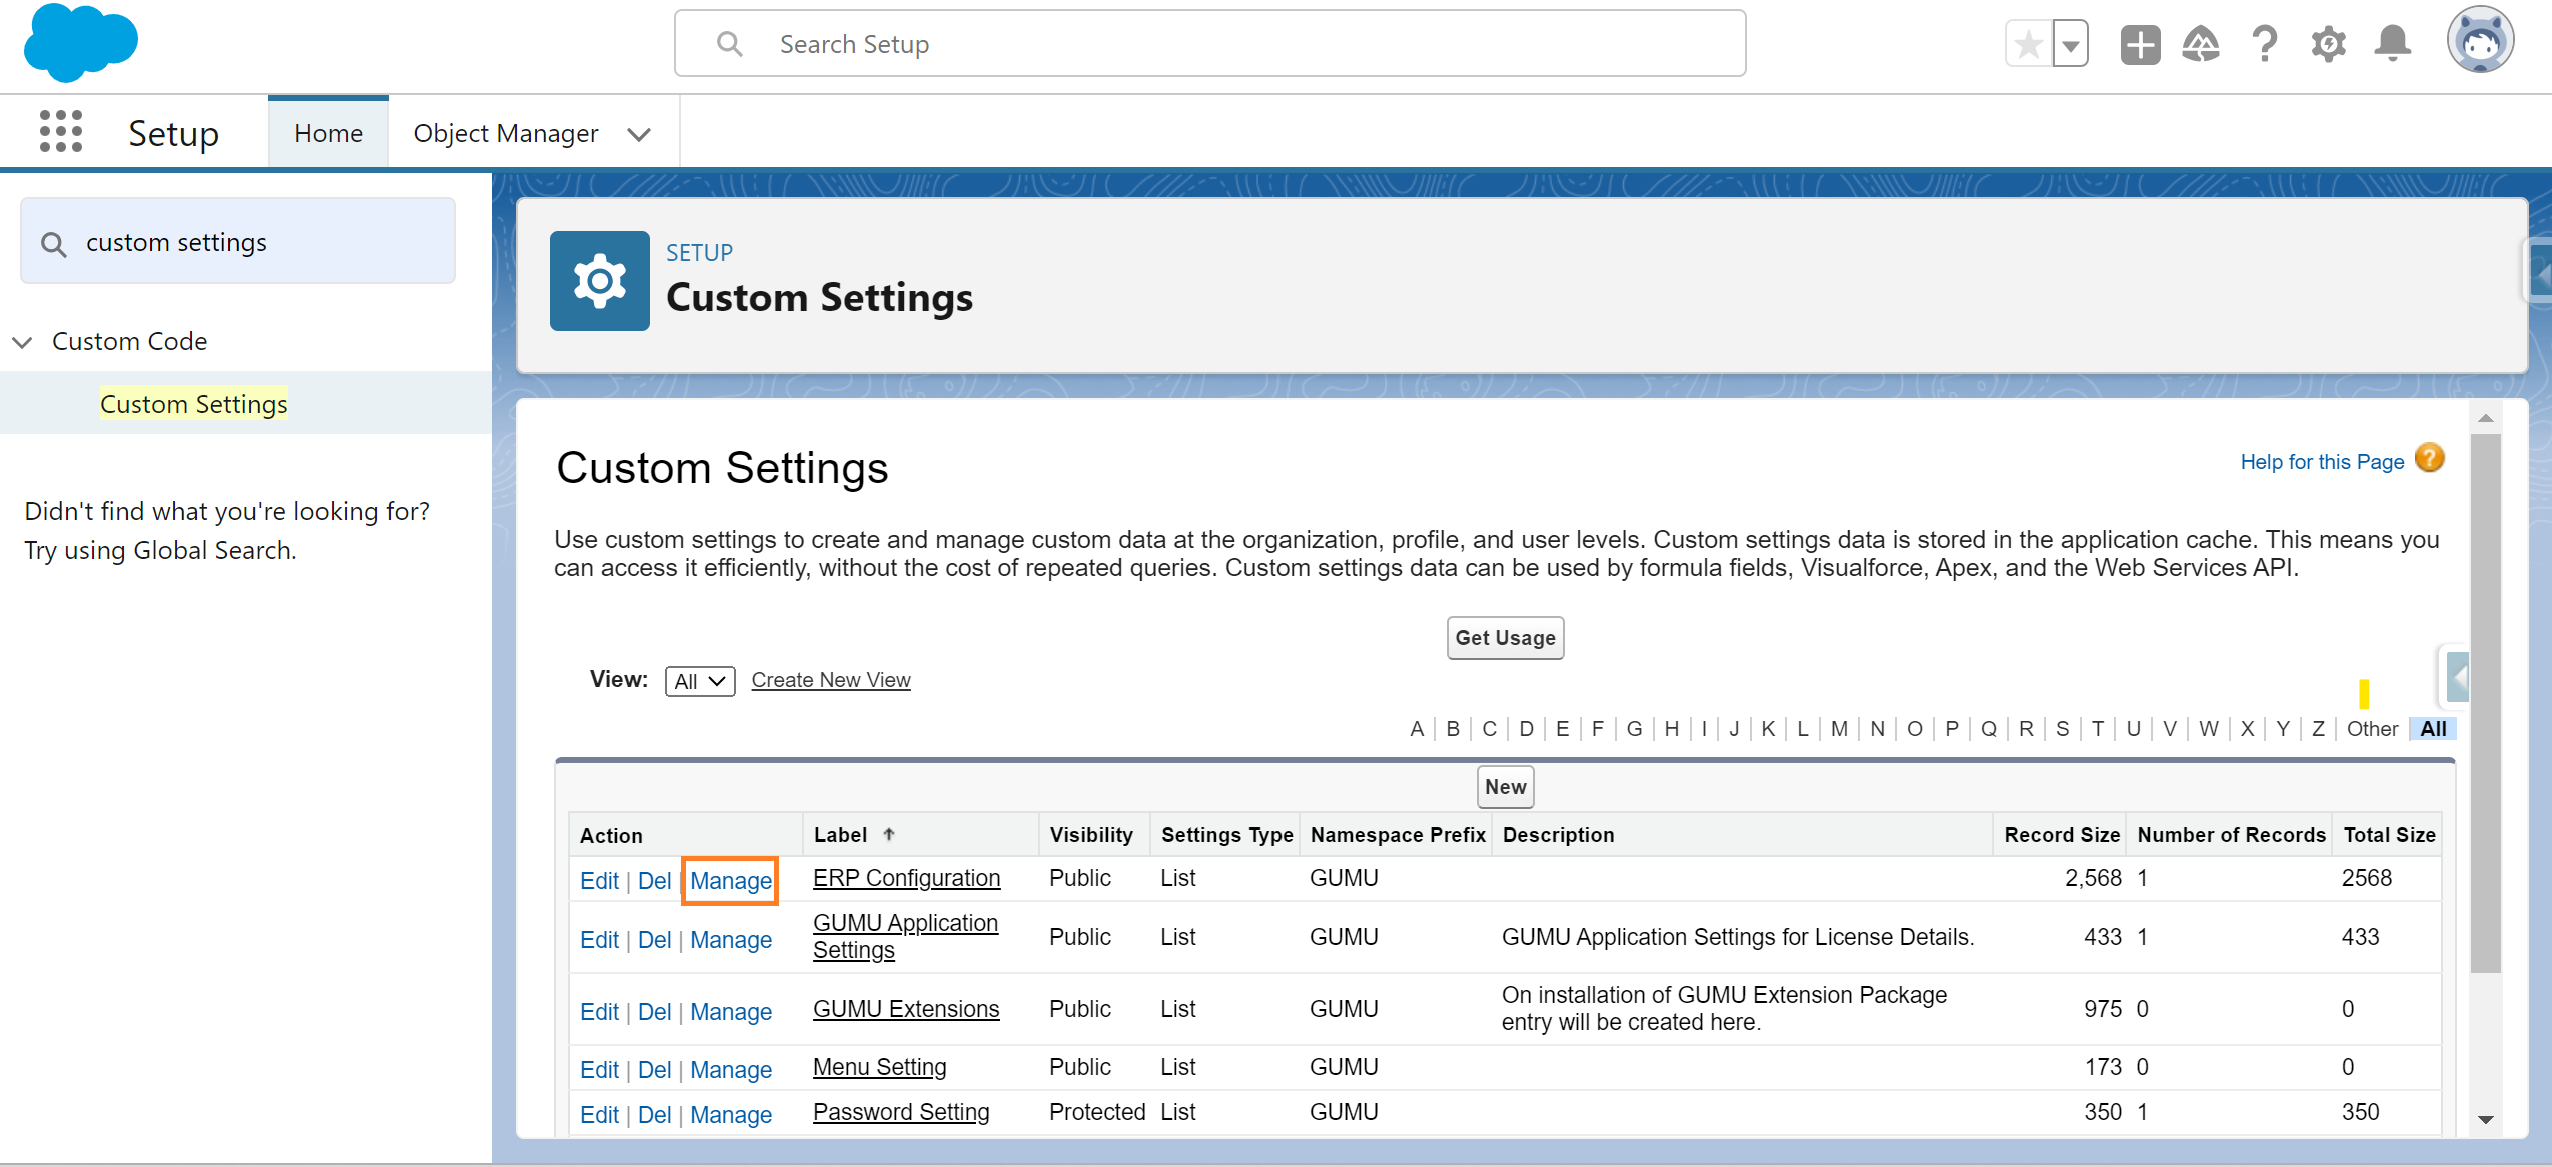
- Now, click on the “Manage” action to manage the ERP configuration and set the Customer No field as Not Required. Refer to the image below.
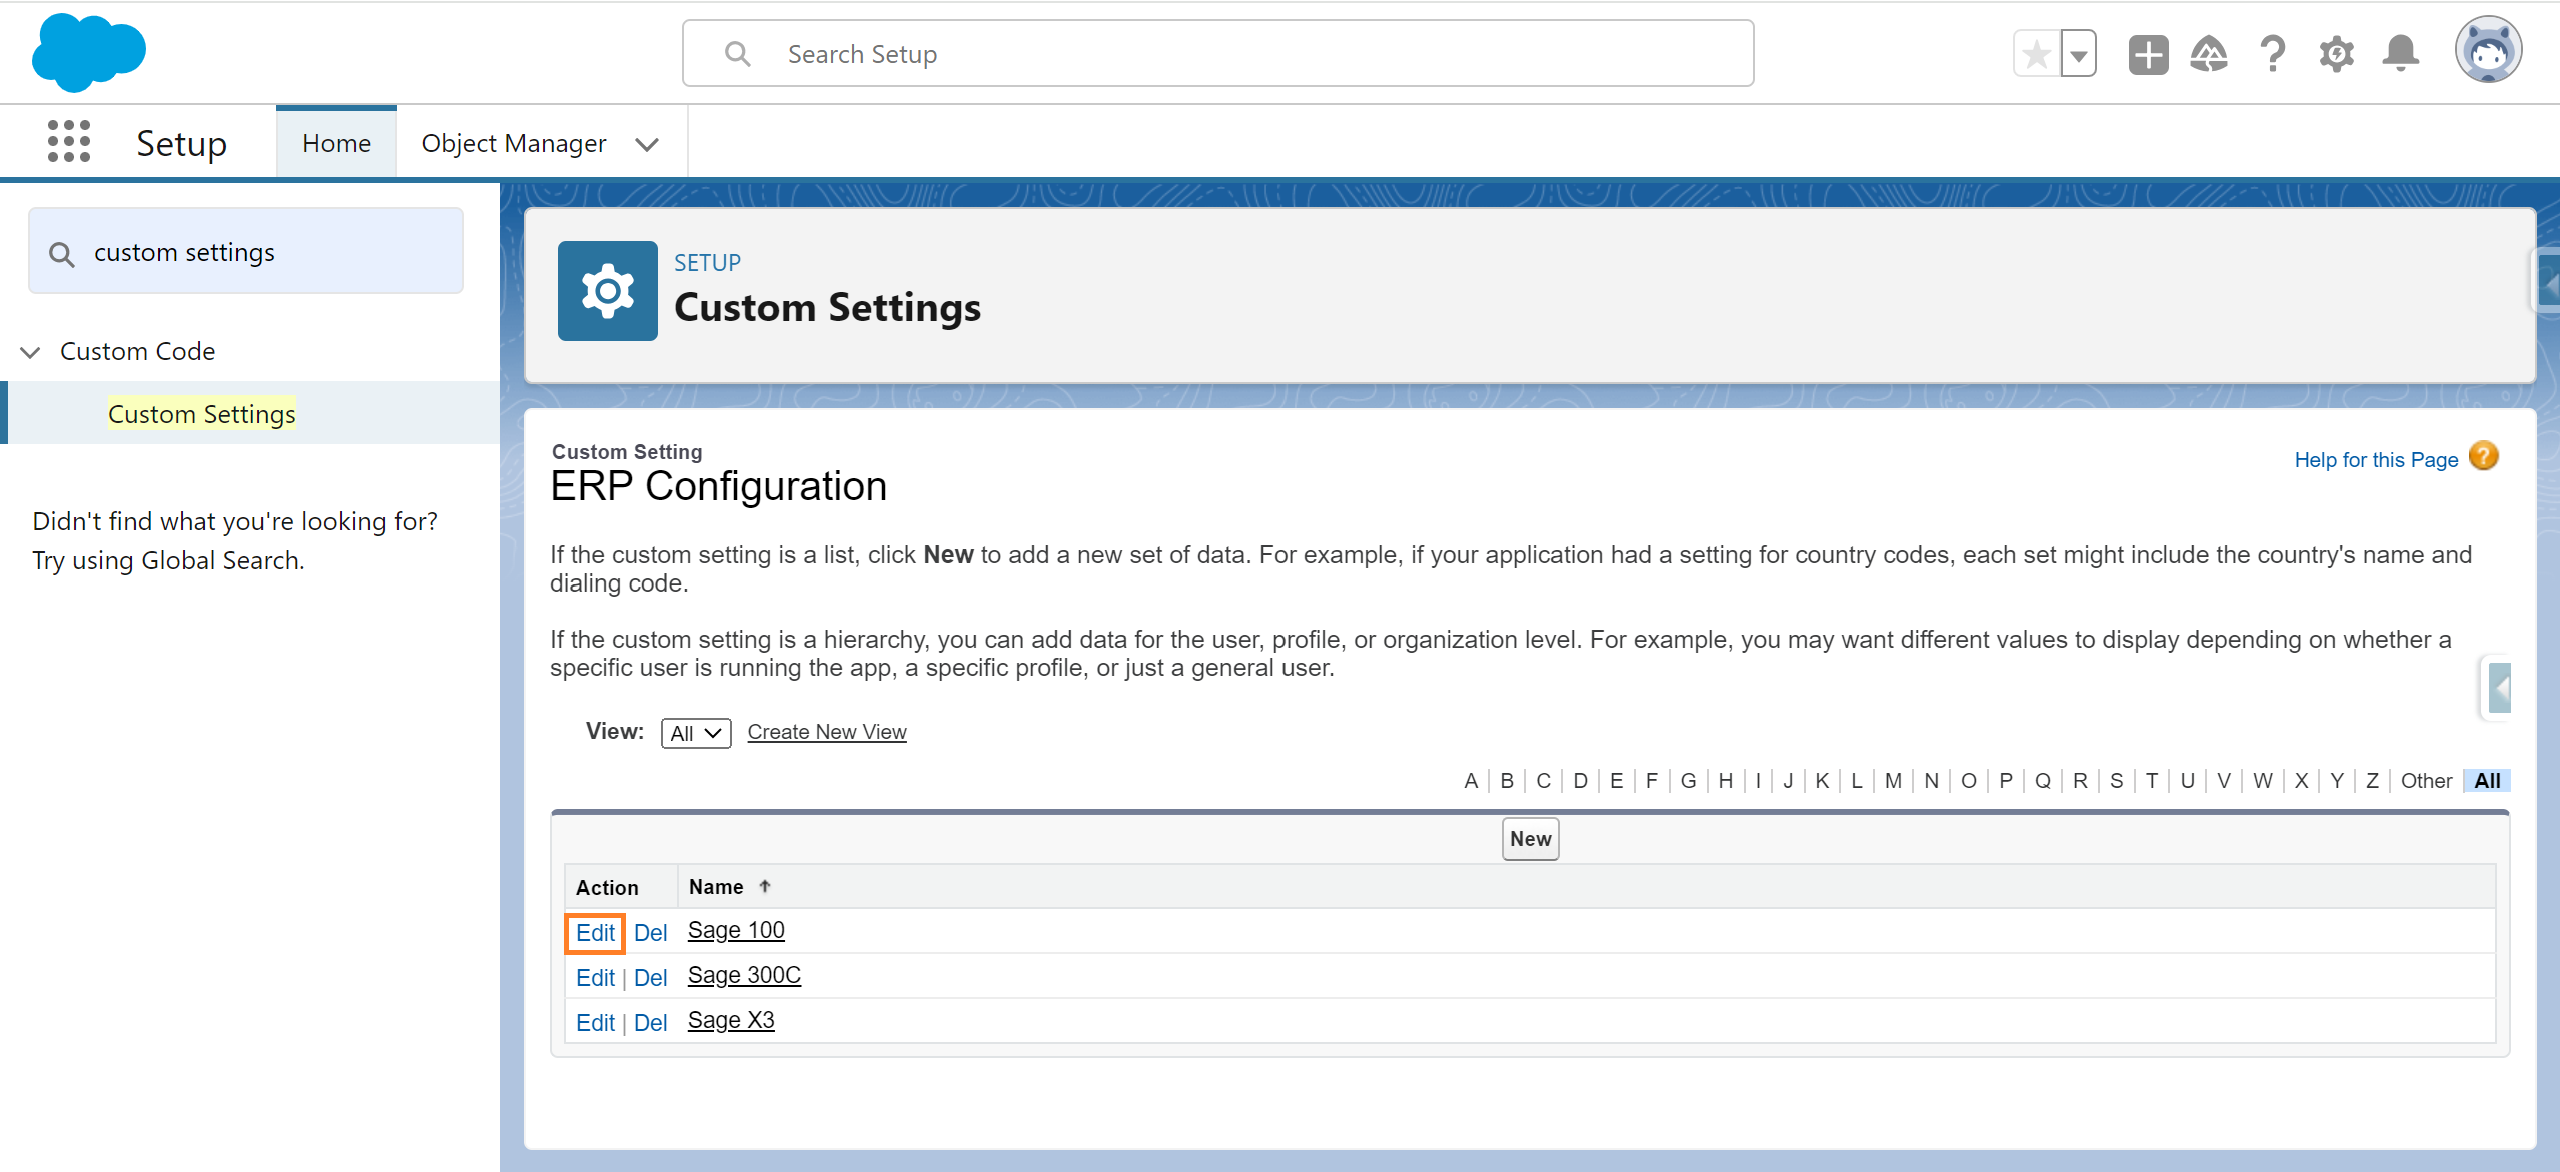
- Click on the Edit option to edit any particular ERP configuration.
- Upon selecting the Edit action, details related to the particular ERP will appear on the screen. Within this section, you can locate the checkbox to set the Customer No field as Not Required.
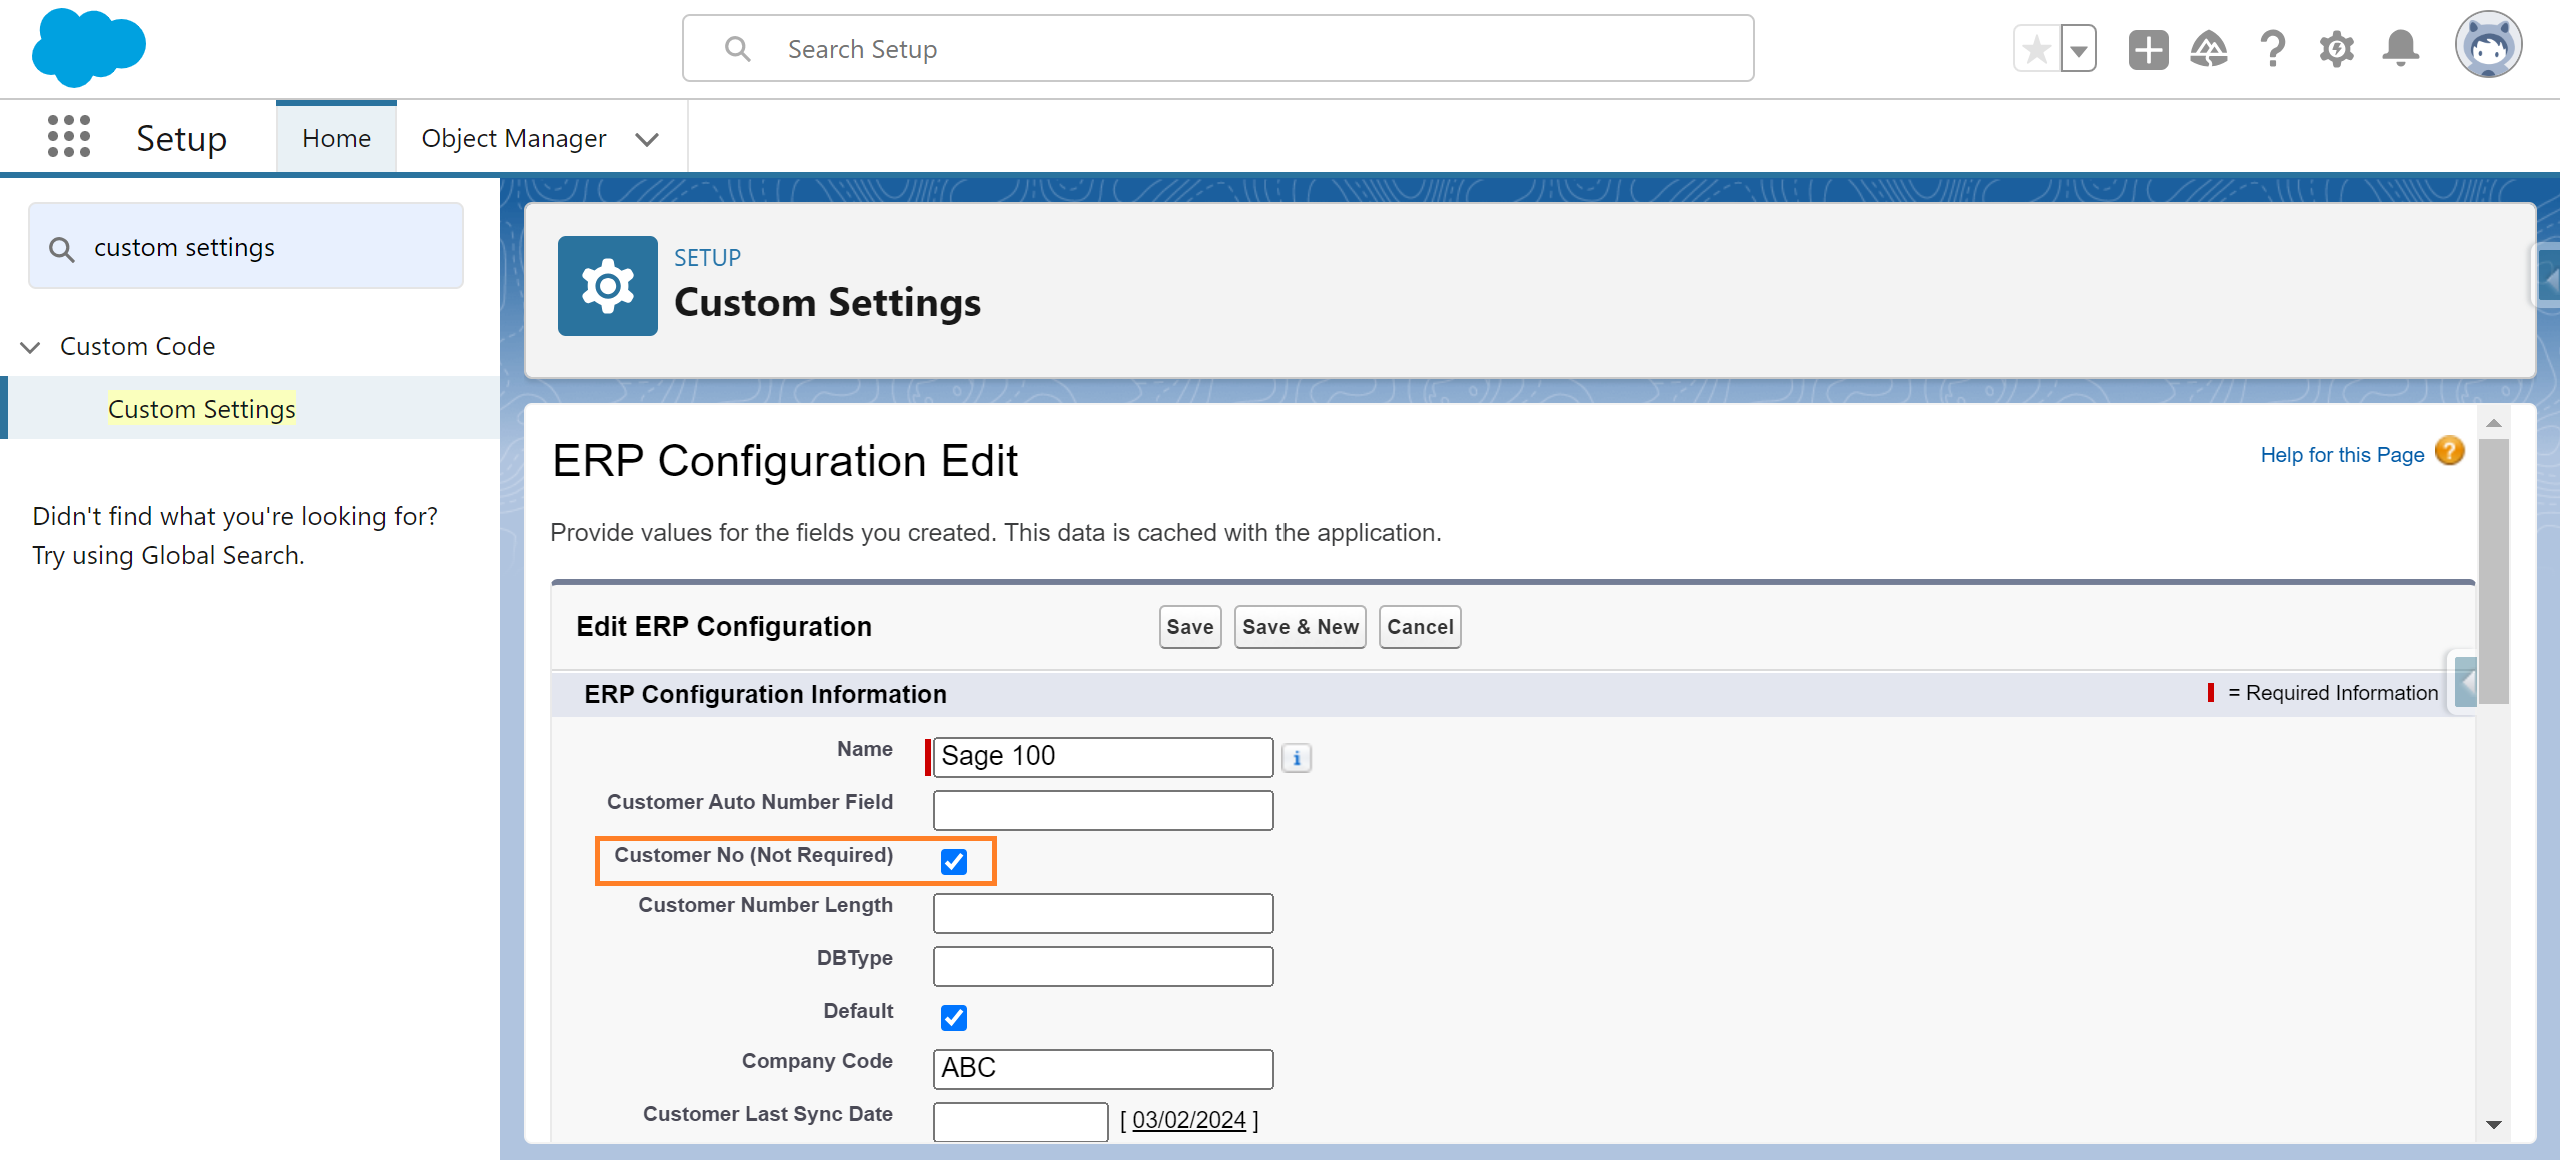
- The Customer No (Not Required) field permits Salesforce users to activate or deactivate the Customer No field when promoting an Account.
- When the Customer No (Not Required) checkbox is selected, the Customer No field becomes inactive, preventing users from entering a customer number while promoting the account from Salesforce to ERP.
- To initiate the promotion process, choose an account from the Accounts Tab or create a new account in your Salesforce org
- Click on the “Promote Customer” button to promote the account. A popup will open displaying all the required fields along with the Customer No field.
Note: In case your Salesforce org is configured with multiple ERP systems, upon clicking the “Promote Customer” button, you must choose the specific ERP system to which you intend to promote the account. After selecting, click the “Next” button, and the popup window, as shown in the image below, will be displayed.
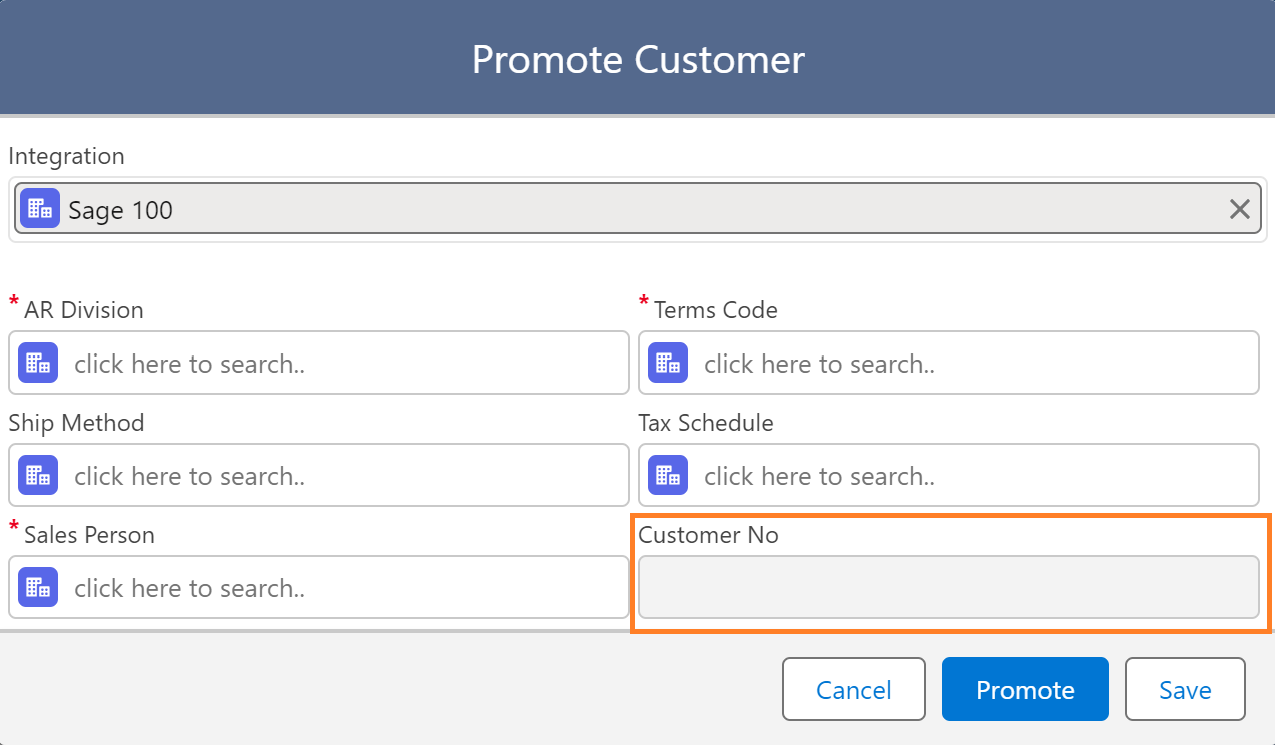
- Fill in all the required details in the input fields and press the “Promote” button to initiate the account promotion to the ERP.
- Upon clicking the “Promote” button, the account is promoted to the ERP, and an automatic numbering system in the ERP assigns the “Customer No” to the promoted account.
- The allocated Customer No can be observed in your Salesforce org within the “Customer No.” field situated in the Details Tab of the promoted account. Alternatively, it can be accessed in the developer console through the “ERP_Config_c” object.
By following the above blog instructions, you will be able to learn about the newly added feature “How to set the Customer No field as Not Required in Salesforce while it is set to use the “Auto Number” functionality in Sage“.
More details about the Product are available on our website and Salesforce AppExchange.
We hope you may find this blog resourceful and helpful. However, if you still have concerns and need more help, please contact us at salesforce@greytrix.com.
About Us
Greytrix – a globally recognized and one of the oldest Sage Development Partner and a Salesforce Product development partner offers a wide variety of integration products and services to the end users as well as to the Partners and Sage PSG across the globe. We offer Consultation, Configuration, Training and support services in out-of-the-box functionality as well as customizations to incorporate custom business rules and functionalities that require apex code incorporation into the Salesforce platform.
Greytrix has some unique solutions for Cloud CRM such as Salesforce Sage integration for Sage X3, Sage 100 and Sage 300 (Sage Accpac). We also offer best-in-class Cloud CRM Salesforce customization and development services along with services such as Salesforce Data Migration, Integrated App development, Custom App development and Technical Support business partners and end users. Salesforce Cloud CRM integration offered by Greytrix works with Lightning web components and supports standard opportunity workflow. Greytrix GUMU™ integration for Sage ERP – Salesforce is a 5-star rated app listed on Salesforce AppExchange.
The GUMU™ Cloud framework by Greytrix forms the backbone of cloud integrations that are managed in real-time for processing and execution of application programs at the click of a button.
For more information on our Salesforce products and services, contact us at salesforce@greytrix.com. We will be glad to assist you.
Related Posts
- Providing Access/Rights to User in Salesforce through GUMU™ Security Matrix to Promote Account
- Using GUMU™ Link existing Salesforce Accounts with Sage 300 ERP Customers
- Steps to Update or Promote Salesforce Contact to the Sage 100 ERP Using GUMU™ Lightning Interface
- How to resolve “Error while promoting customer from Salesforce to ERP: 404 Not Found. It seems you need to restart the service” while promoting Customer from Salesforce to Sage 300C