In this blog post, we will delve into the topic of how to master Pardot and using Automation Rules for Precise Record Filtering in it. The discussion will revolve around efficiently managing your Pardot records through the utilization of Automation Rules. Additionally, we will gain insights into establishing rules that automatically include records in specific lists, guided by predefined criteria within the automation settings.
Automation Rules for Precise Record Filtering in Pardot
To initiate the creation of automation rules in Pardot, and using Automation Rules for Precise Record Filtering in it. First let us begin by creating a segmentation list. Subsequently, proceed with the rule creation process.
- Access pi.demo.pardot.com through your web browser and log in using the credentials associated with your connected Pardot organization.
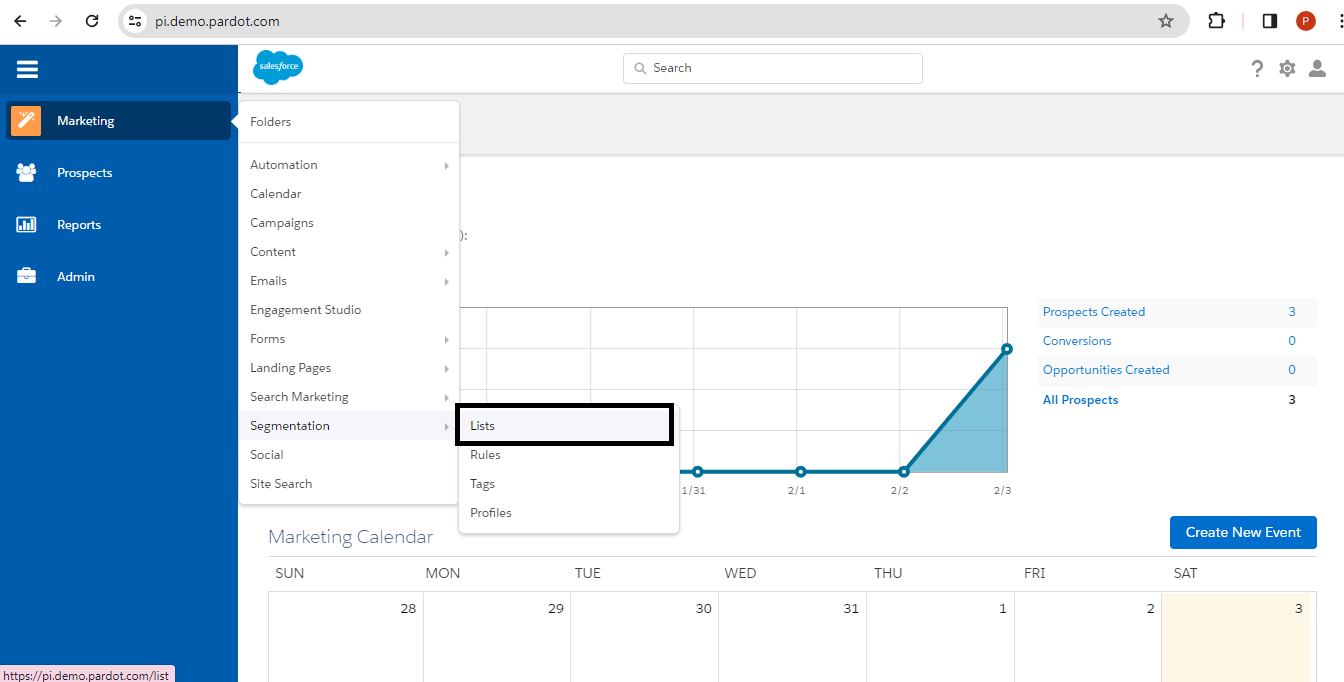
- Next, click the “+Add List” button to create a new list and add the necessary details.
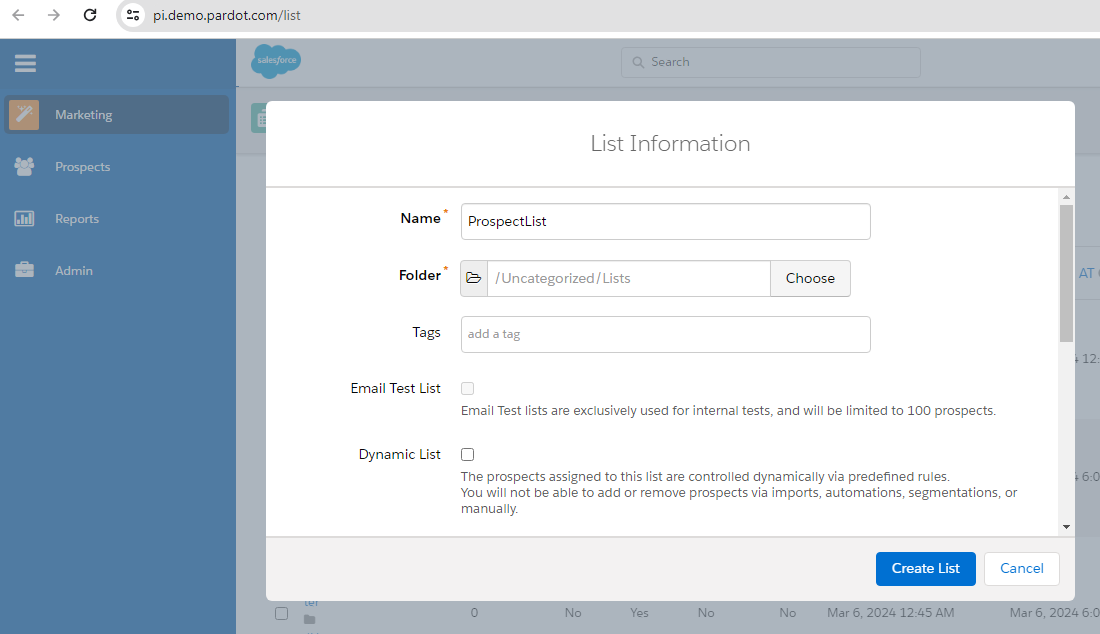
- While creating a list, make sure to check the “Public List” checkbox.
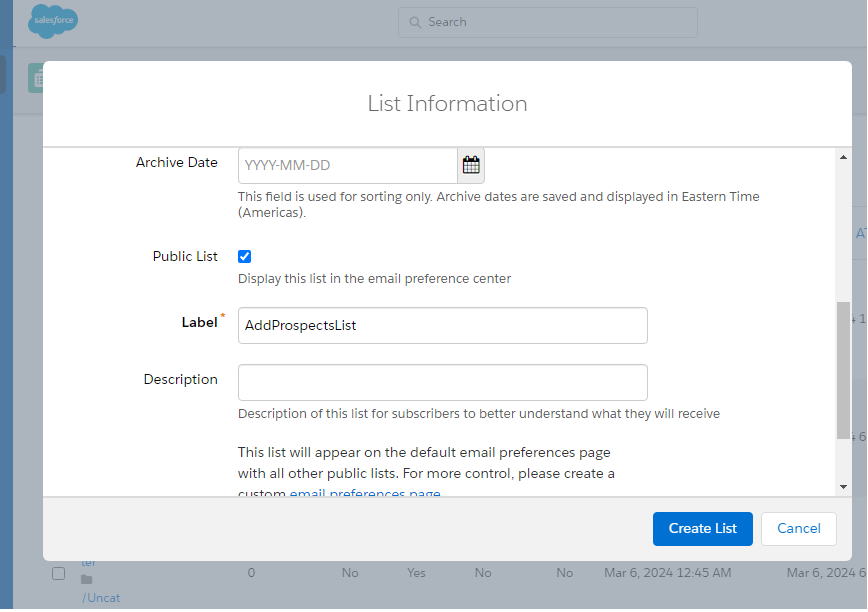
- Continue by clicking the “Create List” button, and the list will be generated.
- Now, to formulate a rule, click on “Automation Rules” as shown below and based on this we can filter a Pardot record using a Automation Rule.
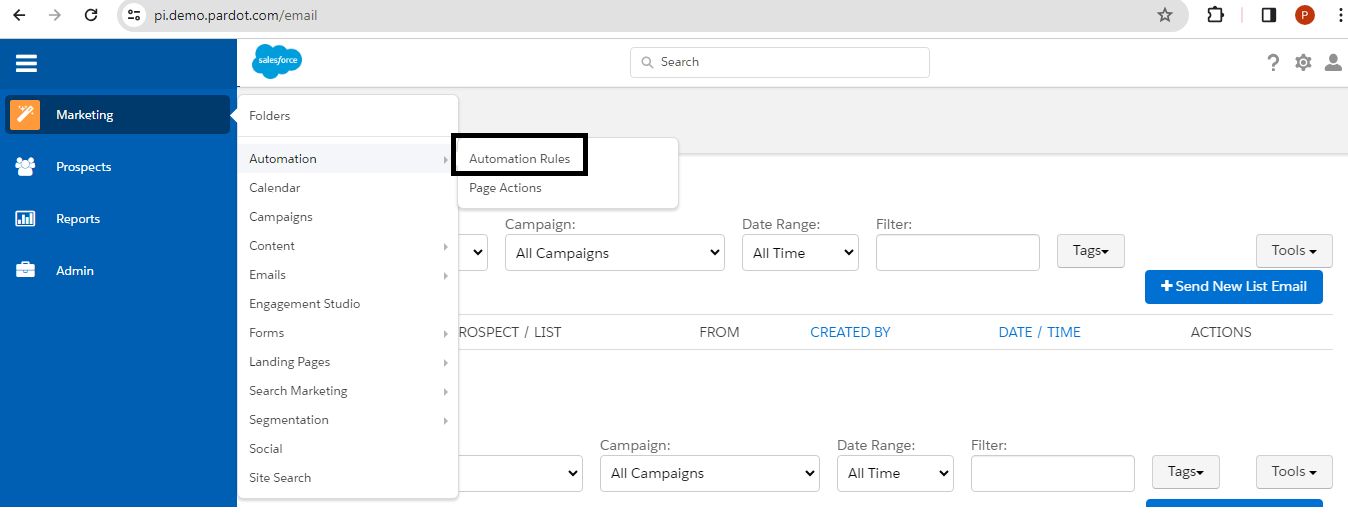
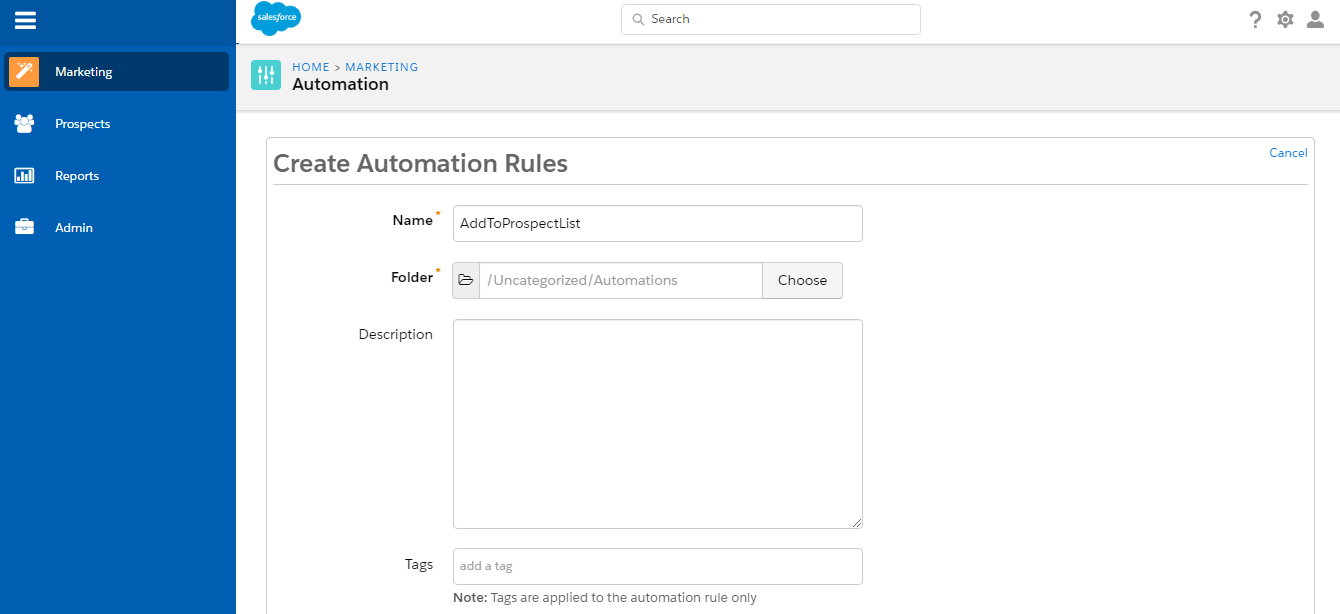
- Select the “+Add Automation Rules” button to generate a new list and add the required details.

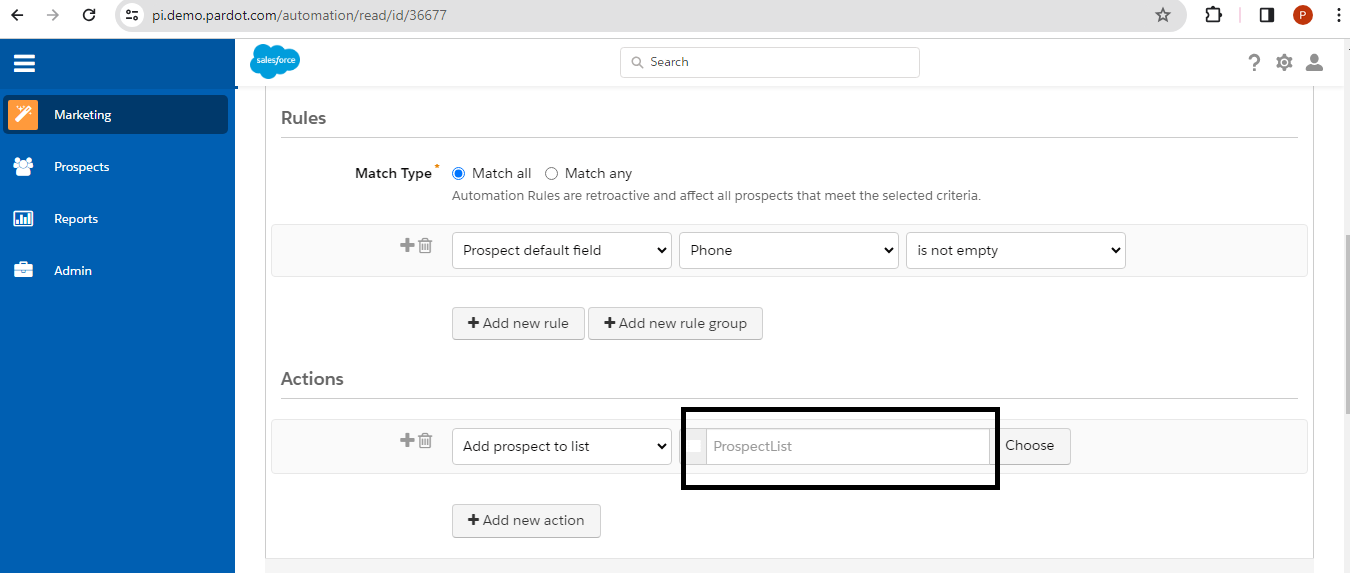
- It’s time to integrate rules into this automation. We’re introducing a matching rule for prospect records with a non-empty “Phone” field. Following this condition, we will implement the rule.
- In the Actions section, select your previously established list, “ProspectList,” and then scroll down to the bottom of the page and click the “Create Automation Rules” button.
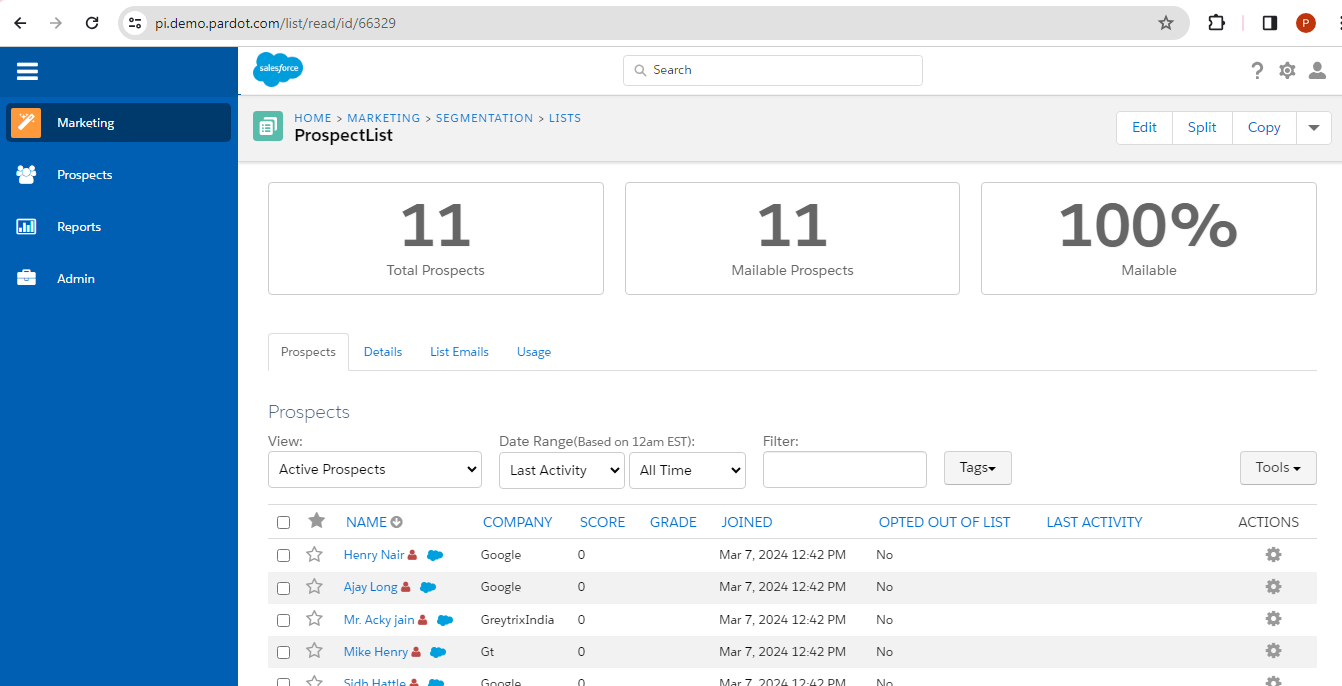
- To verify the count of prospect records meeting our criteria, navigate to your segmentation list. Select “All Current Lists” from the dropdown menu, and then locate your list.

- The automation rule will automatically add the prospect records that meet the criteria to the previously established list called “ProspectList.”
By following the above blog instructions, you will be able to learn “How to Master Pardot: Unleashing the Power of Automation Rules for Precise Record Filtering?“.
If you still have queries or any related problems, don’t hesitate to contact us at salesforce@greytrix.com. More details about our Products are available on our website and Salesforce AppExchange.
We hope you may find this blog resourceful and helpful. However, if you still have concerns and need more help, please contact us at salesforce@greytrix.com.
About Us
Greytrix – a globally recognized and one of the oldest Sage Development Partner and a Salesforce Product development partner offers a wide variety of integration products and services to the end users as well as to the Partners and Sage PSG across the globe. We offer Consultation, Configuration, Training and support services in out-of-the-box functionality as well as customizations to incorporate custom business rules and functionalities that require apex code incorporation into the Salesforce platform.
Greytrix has some unique solutions for Cloud CRM such as Salesforce Sage integration for Sage X3, Sage 100 and Sage 300 (Sage Accpac). We also offer best-in-class Cloud CRM Salesforce customization and development services along with services such as Salesforce Data Migration, Integrated App development, Custom App development and Technical Support business partners and end users.
Salesforce Cloud CRM integration offered by Greytrix works with Lightning web components and supports standard opportunity workflow. Greytrix GUMU™ integration for Sage ERP – Salesforce is a 5-star rated app listed on Salesforce AppExchange.
The GUMU™ Cloud framework by Greytrix forms the backbone of cloud integrations that are managed in real-time for processing and execution of application programs at the click of a button.
For more information on our Salesforce products and services, contact us at salesforce@greytrix.com. We will be glad to assist you.
Related Posts

