As working with Acumatica, we need several actions to perform different operations. Acumatica provides large set off actions to perform operations on data in the ERP. But in many business scenarios we came into the situation where we want to perform operation on data which is not added on the screen itself.
Many times we need to add actions on processing screens to perform several actions to complete our daily task smoothly and in less time. In this blog, we will add the action from editor to process invoices and memos records.
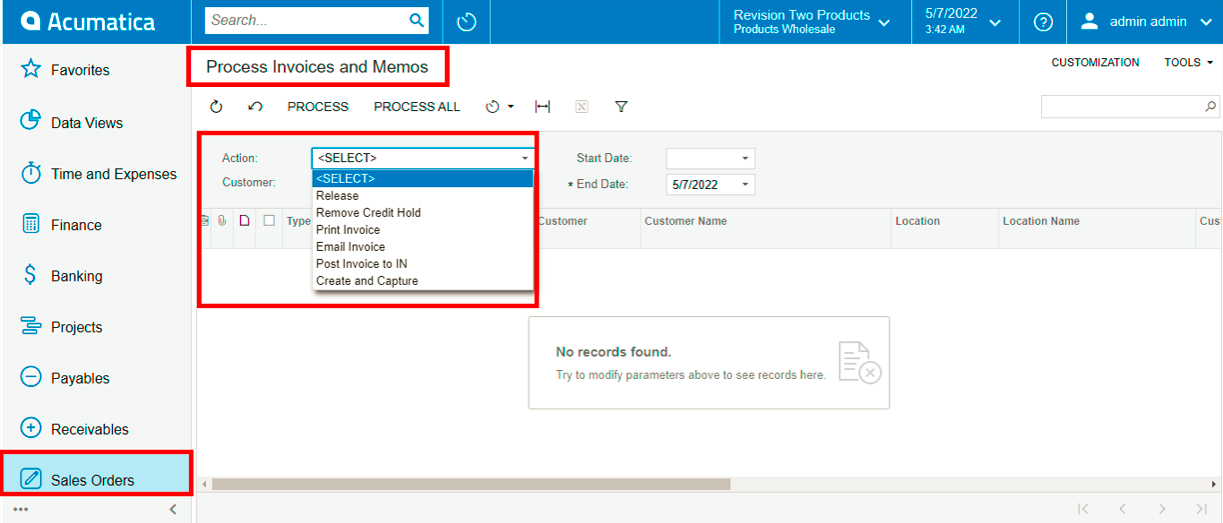
For Example. If we go to process the Invoices and memos screen, we got below limited actions that are allowed to be scheduled.
- Release
- Remove Credit Hold
- Print Invoice
- Email Invoice
- Post Invoice to IN
- Create and Capture.
But if we need any other actions need to perform i.e. Remove Hold, we can add actions from Customization Project Editor as performed below.
1) Go to “Process Invoices and Memos” (AR301000) screen by below navigation. Sales Orders a Processes a Process Invoices and Memos (AR301000). We can Go through the Action section to know which actions are performed by the current screen.
We will add Pay Action to the screen by following below steps.
2) Create new Customization project as it is part of adding action to the screen.
Customization Approaches in Acumatica – Acumatica – Tips, Tricks and Components (greytrix.com)
3) Navigate to Customization Inspect element and Click on the Action field of the Process Invoices and Memos screen.
4) After Displaying the popup of Element Properties of the Action field Click on Customize.it will display a popup for selecting Customization project which we already created.
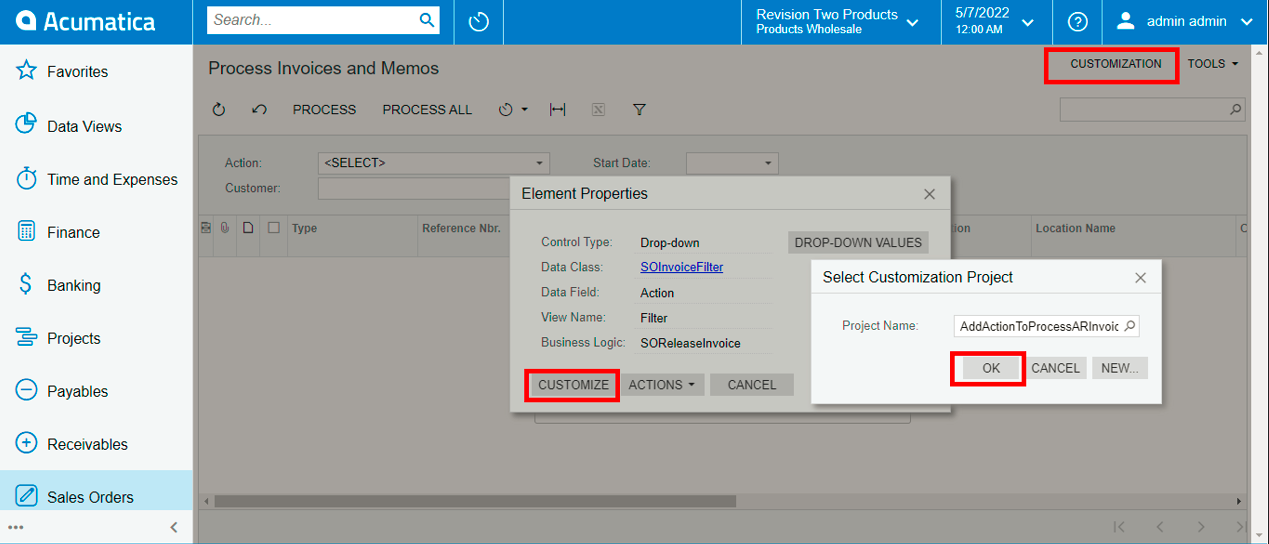
After Clicking on OK, Customization Project Editor will open in new window in current browser.
5) After the Above window opens, we have to go to the screens section in left side and click on the “Customize Existing Screen” tab. A new popup window opens and asks for the screen name from which we want to add action.
6) Here we select the Invoices and memos screen (AR301000).so if I Click on the newly added Pay Action, it will go to the Invoices and memos screen for paying the invoice.
7) After Adding the screen, we have to click on the arrow besides the screen name in left side then List of actions is available as below.
8) Here we need to select the preferred action which we want to add. Here we select payInvoice action. after selecting an action, a new popup screen opens, where we need to add a processing screen in which we want to perform an action with the category as below.
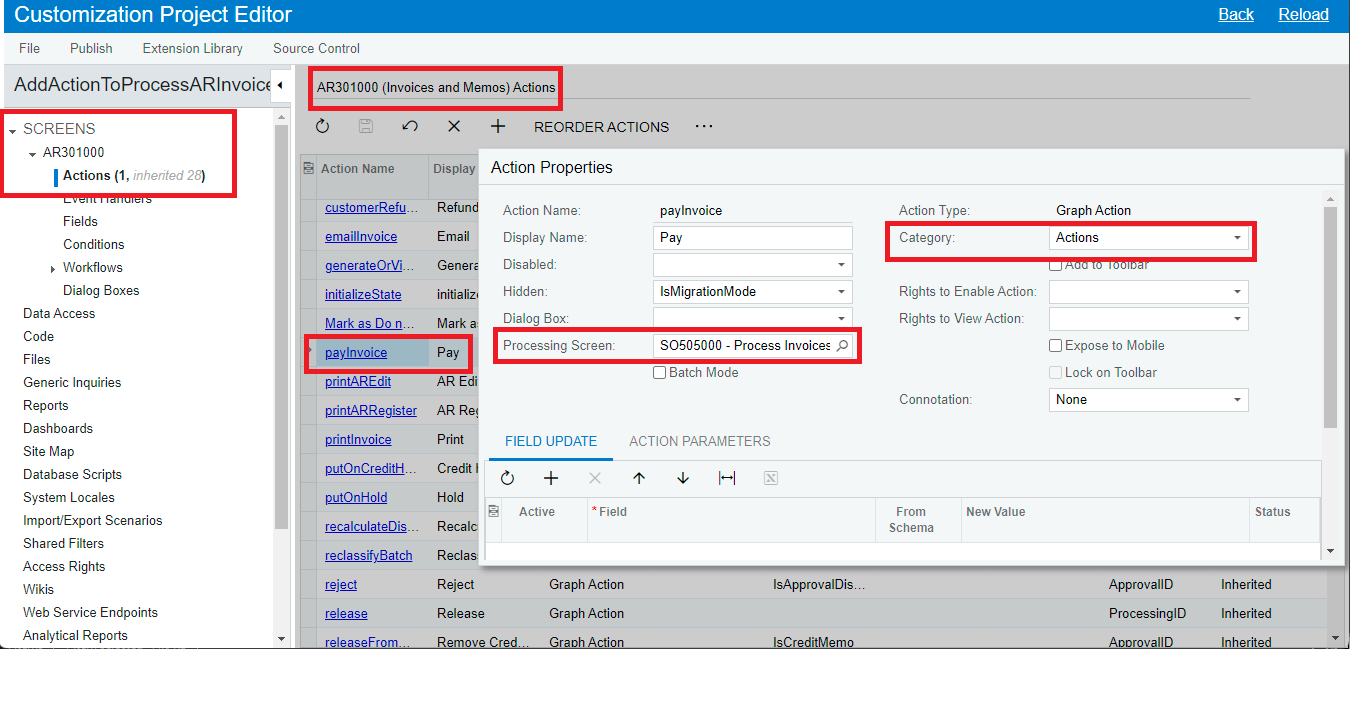
Then Click on Ok and publish the customization Project. After Publishing the project, we have to Refresh our “Process Invoices and Memos” screen. After Refreshing screen, New “Pay” Action will be available to the Actions section.
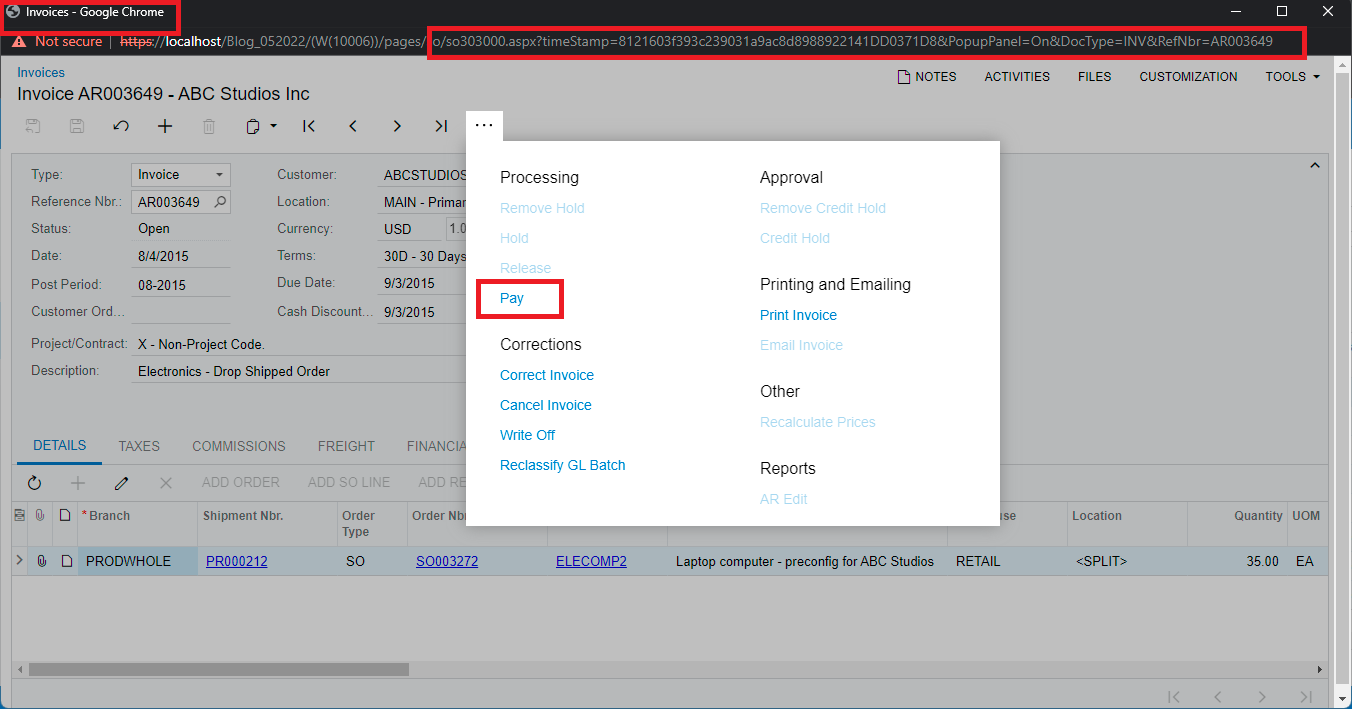
9) After clicking on Pay Action, it will go to the Invoices screen for paying the Invoice.

As in the above screen, we have added Pay Action Successfully to the Process Invoices and Memos screen. After Clicking on Pay Action, it navigates to the invoice page for paying the same invoice. We can use this facility on processing screens like Process Orders, Process Shipments, Process Payments etc.