In the world of ERP systems, Acumatica shines for its flexibility and adaptability. One exceptional feature of Acumatica is its customization, allowing organizations to tailor the system to their precise needs. One important aspect of this customization is the ability to adjust the options in drop-down lists. In this blog post, we will walk you through the process of modifying these drop-down values within Acumatica.
Sometimes, we find ourselves in situations where we need to display different options in dropdown lists or even remove some that are not needed. To address this, Acumatica allows us to modify these dropdown values to better suit our business requirements.
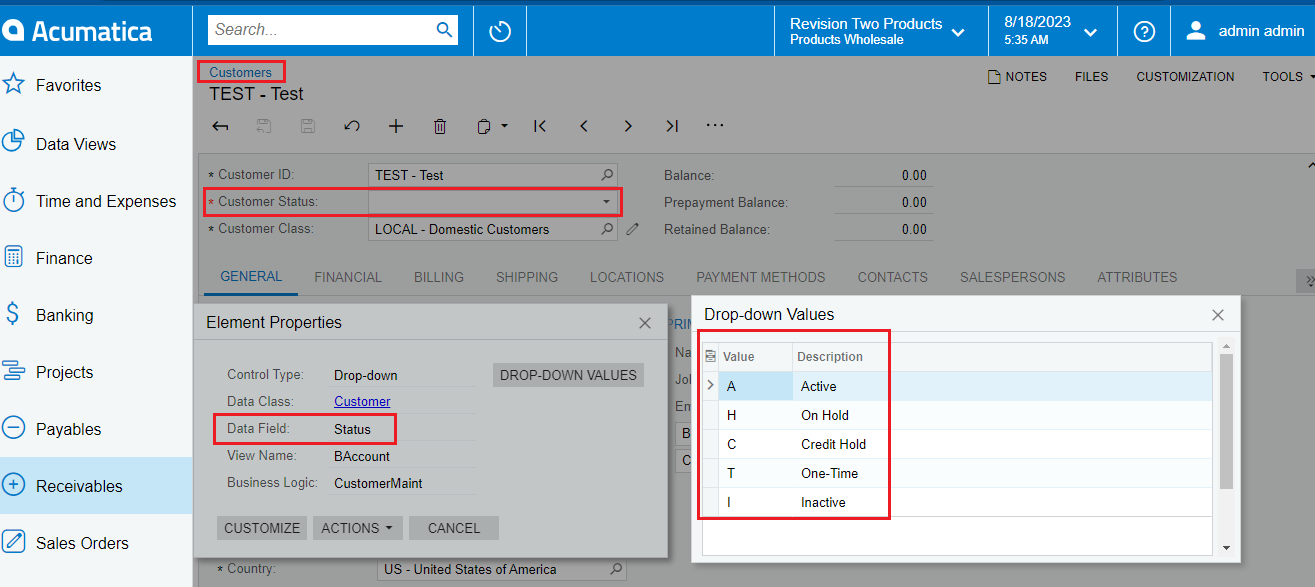
Let’s take an example using the Customers screen. In this screen, there’s a field called “Customer Status” which has a dropdown with options like Active, On Hold, Credit Hold, One – Time, and Inactive.
To modify these dropdown values, you can follow these straightforward steps. This enables you to control the options presented in the dropdowns, aligning them with your business needs.
To adjust the dropdown values, you can easily do so without the need for coding. Here’s how:
1) Begin by creating a new customization project through the Customization Projects feature. You can find detailed steps in the following link:
Customization Approaches in Acumatica – Acumatica – Tips, Tricks and Components
2) Access the Customization Editor and select “Customize Existing Screen.” Choose the “Customers” screen and add it to your customization project.
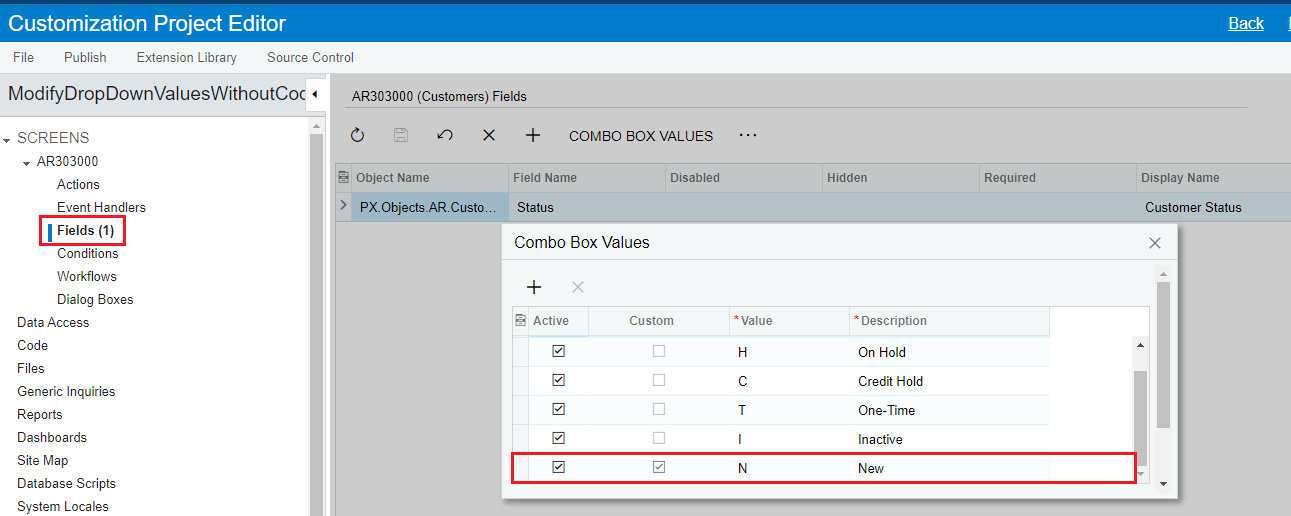
3) Navigate to the right-hand pane of the customization editor and click on the arrow next to the screen’s name. Click on “Fields“. Add the “Status” field, as shown in the screenshot below.

4) Click on Combo Box Values and add new Customer Status.(i.e. New)
5) Publish the customization project.
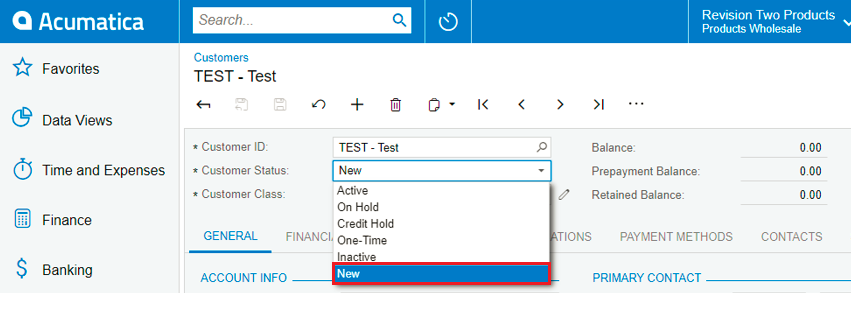
Navigate to the customers screen, and you’ll now observe the updated value being displayed for the status fields.
By following above detailed steps, we will be able to modify dropdown values of standard fields in Acumatica.