In Acumatica, we can implement mandatory, default, and disable validations using the Acumatica editor without writing a code. The platform’s low-code functionality enables users to effortlessly add these validations based on specific requirements for any screens. All that’s required is to define the logic needed to meet the desired criteria.
In this blog, we will guide you on adding certain validations using only the editor in Acumatica, showcasing standard functionality based on the use of the editor.
Let’s use the Project screen as an example to implement these validations. The following are the simple steps to achieve this:
Step 1:
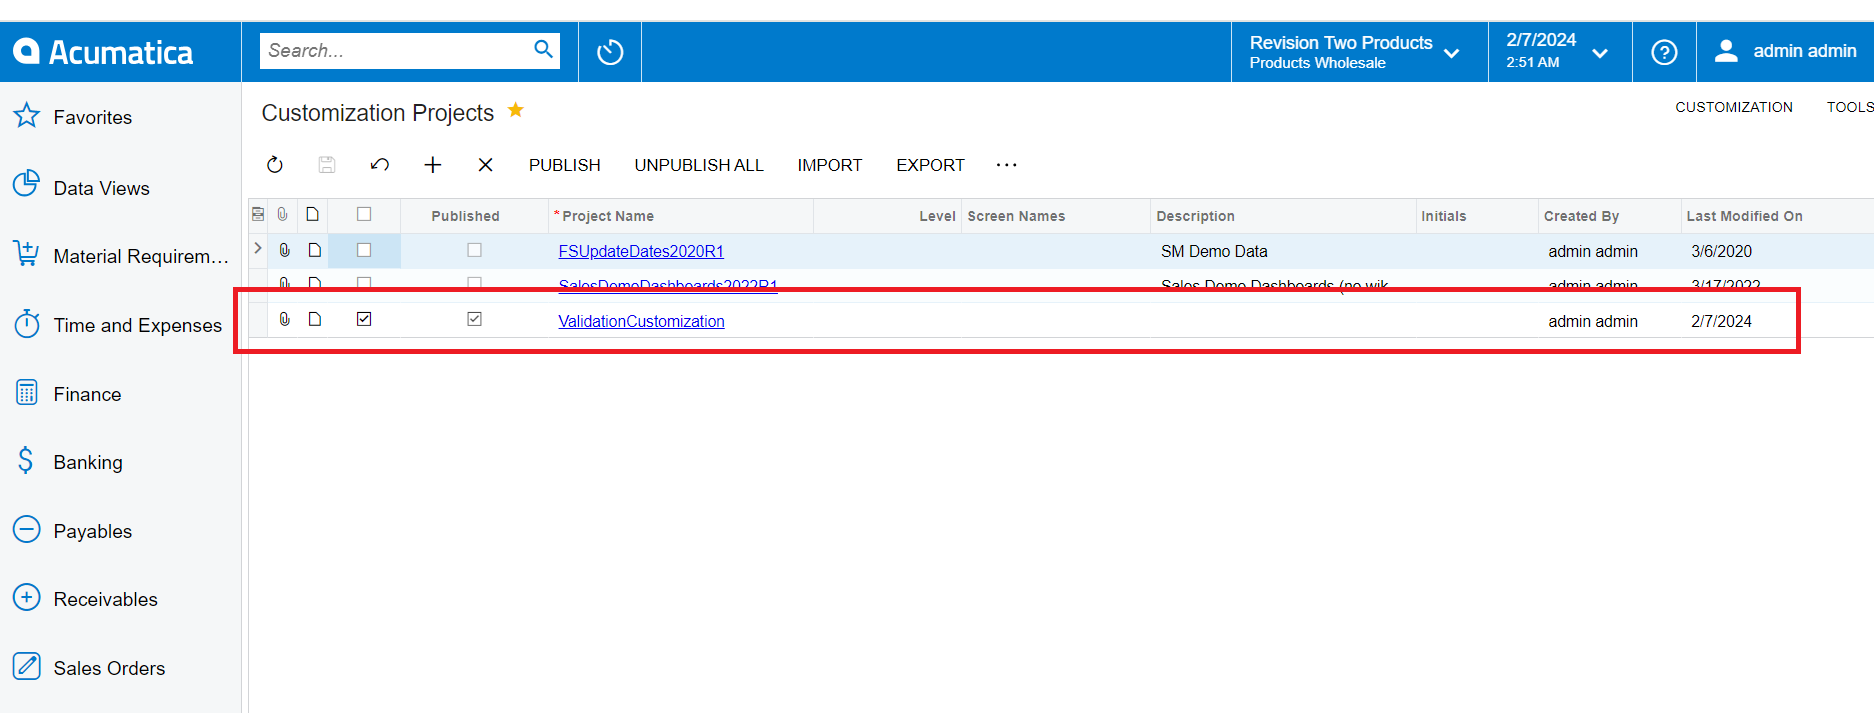
Open the Customization Screen (SM204505).
Click on the “Add” button add the project name click on the Save, publish the project.
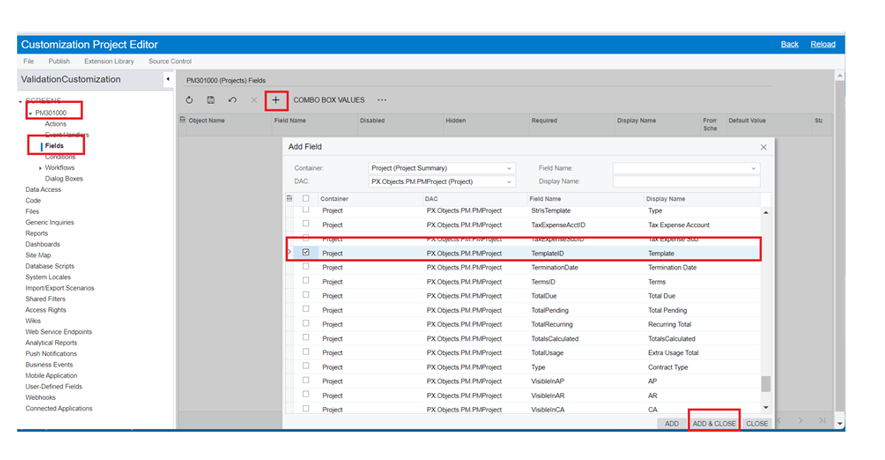
Open the Customization Project Editor, add a screen, split the screen name, click on a field, click on ‘Add > select the DAC > choose the field > click ‘Add and close’.
Added active condition > click condition > click on (+) > add condition name > select field > add value > click Ok.
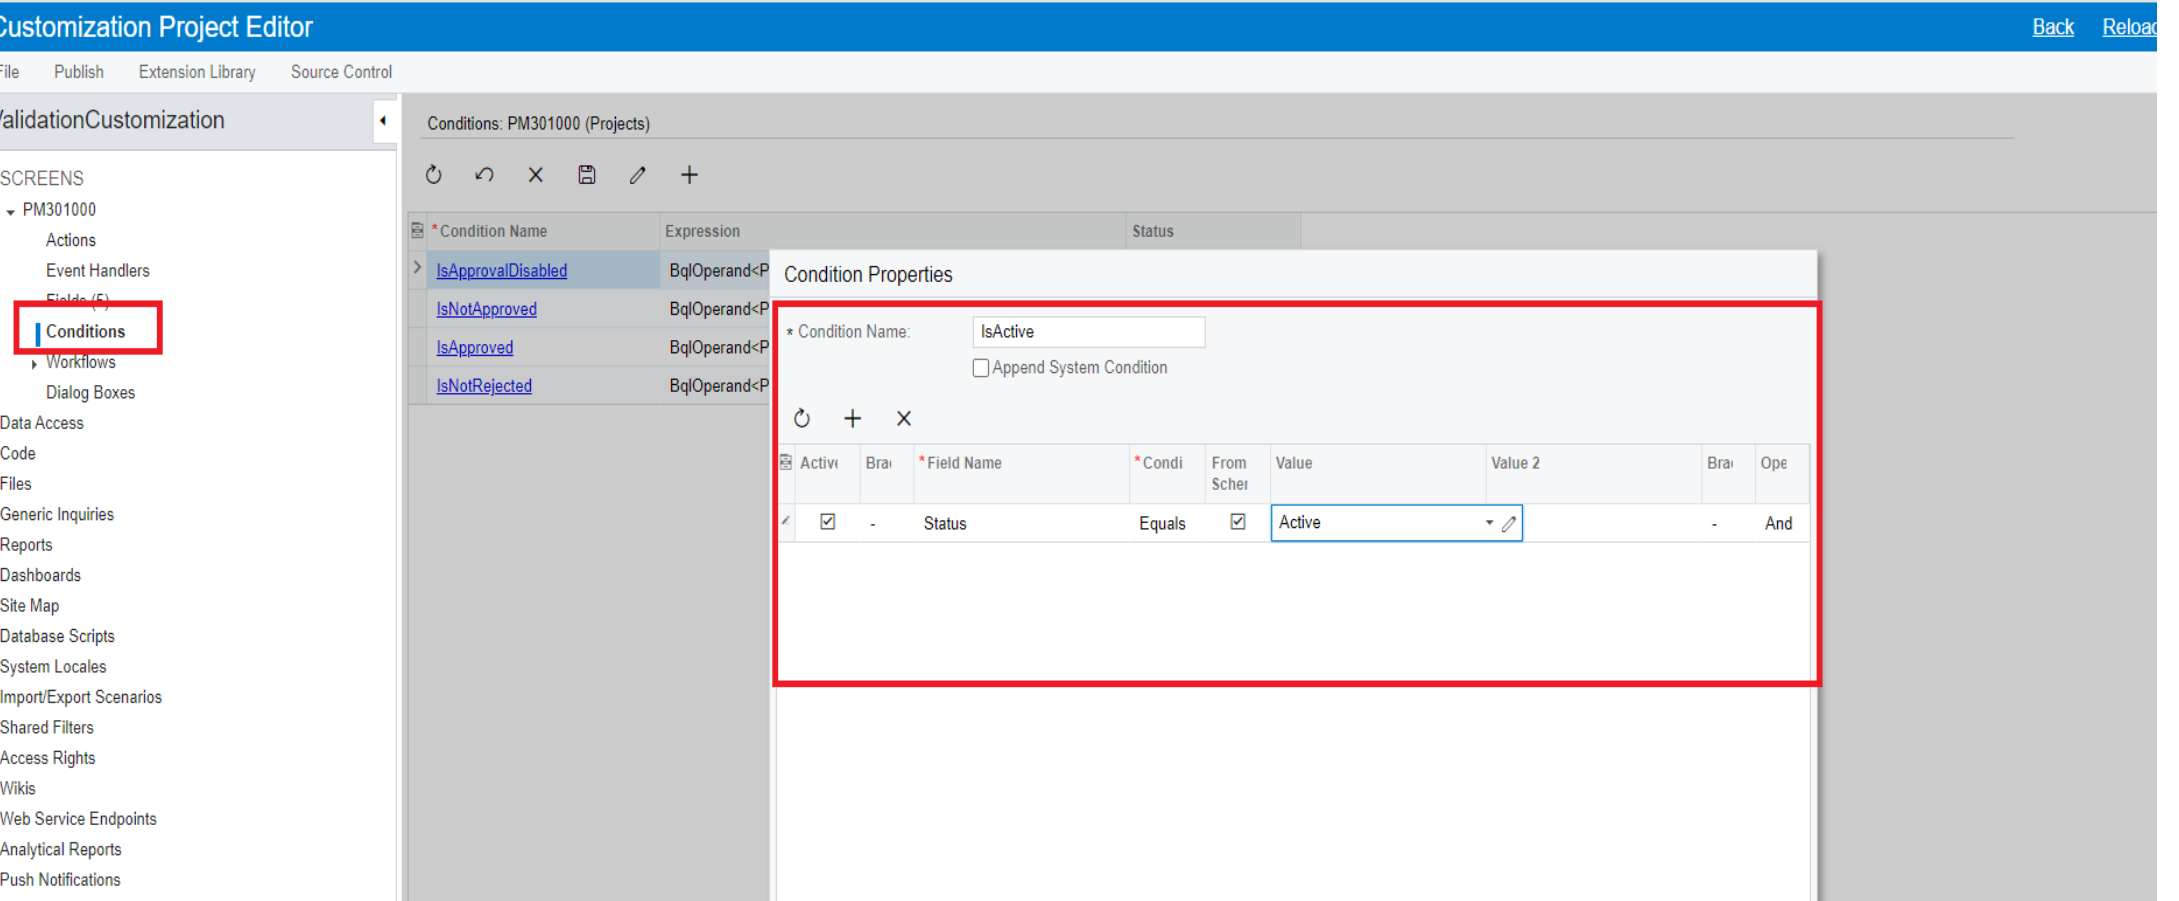
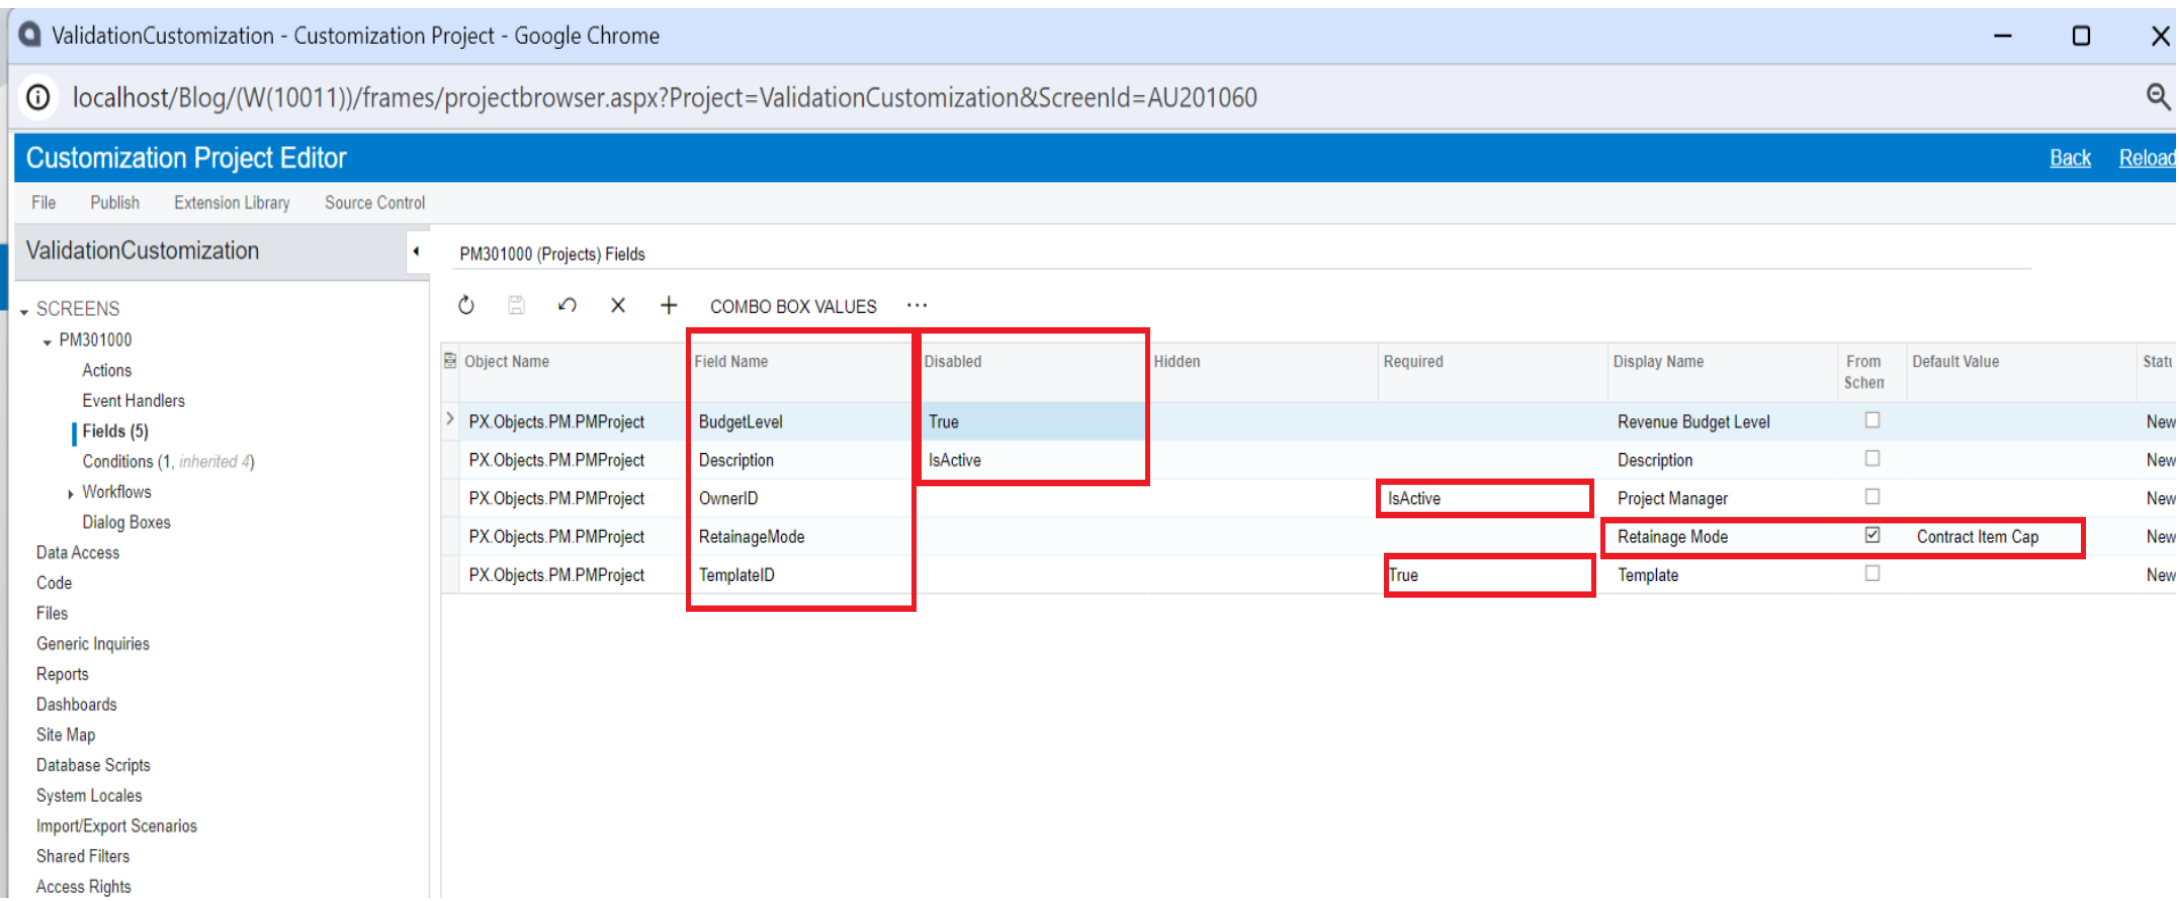
In this example, using the active status condition, added five fields and applied validation conditions:
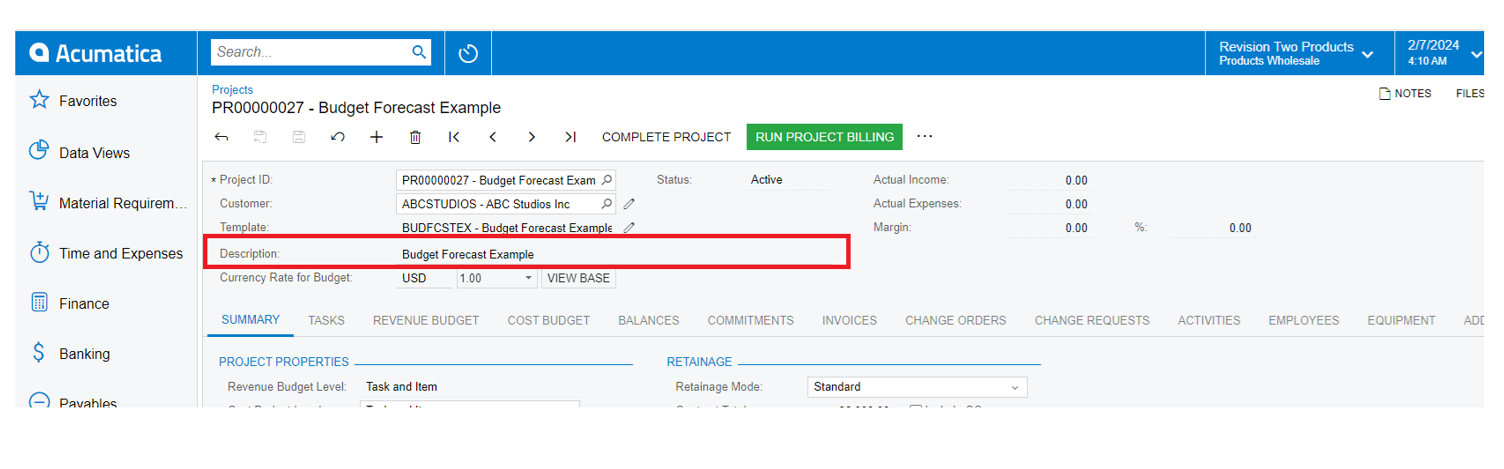
Set ‘Disable’ to true for Revenue Budget Level fields. Also, disabled the Description field if the project has an active status using the ‘Disable’ column.
Set the default value for the Retainage Mode using the ‘Default’ column.
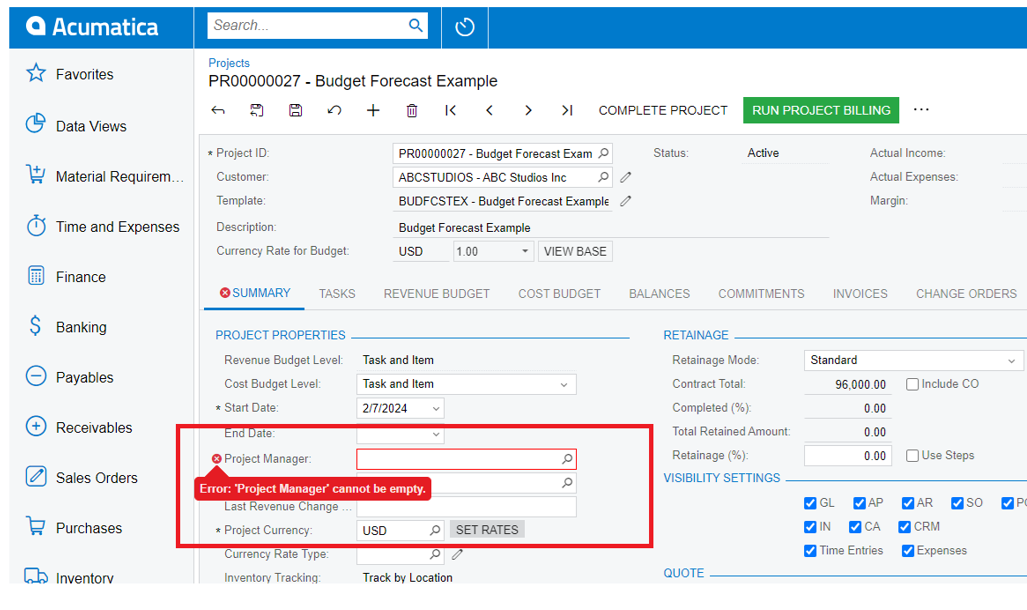
Made Template as mandatory based on the field conditions using the ‘Required’ column. Additionally, added mandatory validation for the Project Manager field based on the active status condition.
This is the output: the template field is mandatory, the Retainage Mode has a default value, and the Revenue Budget Level field is disabled.
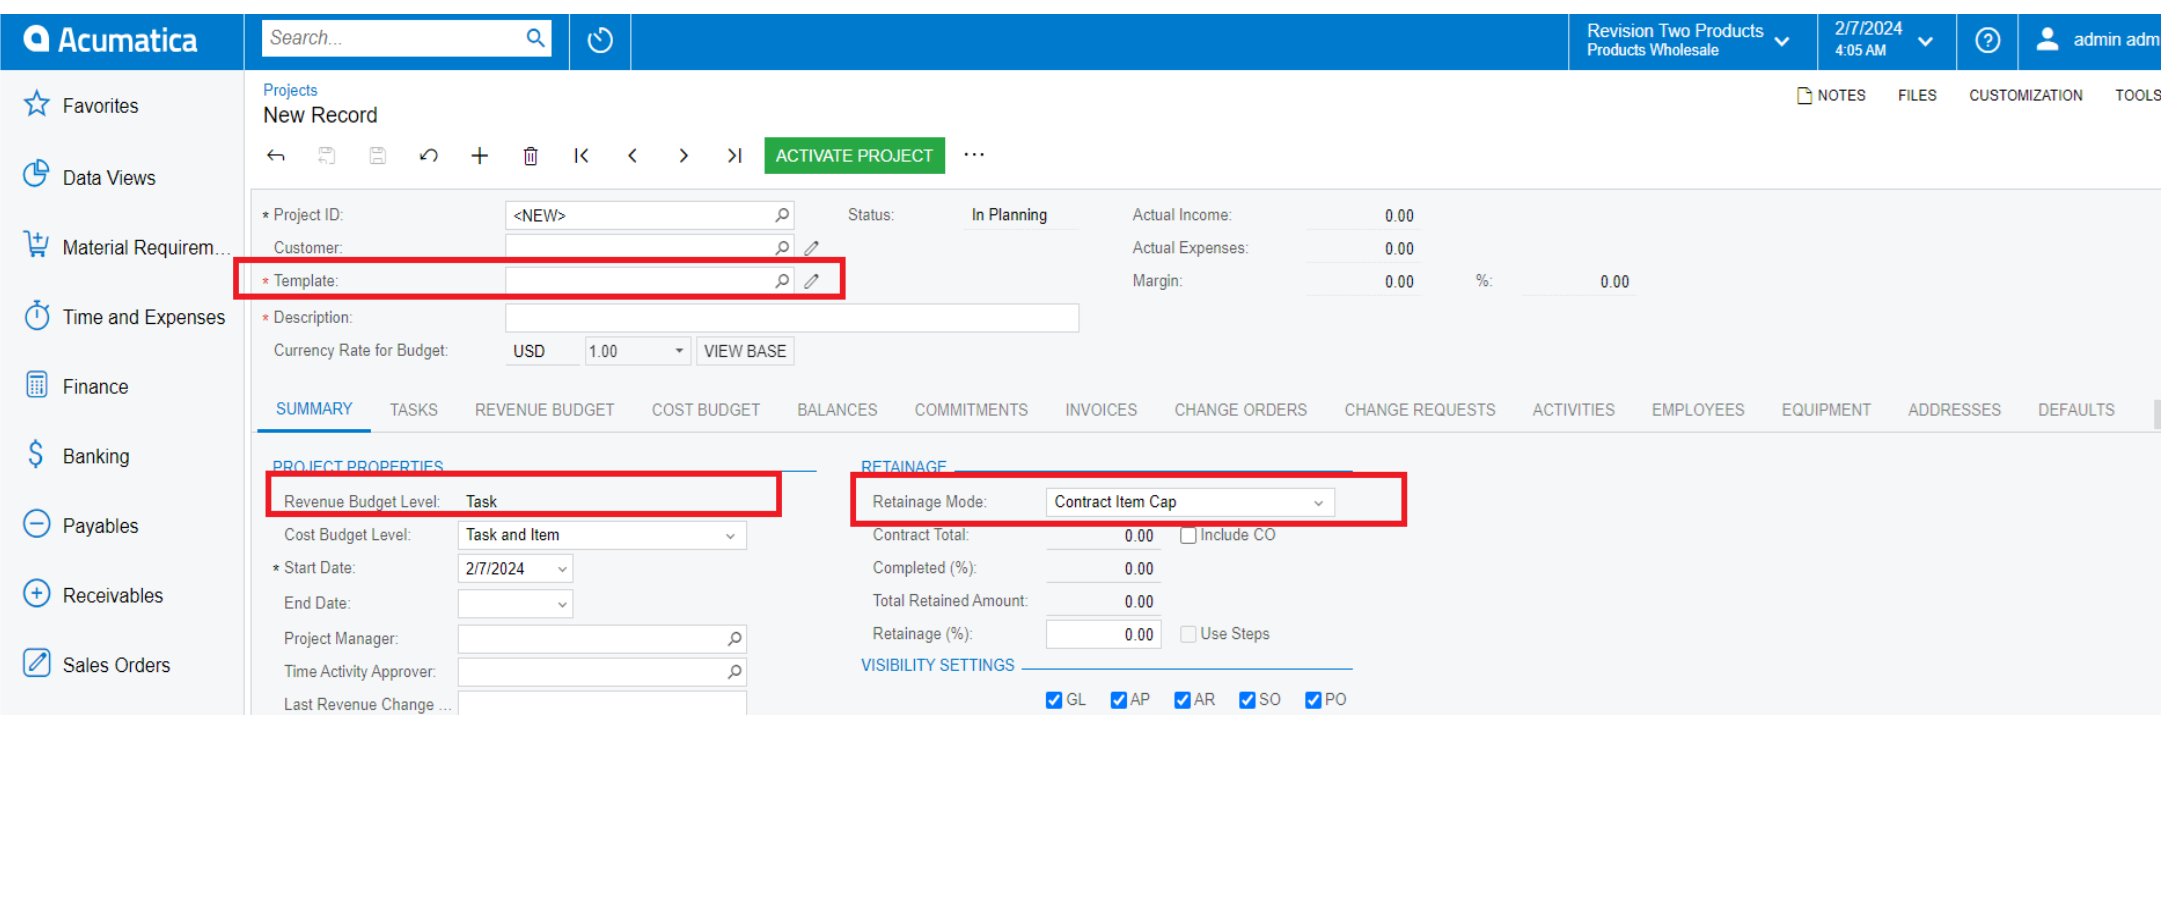
When I click the ‘Active’ action, the Project Manager field displays an error for being mandatory and the description field becomes disabled.