As we all know that our GUMU™ integration for Sage CRM to Sage 500 is a real time bi-directional link where any changes made to Sage CRM is updated to sage 500 on a real time basis.
Once we install GUMU™ and configure it with Sage 500 company code, real time changes from Sage CRM to Sage 500 starts working automatically without making any additional setting or changes. But for Sage 500 to Sage CRM real time changes, user will have to add customization in Sage 500. In this blog I would be explaining the steps to import the GUMU scripts for Sage 500 to Sage CRM real time changes.
Before importing these scripts please make sure that
a. Customizer module is installed in Sage 500 which we would be using for Sage 500 to Sage CRM real time customer changes.
b. If user has any additional customization then instead of importing the customization they will have to import manually in different way.
GUMU™ for Sage CRM – Sage 500 Integration Trial | Video | Blog
Once you have confirmed the above point we can continue with the implementation of the customization. For this follow below steps:
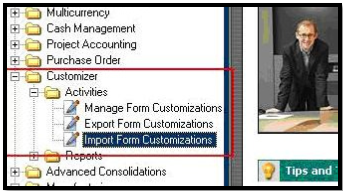
1. Login to MAS 500 and go to Customizer -> Activities -> Import Form Customizations. Please refer to the below snapshot:
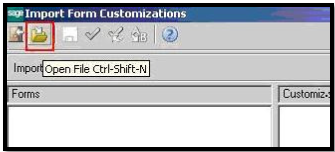
2. In the Import Form Customization Window, click the Open File toolbar Button. Refer the below image:
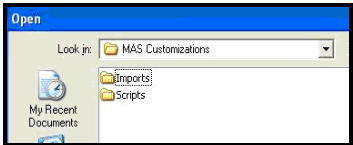
3. For a default installation the path would be <GUMU installation folder>\MAS 500 Integration Plugin\MAS Customizations\Imports.
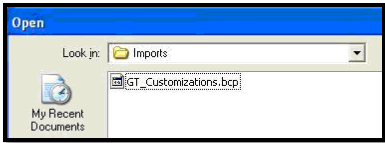
4. Select the export file (extension .BCP) i.e. GT_Customization.bcp to open and click Open.
5. Click on the Save button to save the customizations the MAS 500 system.
Now, to apply the customization for multiple users please follow the below step
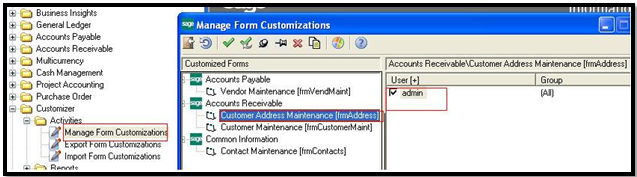
1. Select the Customizer Module, in that selects the ‘Manage Form Customization’.
2. Check the Checkbox as shown in the screen shot for the users for which the Real time changes should work and then click on the Apply Form Customization button.
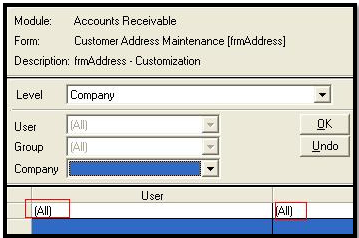
3. This will open the ‘Apply Form Customization’. From that ‘Form’ selects the level as a ‘Company’ from the dropdown. And Select the company name from the Company Dropdown.

4. After that click on the ‘Ok Button’ and save it as shown below
This will apply all the changes from MAS to CRM Real time changes.