Sage has introduced a Client Side API in Sage CRM v7.2. In this blog post, we will explain a feature which is used to add a Print button on screen. This button is used to print the entity information.
New Stuff: Apply Desktop Theme for Sage CRM Tablet Version
Let’s consider that you want to add a Print button on the Opportunity entity screens and print relevant information. Here are the steps that you need to follow.
1) Login to Sage CRM.
2) Navigate to below path.
Administration | Customization | Opportunity.
3) Navigate to Screens tab and click on the Opportunity Top Content screen.
4) Copy and Paste below code into the Custom Content section of screen.
<script>
crm.ready(function()
{
crm.addButton(“print”);
})
</script>
5) Click on Save button.
Once done, navigate to opportunity summary screen and you will find Print button added to the Summary screen. Refer below screenshot.
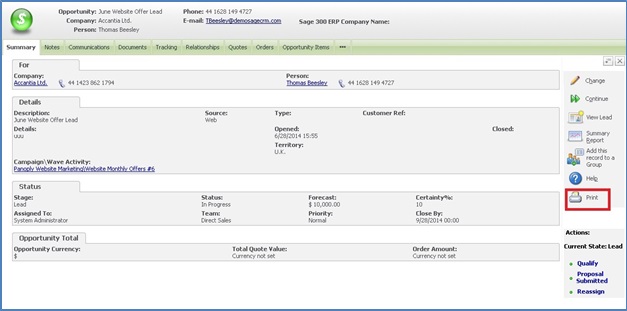
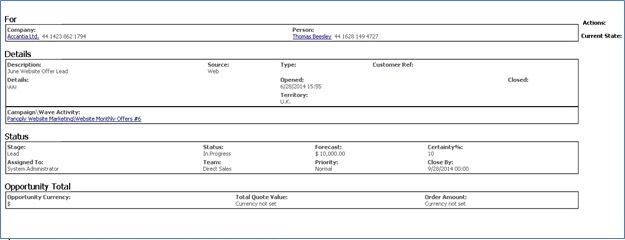
On click of Print button, Print Preview screen will get popped up in a new window as shown below.
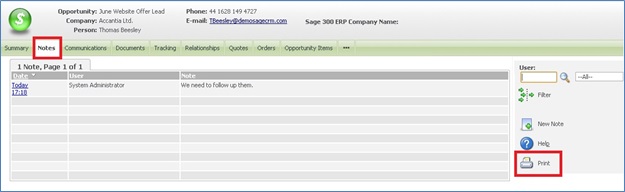
You will observer that the same Print button has been added on other tabs of an Opportunity. Refer below screenshot of Notes tab.
User can add Print button to any other entities so that entity information can be easily printed.
Also Read:
1) Display Background Color on Required Fields in Sage CRM v7.2
2) Information and Error Message feature in Sage CRM v7.2
3) Features of Outlook integration with SageCRM 7.2
4) New js Folder in Sage CRM v7.2
5) Report Columns are now loaded in Alphabetical Order – Sage CRM 7.2