GUMU for Sage CRM – Sage 100 integration works bi-directionally on real time basis. In the latest version of our integration, we have released new GUMU Sage 100 module which is used for real time changes from Sage 100 to Sage CRM. In this blog post, we will go through the installation and configuration steps which need to be followed while installing GUMU Sage 100 module.
New Stuff: GUMU for Sage CRM – Sage 100 Integration DOs and DON’Ts
Steps to be followed before installation of GUMU Module
Before you begin the installation, there are a few things you need to confirm.
a. Take backup of complete Sage 100 system. (For this, take backup of complete MAS 90 installation directory from Sage 100 server).
b. No Sage 100 user should be logged in during GUMU™ module installation in Sage 100 application.
c. No processes should be running related to Sage 100 application.
d. Please make sure that GUMU workstation setup is installed on Sage 100 server.
Steps to be followed during installation of GUMU Sage 100 Module
Please follow below steps to install the GUMU Sage 100 Module.
a. Login to Sage 100 windows server as an administrator.
b. Run the GUMU Module’s setup.exe with “RUN as administrator” option.
c. Select the Sage 100 installation path (till MAS 90 directory). Click on NEXT.
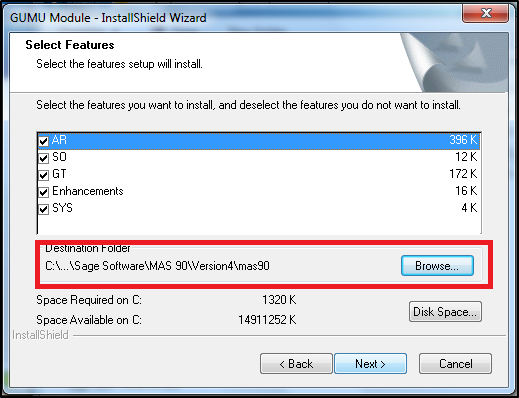
This will complete the installation of our GUMU Module.
Steps to be followed for configuring GUMU Module
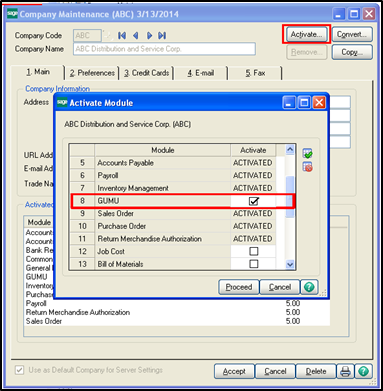
a. After successful installation, login to Sage 100 application as ADMIN and navigate to Library Maintenance->Main->Company Maintenance.
b. Select the Sage 100 company code for which you want to configure the GUMU module and click on the activate button.
c. Check the checkbox in front of GUMU module option and click on the proceed button
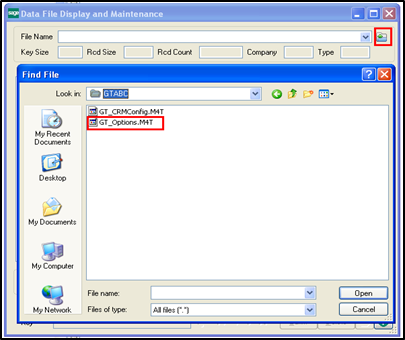
d. Once Module is activated, open the “Library Master-> Utilities->Data File Display” screen and select “GT_Options” table file from “MAS_ABC\GTABC” folder if it is for ABC Sage 100 Company code.
e. Edit the “NewSystem$” column value of “GT_Options.M4T” to “N” and click Ok.
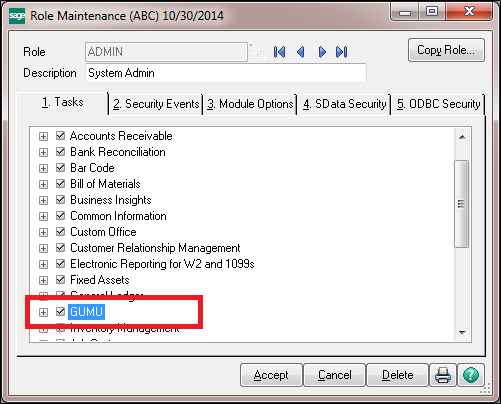
f. Also Admin will have to provide rights to the user to access the GUMU Module. For this navigate to the “Library Maintenance->Main->Role Maintenance” screen and assign the desired access to GUMU Module.
Steps to be followed to setup the integration
1. Open the CRM Configuration screen from “GUMU-> GUMU Options -> Sage CRM Configuration”
2. Fill the following details
Username : <Enter sage CRM admin level username >
Password : <Enter the valid password of Sage CRM>
CRM Url : <Enter Sage CRM Url >
3. Check the check box depending upon the entities which you want to pass to Sage CRM.
4. Finally click on the accept button
