In our previous blog, we have explained the functionality to display the list on Standard Communication screen by using HTML scripting. But, this time we will be explaining how to add communication list using JAVASCRIPT.
New Stuff: Promoting Quote to an Order issue
Here, we were asked by our customer to display past communication records regarding the company on Communication Summary screen. Below are the steps we followed to achieve the same.
Step 1:
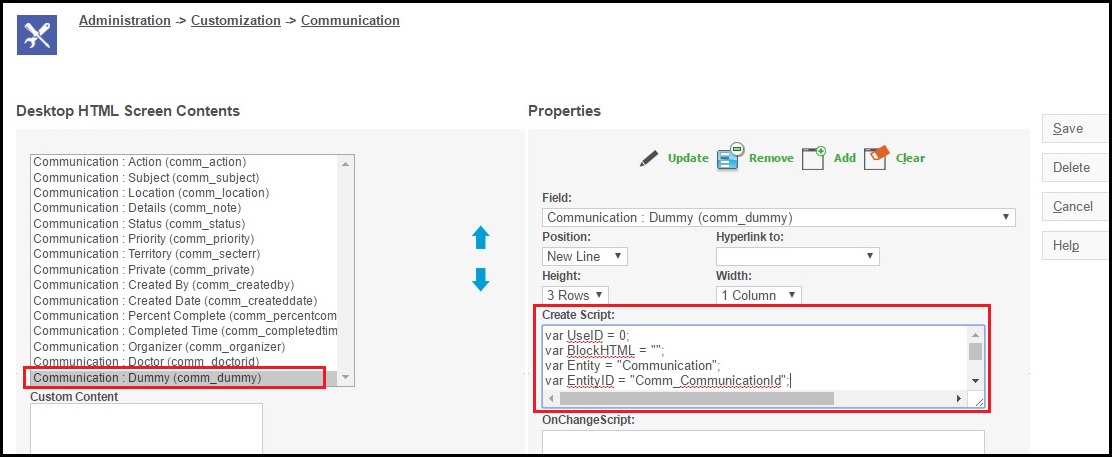
Create Dummy field in Communication entity and add it on “CustomCommunicationDetailBox” screen.
Step 2:
Add below script in “Create Script” section of dummy field, as shown below.
var UseID = 0;
var BlockHTML = “”;
var Entity = “Communication”;
var EntityID = “Comm_CommunicationId”;
var EntityList1 = “FFEPastCallHistoryList”;
var sAct=new String(Values(“Act”));
if(sAct==”” || sAct==”null” || sAct==”undefined”)sAct=””;
var Team = CurrentUser.user_primarychannelid;
var EmpCode=””;
EmpCode=new String(Values(“comm_metisempcode”))
if(EmpCode==”” || EmpCode==”undefined” || EmpCode==”null”)
{
EmpCode=new String(FormValues(“comm_metisempcode”))
if(EmpCode==”” || EmpCode==”undefined” || EmpCode==”null”)
{
EmpCode=new String(eWare.GetContextInfo(“communication”,”comm_metisempcode”));
}
}
if(Team==”6″)
{
if(sAct==”364″ || sAct==”363″)
{
var strEntityID = new String(eWare.GetContextInfo(Entity,EntityID));
if(strEntityID==”” || strEntityID==”undefined” || strEntityID==”null”)
{
strEntityID = new String(Request.QueryString(“Key6”));
if(strEntityID == “” || strEntityID == “undefined” || strEntityID == “null”)strEntityID = “0”;
}
if(strEntityID.indexOf(‘,’) > 0)
{
var Idarr = strEntityID.split(“,”);
UseID = Idarr[0];
}
else
UseID = strEntityID;
if(UseID!=”0″)
{
//Block 1
var PurposeSelectSQL = “”;
PurposeSelectSQL = ” select * from vFFEPastCallHistory “;
PurposeSelectSQL += ” where case_ticketempcode = ‘”+EmpCode+”‘ “;
var PurposePanel = CRM.GetBlock(EntityList1);
PurposePanel.Title = “Past Call History Details”;
PurposePanel.DisplayButton(“1”) = false;
PurposePanel.DisplayForm = false;
PurposePanel.width = ‘90%’;
PurposePanel.SelectSQL = PurposeSelectSQL;
PurposePanel.PadBottom = false;
PurposeBlockHTML = PurposePanel.Execute();
}
Caption = “”;
Caption += CRM.GetTrans(“scripttags”, “scriptopen”);
Caption += “var strPurposeBlockHTML ='”;
Caption += escape(PurposeBlockHTML);
Caption += “‘;”;
Caption += CRM.GetTrans(“scripttags”, “scriptclose”);
}
else
{
Hidden=true;
}
}
else
{
Hidden=true;
}
Step 3:
Call below function in On Load method of your Custom.js page to display the required panel i.e. List on screen.
function WritePanel()
{
try
{
var sAct = crm.getArg(“Act”,crm.url());
if(sAct==”364″ || sAct==”363″)
{
var oTableElement= $(“form table:first”).find(“tr:last”);
var strPurposeTD=””;
strPurposeTD = “<TR><TD colspan=3 width=1px></TD></TR>”;
strPurposeTD += unescape(strPurposeBlockHTML);
var PurposeContainer = document.createElement(“tr”);
PurposeContainer.id=”purpose-container”;
if ( $.browser.msie ) {
PurposeContainer.width=”100%”
PurposeContainer.innerHTML = strPurposeTD
}
oTableElement.after(PurposeContainer)
if (!$.browser.msie )
{
$(“#purpose-container”).html(strPurposeTD);
}
$(“#purpose-container”).find(“td:first”).attr(“colspan”,”3″)
var PurposeHtml = $(“#purpose-container”).find(“tr:first”).html();
$(“#comm_dummy”).hide();
$(“#purpose-container”).html(PurposeHtml);
$(“#purpose-container”).insertBefore($(“#MeetingPlanner”));
$(“#purpose-container table”).each(function(){
$(this).attr(“width”,”100%”)
});
}
}
catch(e)
{
}
}
After applying this script, you will be able to see the List on Communication’s Summary Screen, as shown below.

Enjoy Scripting..!! 🙂
Also Read:
1. Display List on Communication screen
2. Show multiple Panel/Lists on a screen using .NET API
3. How to give Name in Communication List for Attachment column
4. Apply underline to a Column Header in List or Grid
5. Control Column Visibility in Sage CRM Grids and Lists