In this blog, we will discuss How to ‘Create Territories Using Shape Layer in Salesforce Map’. But first lets understand what is “Salesforce Maps”. Salesforce Maps is built on the Salesforce platform, so you can do much more than just visualize your data; you can interact with and change data as needed. Let’s say you have a business requirement to visit all of your opportunities projected to close this month. Visualize the locations of your opportunities by stage to prioritize which accounts to visit first, log your calls, enter notes after each visit, and change required fields. This can all be achieved from the Salesforce Maps interface.
This multi-cloud app brings location intelligence technology to the Salesforce Cloud and centers around four main categories.
- Visualizing data
- Territory planning
- Tracking live locations
- Optimizing routes and schedules
Salesforce Maps products helps increasing customer conversions, improve revenue, and drive pipeline and lead generation. Help field reps plan for customer visits when they spend less time on the road and more time building relationships. Design strategic sales and service territories that integrate with Salesforce and external systems.
Salesforce Maps is Available in both Salesforce Classic (not available in all orgs) and Lightning Experience and in Professional, Enterprise, Performance, Unlimited, and Developer Editions.
Salesforce enables businesses to optimize their sales strategies through territory mapping using shape layers. By overlaying geographical boundaries on a map, teams can visualize and allocate sales territories efficiently.
Note: Make sure the ‘Salesforce map’ package is installed in your org. Details for the Salesforce Map features are available on their wesbite here.
Create Territories Using Shape Layer in Salesforce Map –
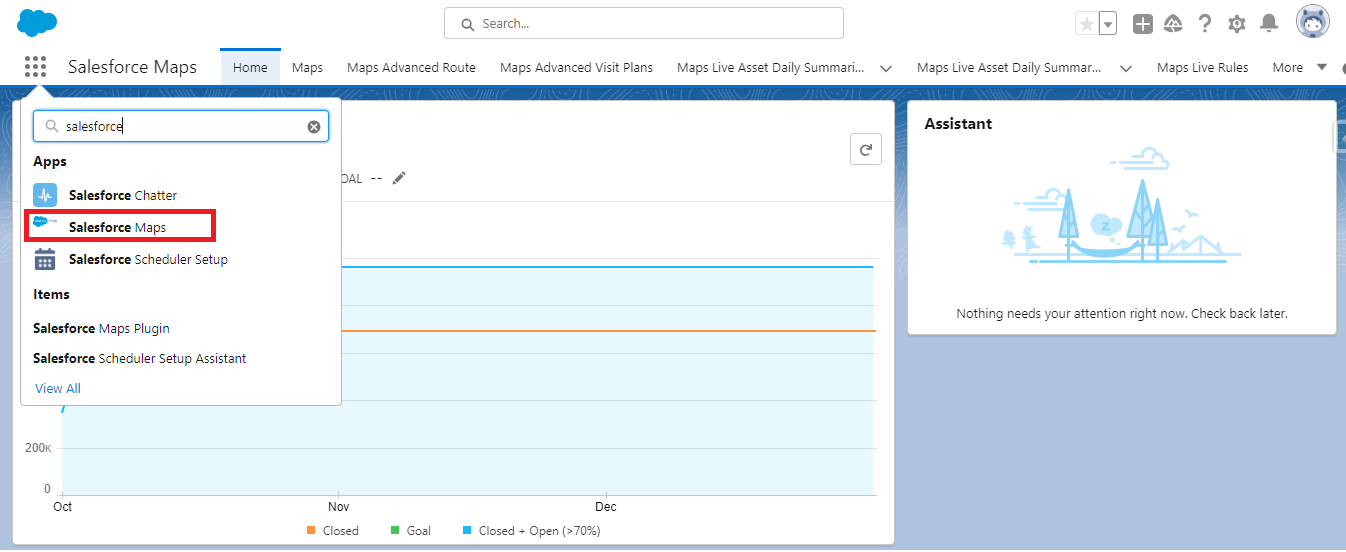
- Log in to your Salesforce org and find the Salesforce map on the app launcher.
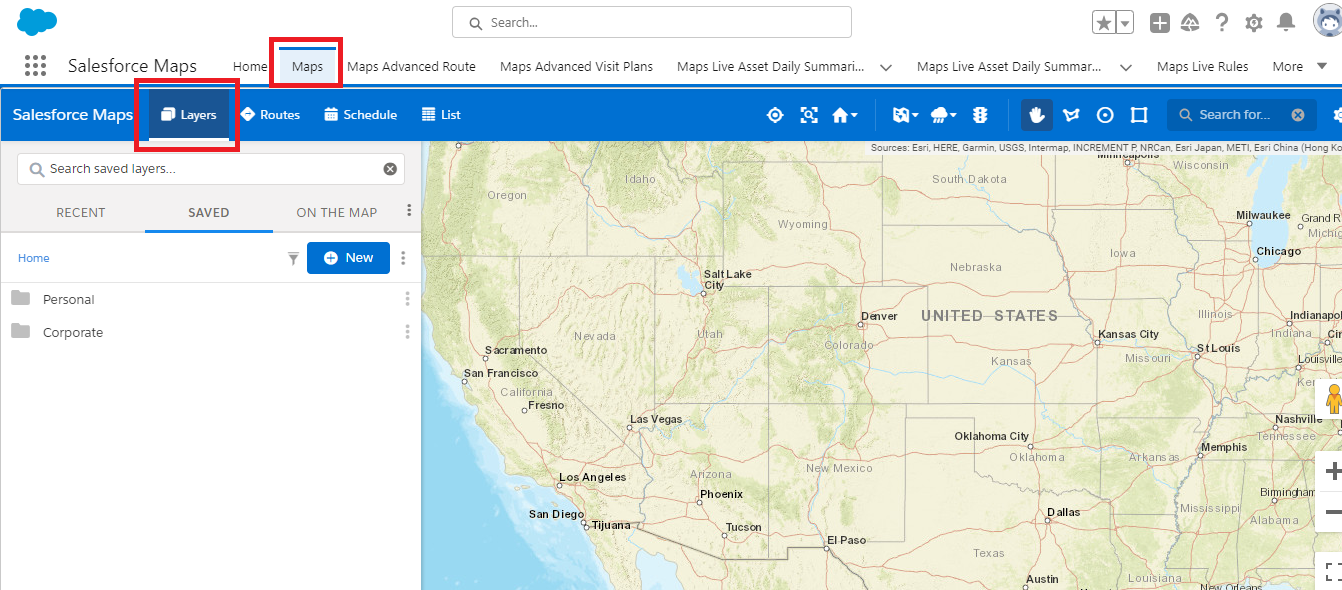
- Click on “Maps” and then click on “Layers.”
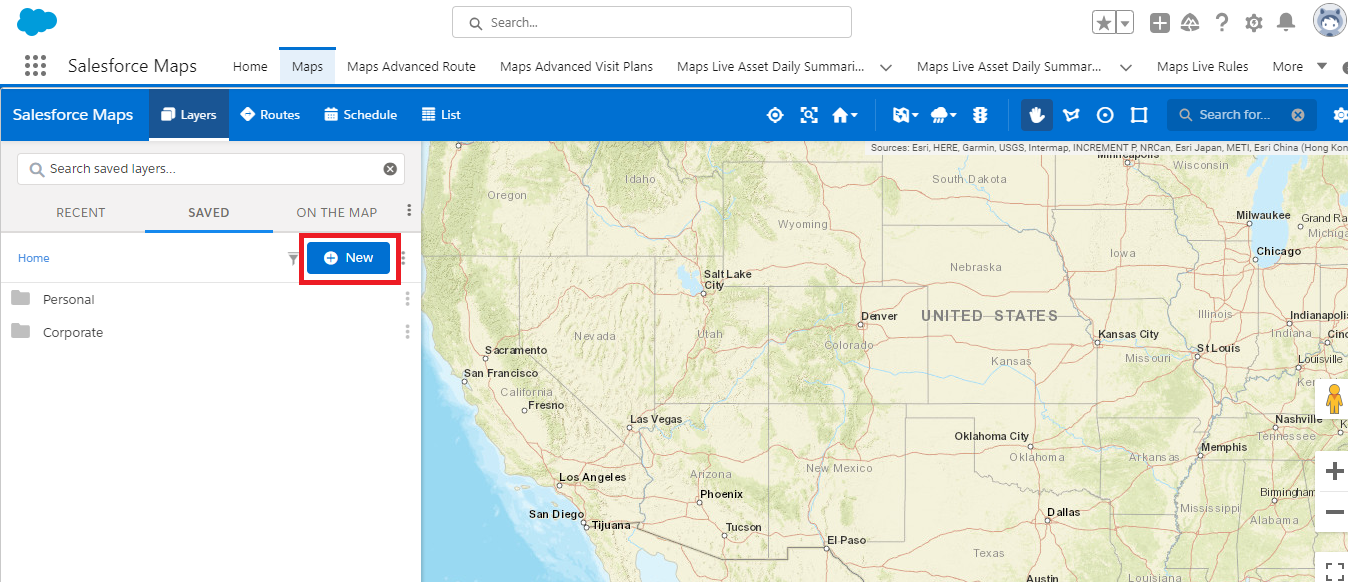
- Create a folder and click on the “New” button.
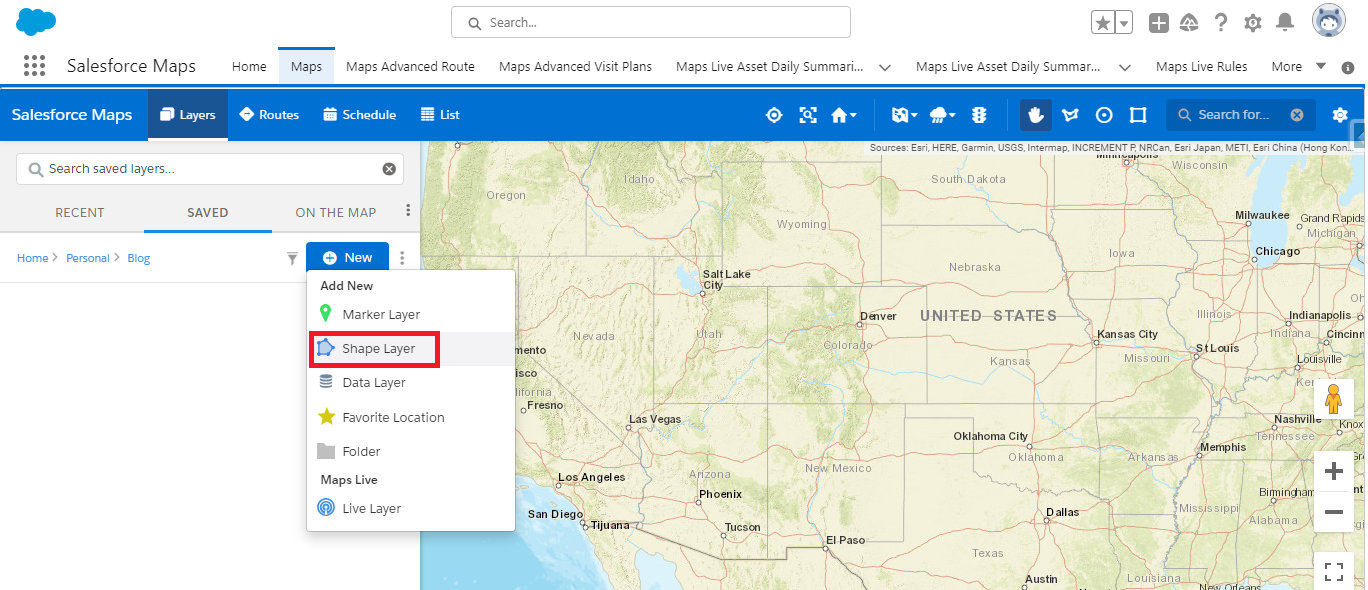
- To create a new shape layer, select the “Shape Layer” option.
- Give a name to the territory and click on “Next”. Using this the user is able to create Territories Using Shape Layer in Salesforce Map
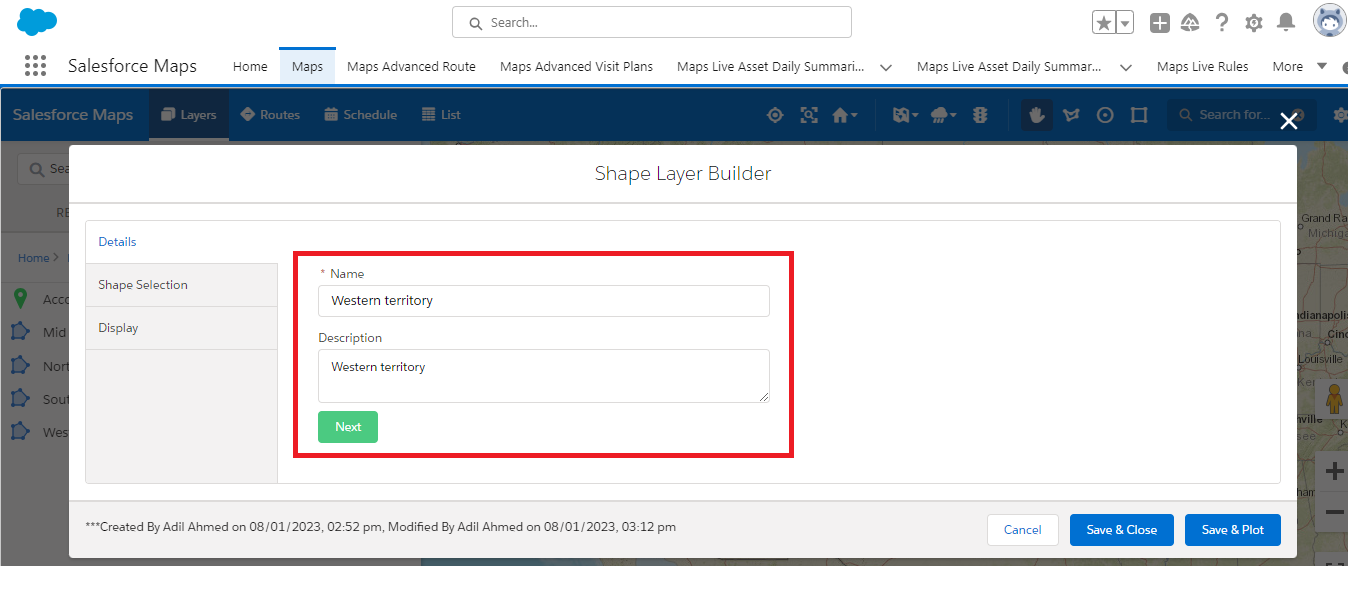
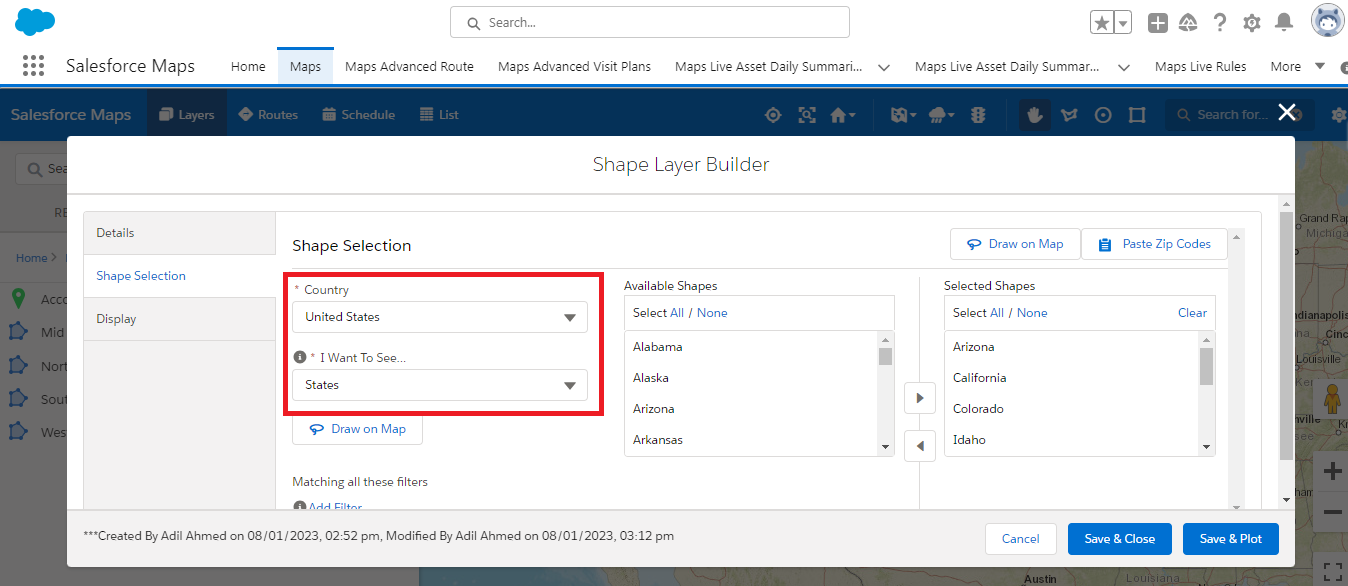
- Select the country for which you want to create a territory. In the ‘I want to see’ dropdown box, choose the territory unit, such as “State,” and then select the states that you want to add to the territory.
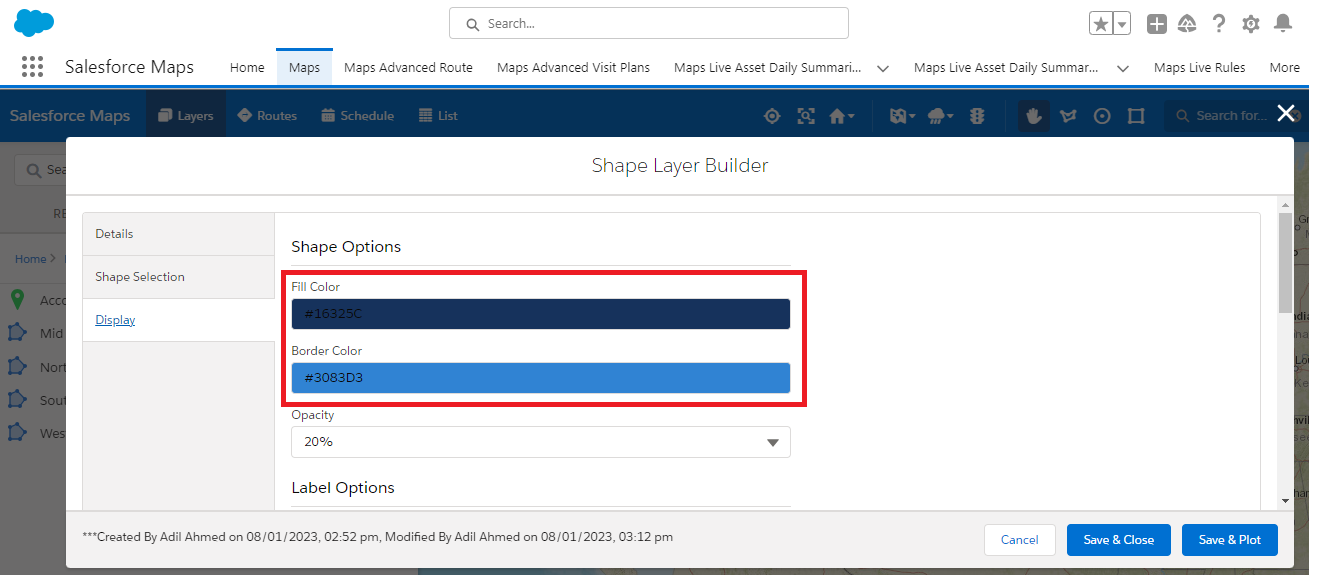
- After adding the states, click on the “Display” option. In the display option, you can select the shape color, boundary color, font size, and style. Also, click on the “Enable label” checkbox to display the territory name on the map.
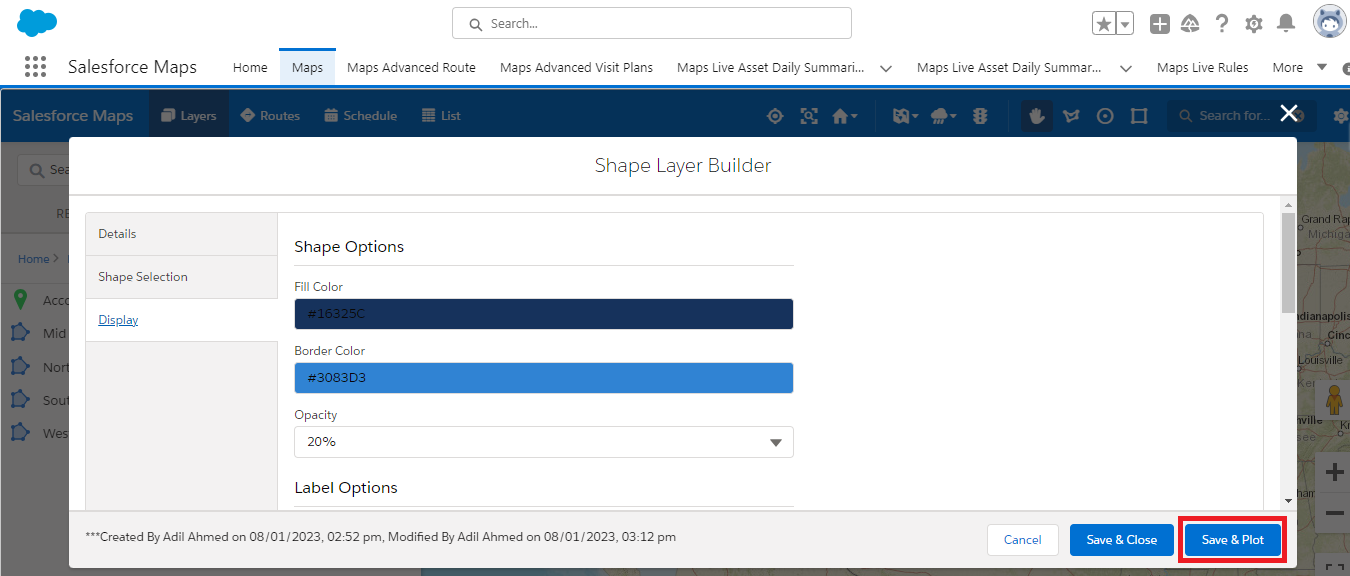
- Next, click on the “Save and Plot” button to display the territory on the Salesforce map.
- After saving the shape layer, you can see the territory plotted on the map.
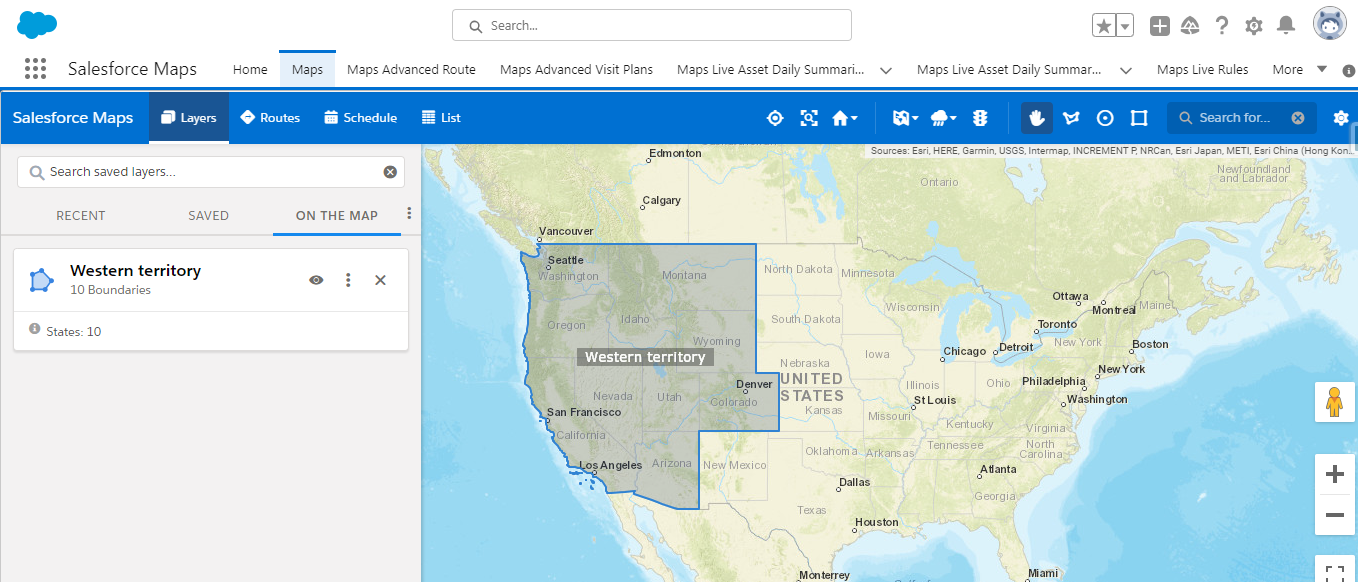
- You can create multiple territories based on your business requirements.
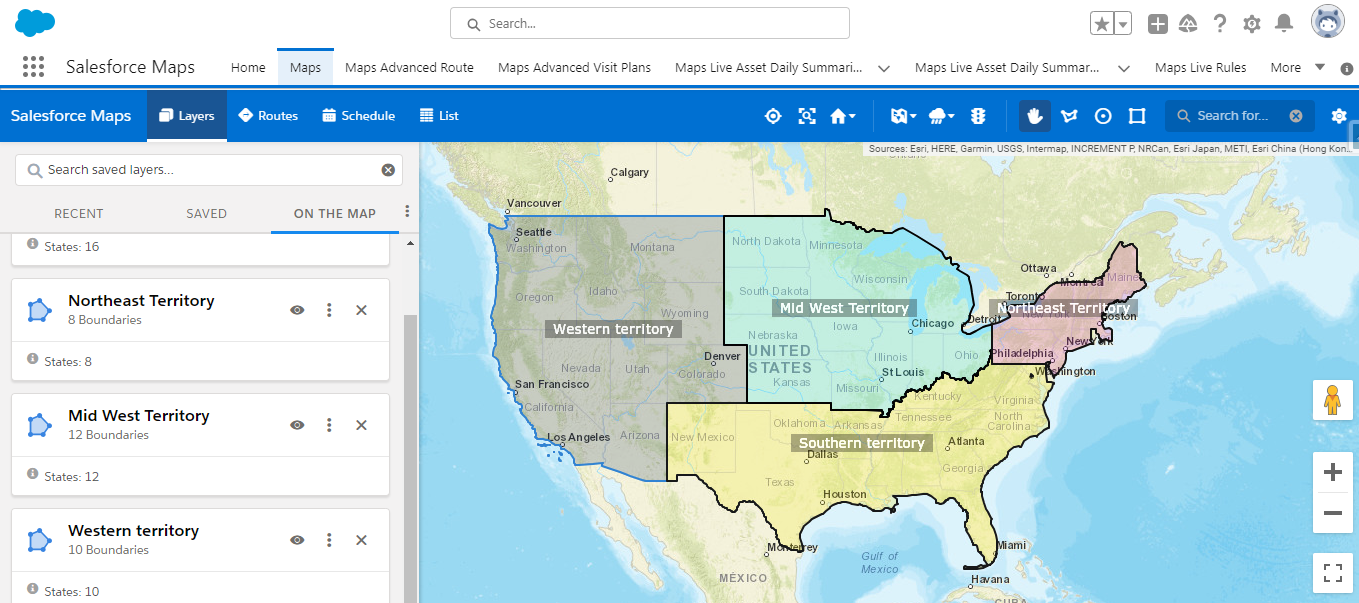
By following the above blog instructions, you will be able to learn “How to Create Territories Using Shape Layer in Salesforce Map“. Salesforce Maps help you sell to and serve customers better, optimize schedules and routes for in-person and virtual visits, and find new business. You can increase sales when you build and maintain customer relationships based on optimized account visits. Improve sales productivity by acting on specific accounts directly from the legend in Salesforce Maps. Fill gaps in schedules with nearby opportunities and create efficient routes.
On a side note, by using the Salesforce Maps you can find new businesses by meeting and exceeding management’s sales and service goals as you generate leads and discover untapped and underserved markets. Expand into new locations, identify who can benefit from your products and services, and fill scheduling gaps while you’re on the road. Salesforce Maps provides property, business, and demographic data that gives you a competitive advantage for crushing sales and service goals.
If you still have queries or any related problems, don’t hesitate to contact us at salesforce@greytrix.com. More details about our integration product are available on our website and Salesforce AppExchange.
We hope you may find this blog resourceful and helpful. However, if you still have concerns and need more help, please contact us at salesforce@greytrix.com.
About Us
Greytrix – a globally recognized and one of the oldest Sage Development Partner and a Salesforce Product development partner offers a wide variety of integration products and services to the end users as well as to the Partners and Sage PSG across the globe. We offer Consultation, Configuration, Training and support services in out-of-the-box functionality as well as customizations to incorporate custom business rules and functionalities that require apex code incorporation into the Salesforce platform.
Greytrix has some unique solutions for Cloud CRM such as Salesforce Sage integration for Sage X3, Sage 100 and Sage 300 (Sage Accpac). We also offer best-in-class Cloud CRM Salesforce customization and development services along with services such as Salesforce Data Migration, Integrated App development, Custom App development and Technical Support business partners and end users.
Salesforce Cloud CRM integration offered by Greytrix works with Lightning web components and supports standard opportunity workflow. Greytrix GUMU™ integration for Sage ERP – Salesforce is a 5-star rated app listed on Salesforce AppExchange.
The GUMU™ Cloud framework by Greytrix forms the backbone of cloud integrations that are managed in real-time for processing and execution of application programs at the click of a button.
For more information on our Salesforce products and services, contact us at salesforce@greytrix.com. We will be glad to assist you.
Related Posts:

