In this blog, we are going to discuss about “How to create product features and options in Salesforce CPQ“. In this blog we will cover the process of establishing features and options for your products options, in this context, refer to the individual items included within a product bundle. A Bundle can have multiple features and features can have multiple options.
Let’s explore the process of create product features and options in Salesforce CPQ
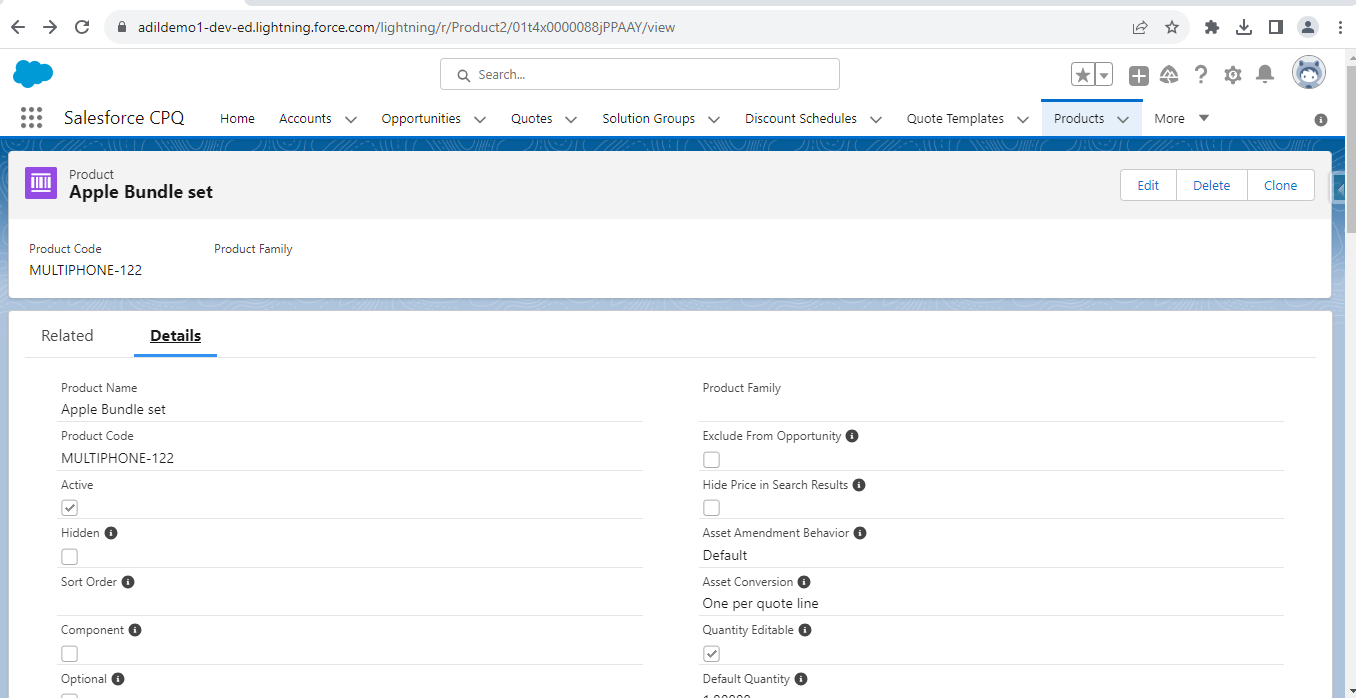
- To begin, we will initiate the creation of a product bundle. It’s important to note that a bundle set has already been established.

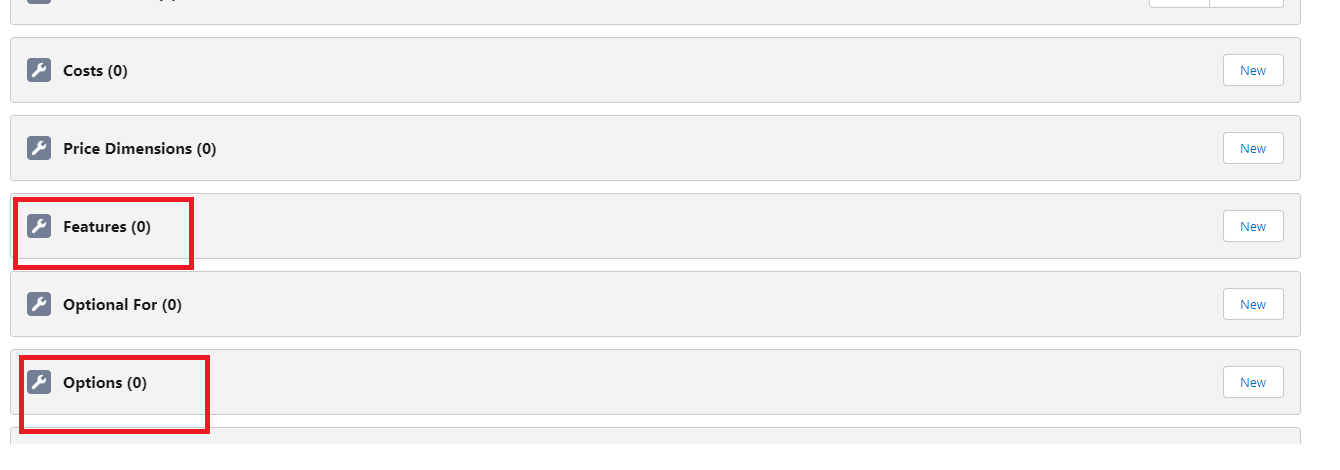
- Navigate to the “Related Tab” where you can see the “Features” and “Options” present.

- Click on Feature “New” Button and fill the details.
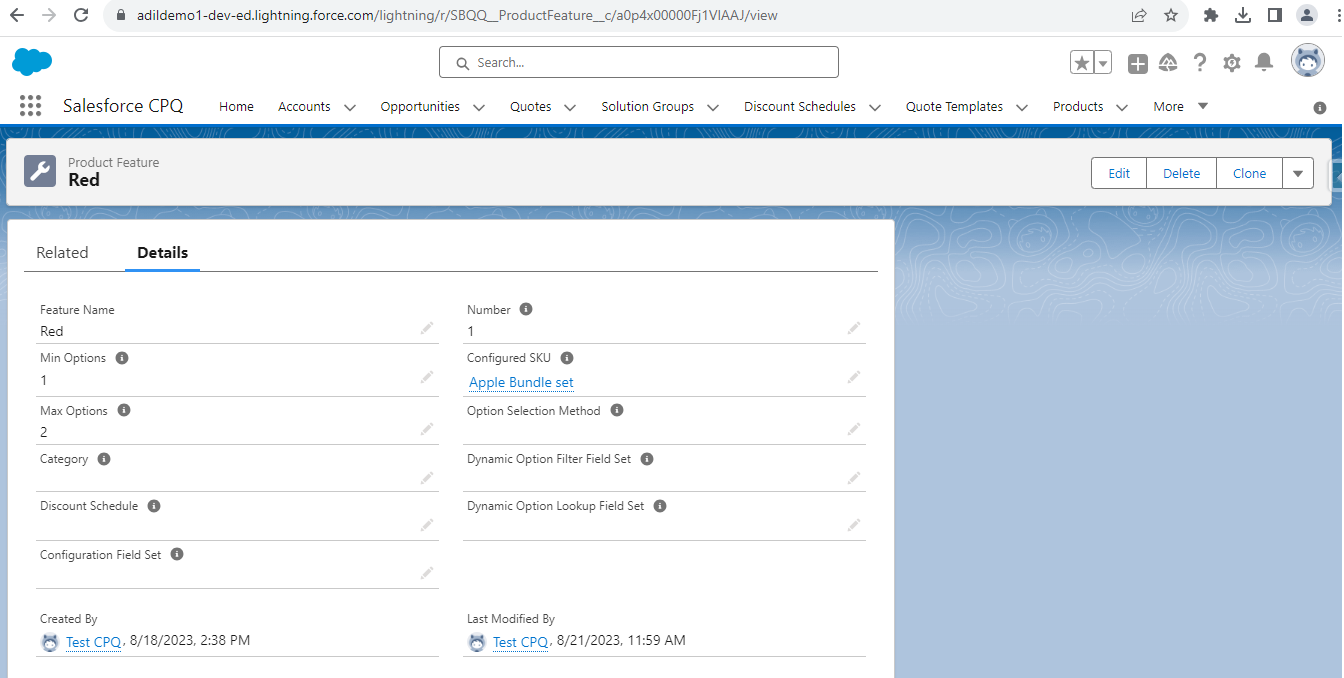
Now, we will include the features within the pre-existing bundle that has been created and create product features and options in Salesforce CPQ.

Note: You have the flexibility to create additional features as needed.
- In this instance, I’ve generated a feature with the color “Red“. If you observe the “Configured SKU” field, you’ll notice that it has automatically incorporated the value we established within the corresponding product bundle set.
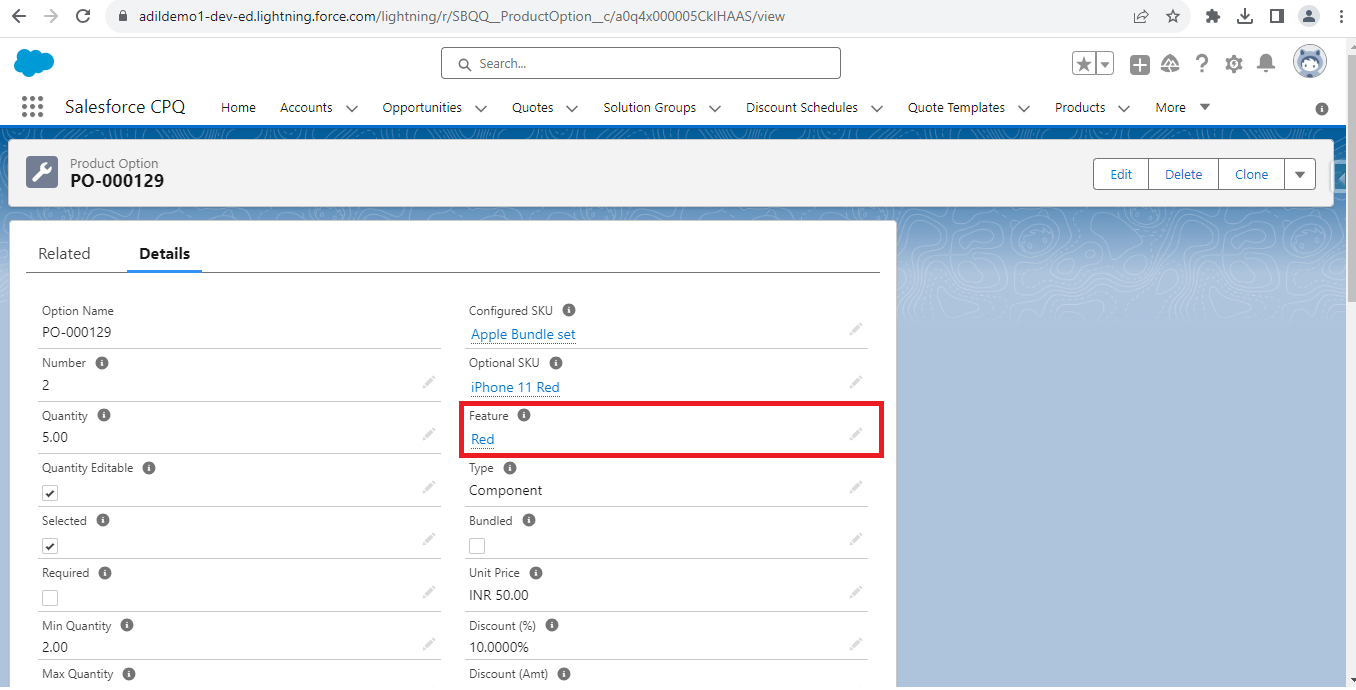
- To create an “Options“, simply click on the “New” button within the Options section, and proceed to fill in the required details.

- During the Options creation process, make sure to select the previously created Feature, which is “Red“.
- The “Optional SKU” field corresponds to a product I’ve already set up, called “iPhone 11 Red“.This product has been included in the bundle set named “Apple bundle Set“, characterized by the color red and the option being “iPhone 11 Red”.
By following the above blog instructions, you will be able to learn “How to create product features and options in Salesforce CPQ.“
More details about the Product are available on our website and Salesforce AppExchange.
We hope you may find this blog resourceful and helpful. However, if you still have concerns and need more help, please contact us at salesforce@greytrix.com.
Related Posts

