User-defined attributes provide a way to create custom fields within Acumatica screens and tables. These fields can be of different data types, such as text, numbers, dates, checkboxes, dropdown lists, and more.
User-defined attributes can be added to various areas of Acumatica, including master data screens (e.g., customers, vendors, items), transactions (e.g., sales orders, purchase orders), and other related objects.
User-defined attributes are fully integrated with Acumatica’s customization and extension framework. In Acumatica, user-defined attributes are a powerful feature that allows you to extend the functionality of the system by adding custom fields to various screens and tables. These attributes enable you to capture and store additional information that is specific to your business needs. They can be added or modified through the Acumatica Customization Project Editor, allowing you to extend the system without modifying the underlying code.
User-defined attributes can be displayed on screens, reports, and inquiry screens, making it easier to view and analyse the data you have captured. You can also filter, sort, and search based on these attributes, enabling more comprehensive reporting and analysis.
Note: Screenshots below will be referencing to Acumatica version 22.212.0046, but the steps can be replicated in most versions of Acumatica
Note: Screenshots below will be referencing to Acumatica version 22.212.0046, but the steps can be replicated in most versions of Acumatica.
create a user-defined field attribute in Acumatica
Steps 1
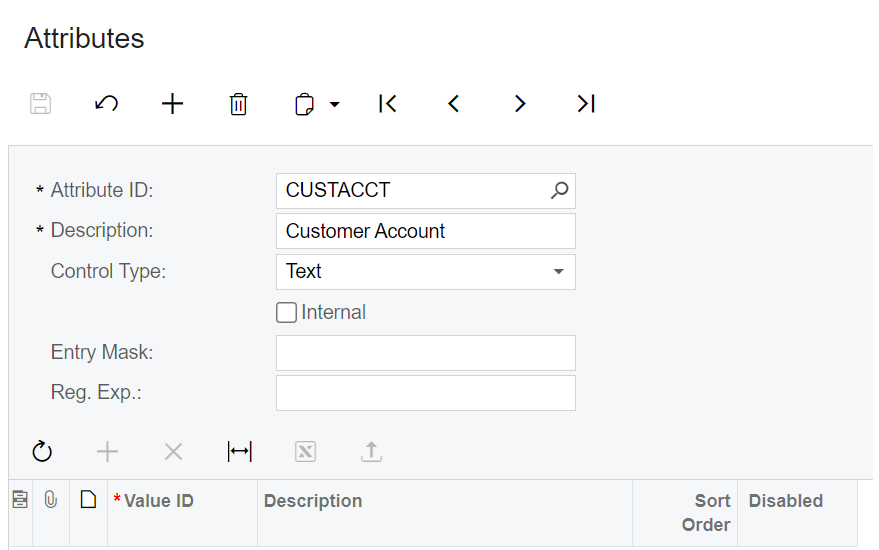
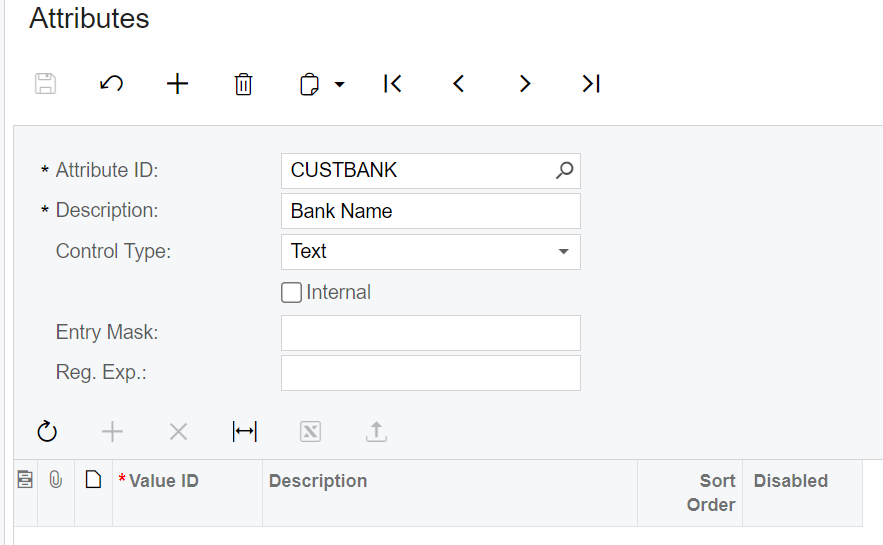
Navigate to the “Attributes” screen (CS205000) by using the quick search or accessing it from the main menu.
On the Attributes screen, click on the “Add” button to create a new attribute.
Fill in the necessary details for the attribute:
Attribute ID: Enter a unique identifier for the attribute.
Description: Provide a descriptive label for the attribute.
Control Type: Select the appropriate Control type for the attribute (e.g., Text, Combo, Multi Select Combo, Checkbox, datetime, Selector etc.).
Steps 2
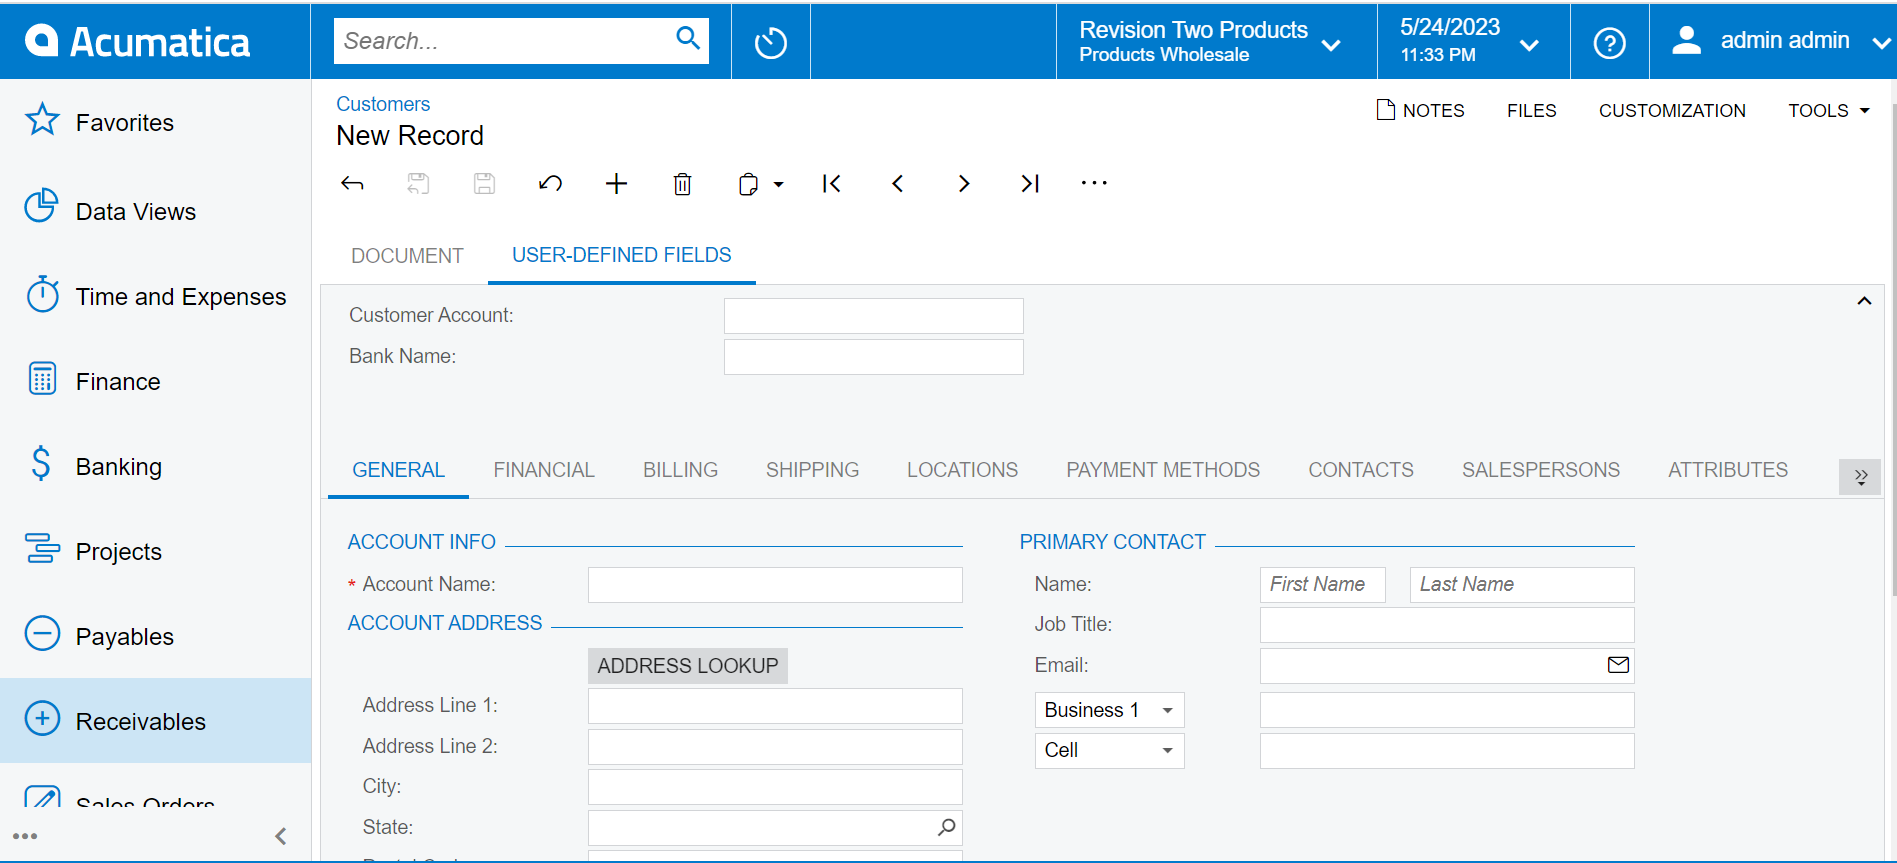
Now, to add the user-defined field attribute to the Customer screen:
Navigate to the Customer screen (AR303000)
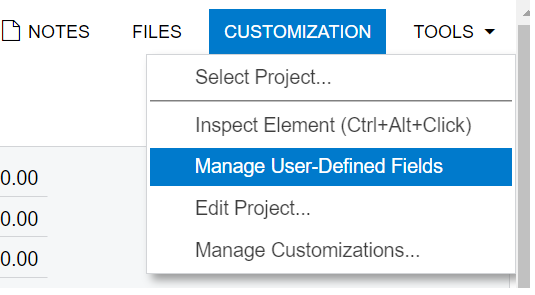
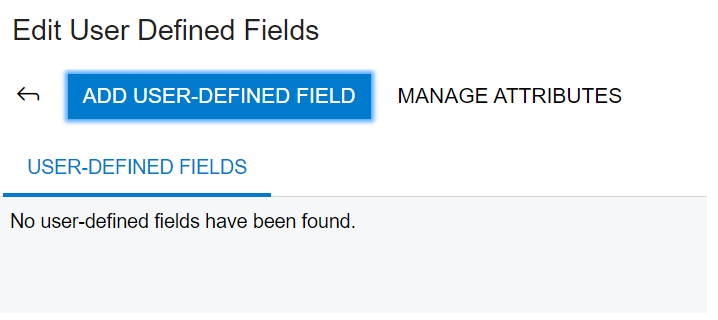
Click on the “Customize” button or select “Manage User-Defined Fields” from the Actions menu. from the Actions menu
In the Edit User-Defined Fields window, click on the “Add User-Defined Fields” button.
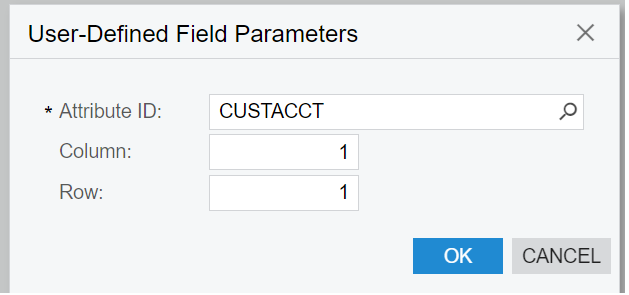
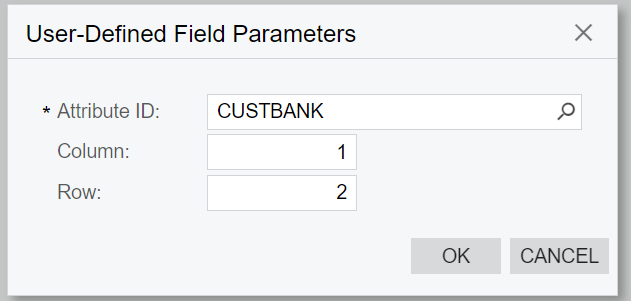
In the User-Defined Field Parameters pop-up, select the desired attribute ID and Click on Ok.
Exit the Edit User-Defined Fields screen.
Now, when you navigate back to the screen, you will see the user-defined field attribute added to the header.