
When someone says “procurement”, it is easy to think of it as a straightforward process: someone needs an item, a supplier is chosen, and a purchase order is created.
In a business, there is usually much more involved.
Acumatica brings these activities together in a structured process. A request can move through a requisition, vendors can be invited to submit bids, those bids can be recorded and compared, and the selected vendor can ultimately be used to create a Purchase Order.
The complete flow is :
Request → Requisition → Bidding → Bidding Results → Purchase Order
In this walk through, we will follow the process using an example from start to finish.
Step 1: Create the Request
Open the Requests (RQ301000) screen.
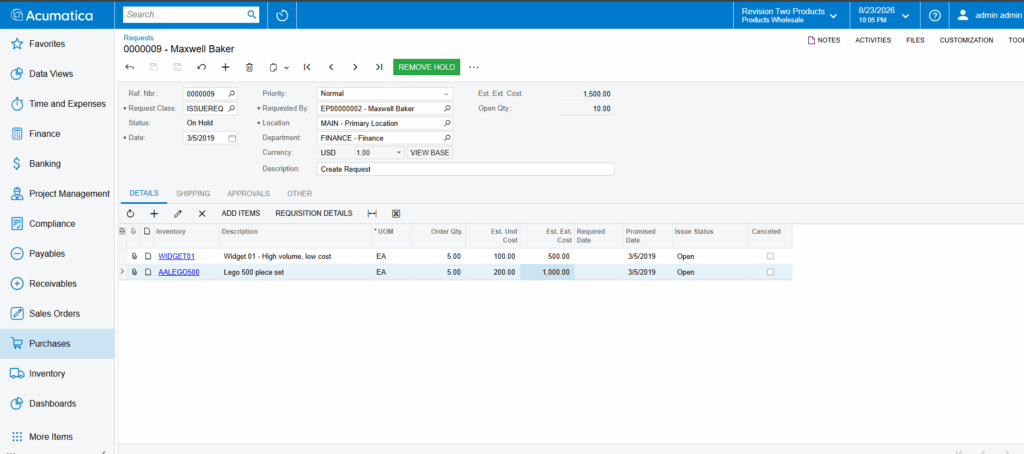
Create a Request for an item.
After entering the request information, move to the Details tab.
This is where the actual items are added. Enter the inventory item, required quantity, and estimated unit cost for each line.
For this example, we entered:
- WIDGET01 – 5 EA at 100.00
- AALEGO500 – 5 EA at 200.00
Once the request details have been entered, click REMOVE HOLD.
Step 2: Create the Requisition
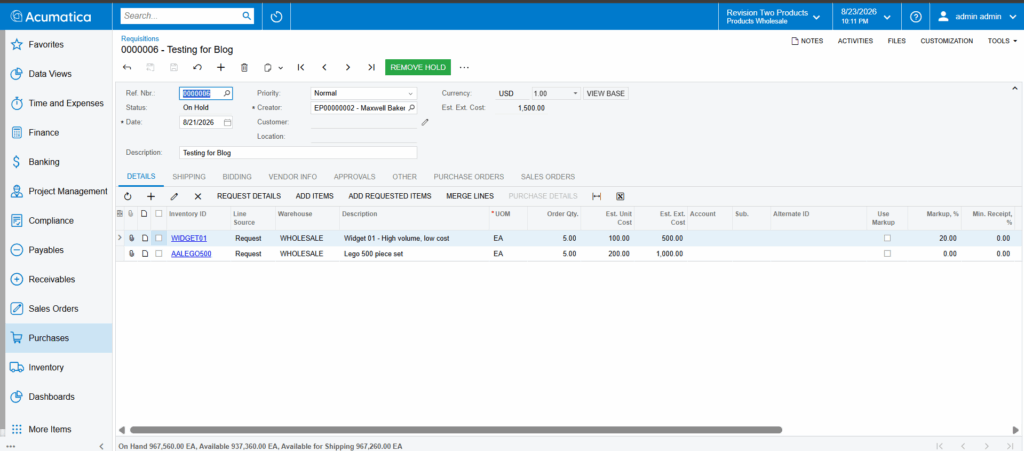
Go to Requisitions (RQ302000) and add a new requisition. Click ADD REQUESTED ITEMS and select your request.
Select the request created in the previous step.
Acumatica brings the requested lines into the requisition.
After adding the requested items to the requisition, decide which vendors should be invited to provide pricing.
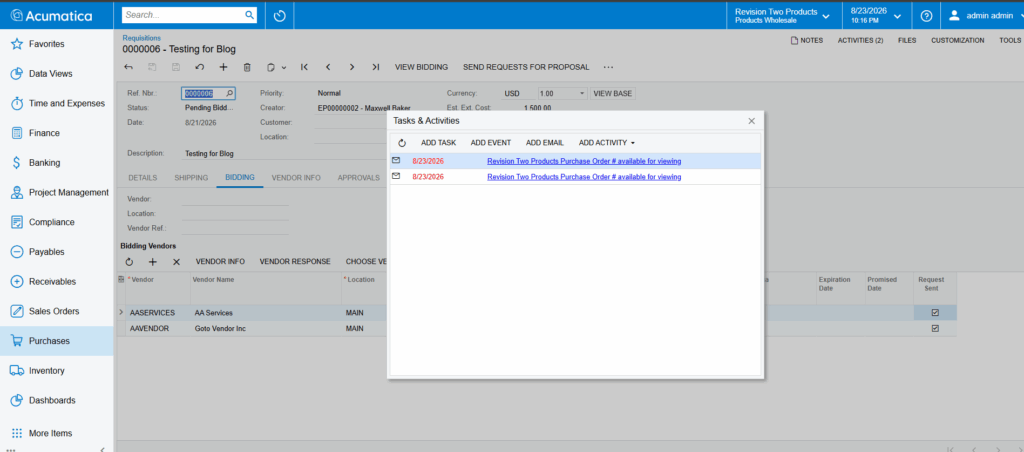
In the BIDDING tab, add the vendors you want to include in the bidding process.
For our example, we added:
- AASERVICES – AA Services
- AAVENDOR – Go to Vendor Inc
Both vendors were added with the MAIN location.
After adding the vendors, click REMOVE HOLD.
The requisition is now ready for the Request for Proposal process.
Send the Requests for Proposal
From the requisition, run the SEND REQUESTS FOR PROPOSAL action.
Acumatica sends the RFP to the vendors selected on the bidding tab. After the requests are sent, the Request Sent checkbox is updated on the corresponding vendor lines.
At this point, the requisition moves to Pending Bidding status.
Step 3: Record the Vendor Bids
Once vendors respond to the RFP, their quotes can be entered into Acumatica.
Open the Bidding Responses (RQ303000) screen.
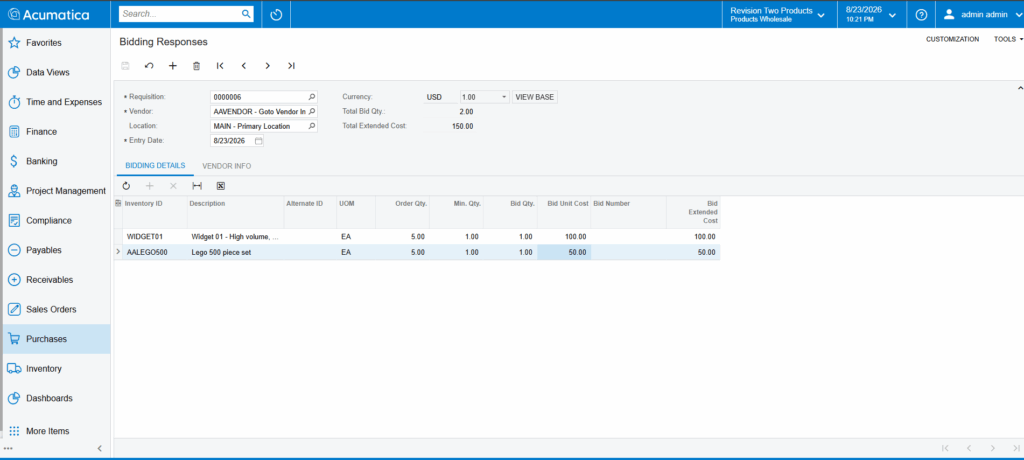
Create a bidding response for each vendor that submits a quote.
The bidding response includes fields such as:
- Min. Qty.
- Bid Qty.
- Bid Unit Cost
Acumatica then calculates the Bid Extended Cost based on the information entered. You create one bidding response per vendor, not one for the whole requisition. So if three vendors reply, you enter three separate documents — each one linked back to requisition 0000006. That way the quotes stay side by side and you can compare them later.
Step 4: Complete Bidding Process
Now comes the part you actually did all this for — comparing the bids and picking a vendor.
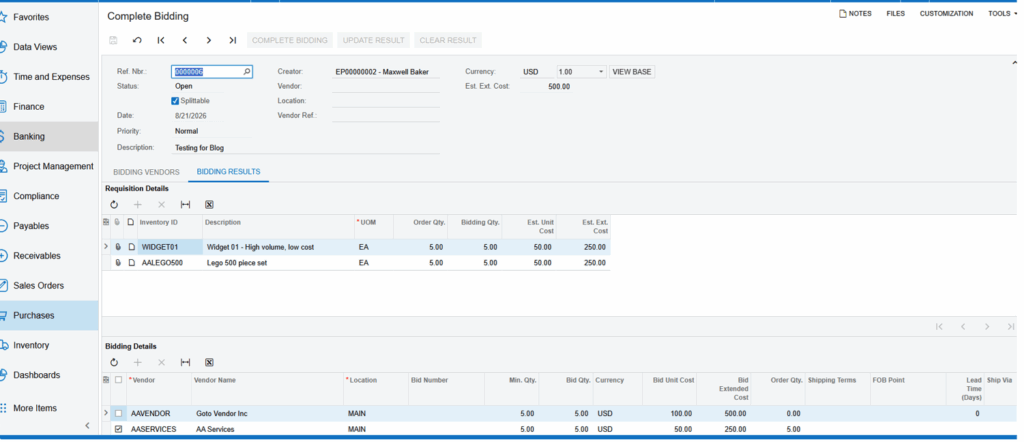
Open the screen Complete Bidding (RQ503000) and select the requisition.
The BIDDING RESULTS tab provides a view of the vendor responses. The Bidding Details grid allows you to compare the quoted prices for the requested items.
In our example, the vendors submitted the following pricing:
- Goto Vendor Inc.: 100.00 per unit
- AA Services: 50.00 per unit
Based on the quoted price, AA Services provided the lower bid in this example.
To select the vendor, check the box against the appropriate vendor and click UPDATE RESULT.
After the result is updated, the Requisition Details grid reflects the selected vendor’s pricing. The estimated unit cost, for example, changes to 50.00.
This is an important point in the process because the requisition is no longer just based on the original estimated cost. The selected bid is now reflected in the requisition.
Once the vendor selection is complete, click COMPLETE BIDDING. The bidding process for the requisition closes this.
Step 5: Create the Purchase Order
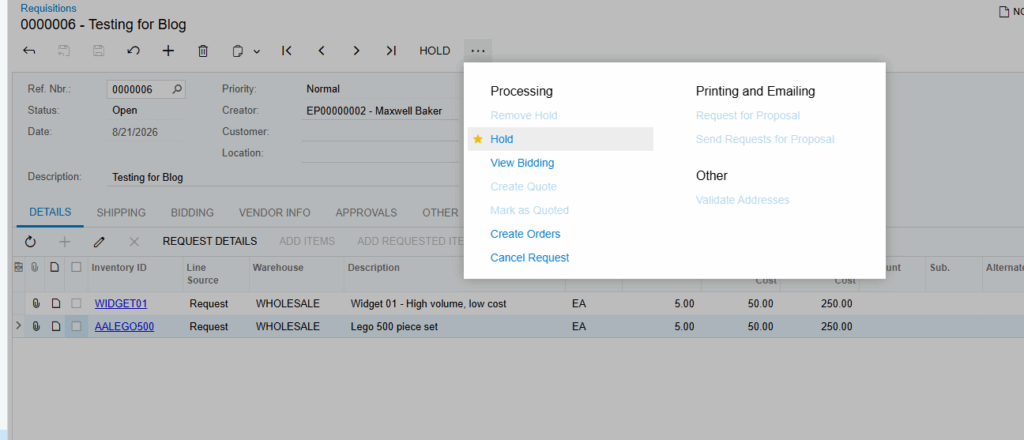
Again, open the screen Requisitions (RQ302000) and select the same requisition.
The status is now open.
From the requisition, go to Processing and click Create Orders.
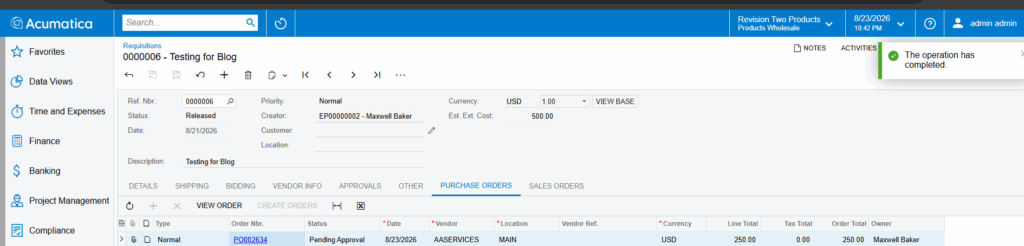
Acumatica processes the requisition and creates the purchase order based on the selected vendor and awarded pricing.
The newly created Purchase Order appears there.
In our example, Acumatica created PO002634 for AASERVICES – AA Services.
Conclusion:
The main benefit of this process is not simply that Acumatica can create a purchase order.
The bigger advantage is that the steps leading up to the Purchase Order are also recorded in the system.
A requirement starts as a request.
You pull that request into a requisition, invite a few vendors to quote, enter what each one comes back with, and compare the numbers before you pick one.
That’s what makes the Request → Requisition → Bidding → Bidding Results → Purchase Order flow worth using. Instead of a pile of emails and phone calls that nobody can reconstruct later, you get one trail inside Acumatica.