Other than Sage ERP X3, Sage Accpac (now Sage 300), Sage 100 and Sage 500 Greytrix has also been involved in developing solutions and carrying our customization’s for Sage 200 (formerly Sage MMS UK) ERP.
Let us share today some tips and tricks for developers for customizing Sage 200 screens. Some pre-requisites first;
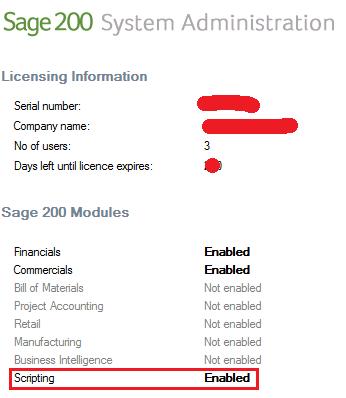
1. You require a developer license.
2. Check whether you have Scripting options available in the System Admin (refer the below screen shot).
Once everything is set, you can “Start” with the customization and then can deploy it as per your preference.
To start with the modification follow the below given few simple steps:
1. Open the screen that you want to modify.
2. Press the F10 button on the keyboard, a screen will appear (Refer the below screenshot).
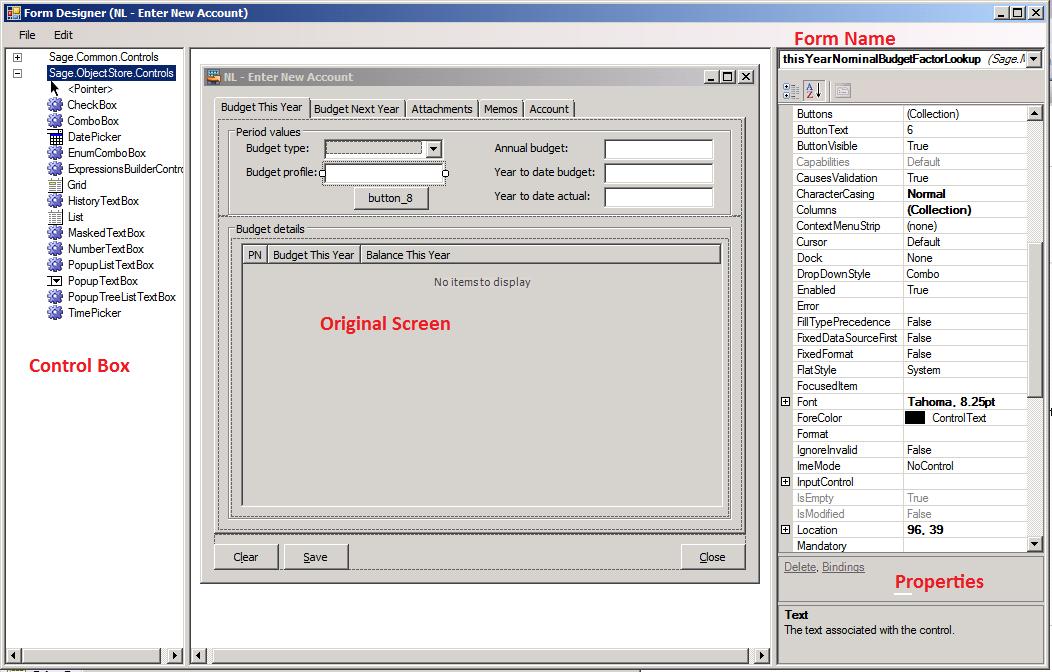
3. Users can customize the screen as per their preferences using the options available.
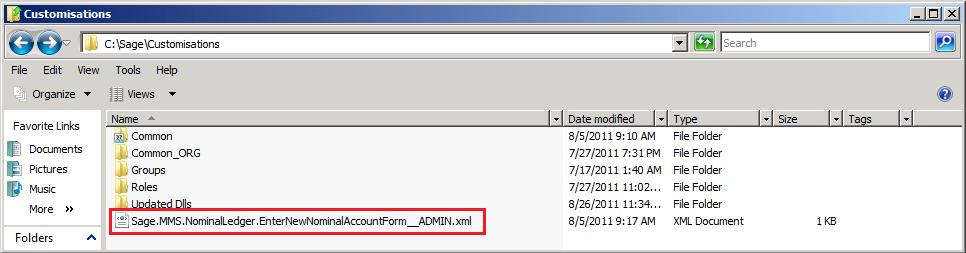
4. Once finished with the customization, click on the close button and it will ask for saving the customizations.
5. Save the above customization, an xml file will be generated in “C:\Sage\Customisations” folder. The generated XML file will have file name similar to below screen.
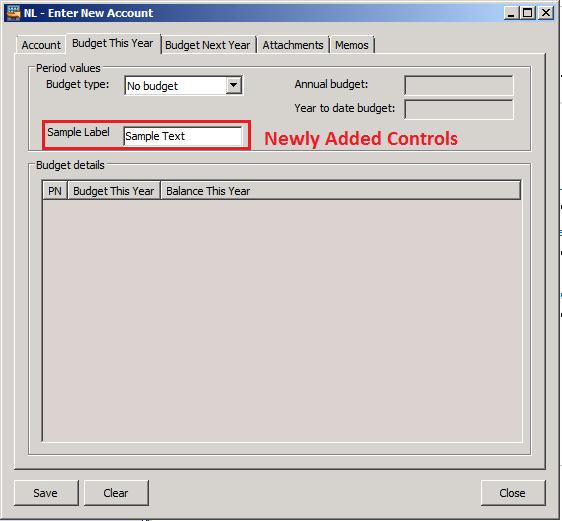
6. Your customization is completed and you can now deploy it to your or on your clients machine.
7. A sample customized screen will appear once you deploy the customization(Refer the below Screen)
Developers can use the similar process to customize other screens in Sage 200. For more tips and tricks on Sage 200 development, watch this space.