As we all know Sage CRM provides reports functionality through which we can design our own reports and do the analysis of the business. Typically, there are 2 report styles which can be used to design reports in CRM i.e. Standard with Grids and Standard without Grids. Using any one of them will either display grids or columns in report output.
New Stuff: Manage CRM Indexer (Window) Service from CRM
In this blog, will see how we can add our own custom report style in CRM. For this, we have follow few steps as mentioned below.
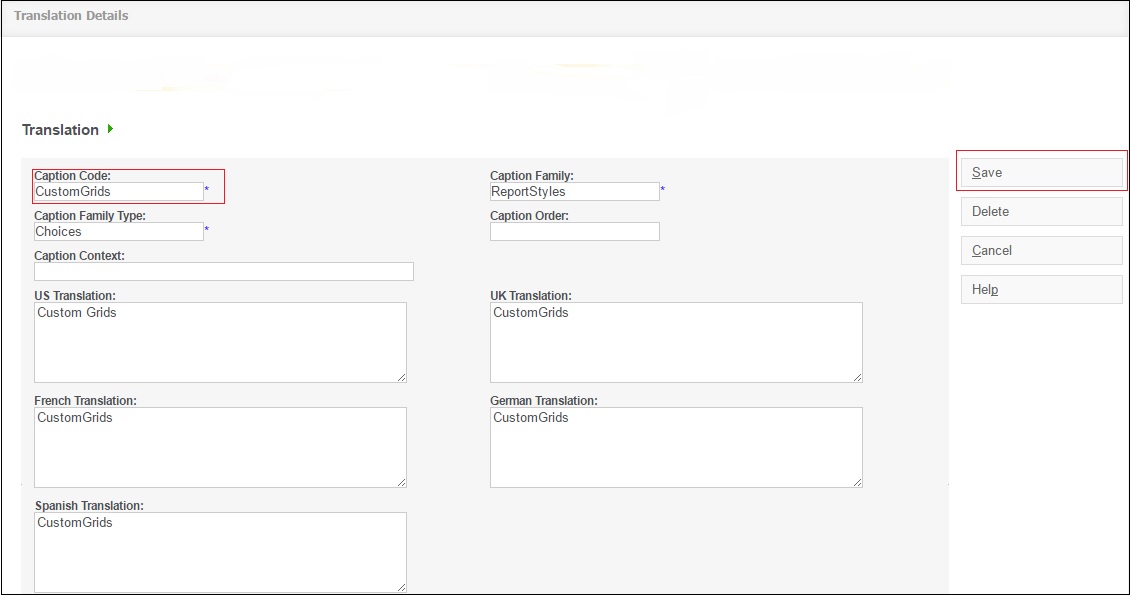
1. Go to Administration | Customization | Translations.
2. Create new Translation entry as per details shown in below screenshot.
3. Go to your installation path. For e.g. F:\Sage\CRM\CRM\WWWRoot\Themes\Reports
4. Under this path you will find 4 folders available namely Color, default, Ergonomic and neutral.
5. At this step you have to open each folders and rename the following files as per our Translations
i.e. CustomGrids.
• StdGrids
• StdGridsCE
• StdGridsPC
6. Now, your renamed files in each of the folders should look like as below.
• CustomGrids
• CustomGridsCE
• CustomGridsPC
7. Open the respective files to modify the report style and start designing your own report.
8. Apply Metadata Refresh to refresh the system parameters and to see the custom report style in report. See below screenshot for your reference.
