Advanced Find option allows us to get the information you need and is be very easily accessible to all users under Find menu option. By default, All primary entities are listed under the same.
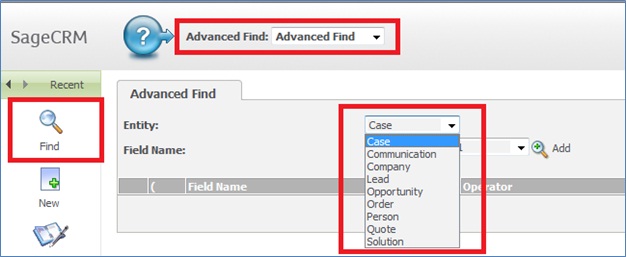
During one of our training session we came across a query as to how we can add the Custom entity under Advanced Find dropdown. Answer is really simple; one can easily add custom entity under Advanced Find dropdown by following below simple steps.
Also Read: Steps to generate complex reports in Sage CRM using Advanced Find
Step 1:
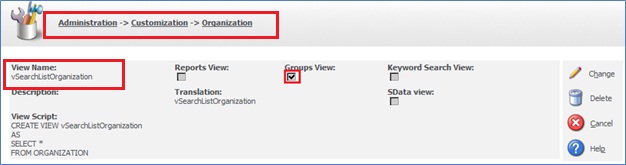
Suppose you need to add Organization entity under Advanced Find menu. Then create a new view vSearchListOrganization by navigating to Administration | Customization | Organization | Views tab. Make sure to check the checkbox Groups View.
Note:
Kindly note that name of the view should be in the below format.
vSearchList<<Custom Entity Name>>
Step 2:
Navigate to Administration | Customization | Translations and click on New button to create translation entries as shown below.
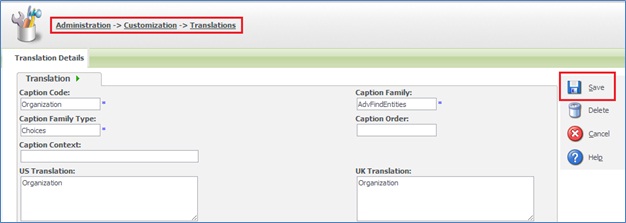
Then Save the translation.
Step 3:
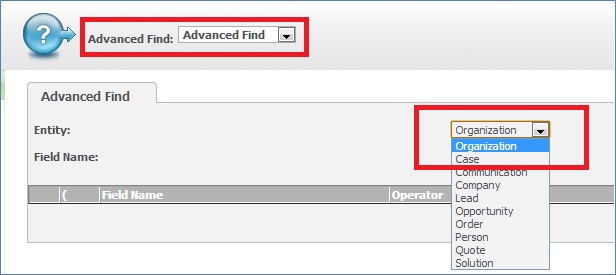
Do the Metadata Refresh.
Once done, when you check the Advanced Find dropdown; you will have custom entity listed in the Advanced Dropdown list.
In this way, you can add new option in the Advanced Find dropdown and making it work using above 3 easy and simple steps.
Also Read:
1) SSA field behavior for custom entity in Sage CRM
2) Linked Search select advanced fields on custom entity screen
3) Change Search Select Advanced field to Selection in Self Service
4) Enable Keyword Search on Sage CRM Find screen
5) Enable Sage CRM Entity for WebService