Inventory warehouse is not default functionality in sage intact it is the work around to do move inventory from own warehouse to another warehouse.
When your company has several warehouses, you might need to move inventory between warehouses.
For example, you might need to move 1 unit of item A and item B from a warehouse in X to a warehouse in Z.
When you use an inventory transfer in Sage Intacct, you specify all the information about the transfer on one page, and Sage Intacct does the rest of the work.
Sage Intacct then does the work of creating the underlying transfer transactions, including automatically propagating the costs of the items.
You can’t alter the price of the goods when they are transported from source Warehouse but we can alter the price into the destination warehouse.
An inventory transfer is the movement of stock items from one place to another. This assists in keeping accurate inventory quantities and locations, allowing businesses to have products in the right places and at the right times.
Inventory transfers will impact the overall inventory quantity; also, they will impact the location of items.
They also assist in supporting multi-location inventory control, minimizing stockouts, and enhancing inventory visibility.
Prerequisites:
Before initiating an inventory transfer, ensure that:
1. The inventory module is enabled in your Sage Intacct system.
2. Locations (warehouses) are already set up in Company > Locations.
3. Inventory items are configured with correct units of measure, costing methods, and tracking (lot/serial numbers if applicable).
4. Users have the proper permissions to access and create inventory transfers.
Before starting the Inventory IN and Inventory OUT process, first we need to check out the available item quantity; for that, first open the item that we want to transfer. Then We need to create transaction definition in sage intact for Inventory IN and Inventory OUT.
Transition Definition for Inventory OUT and IN:
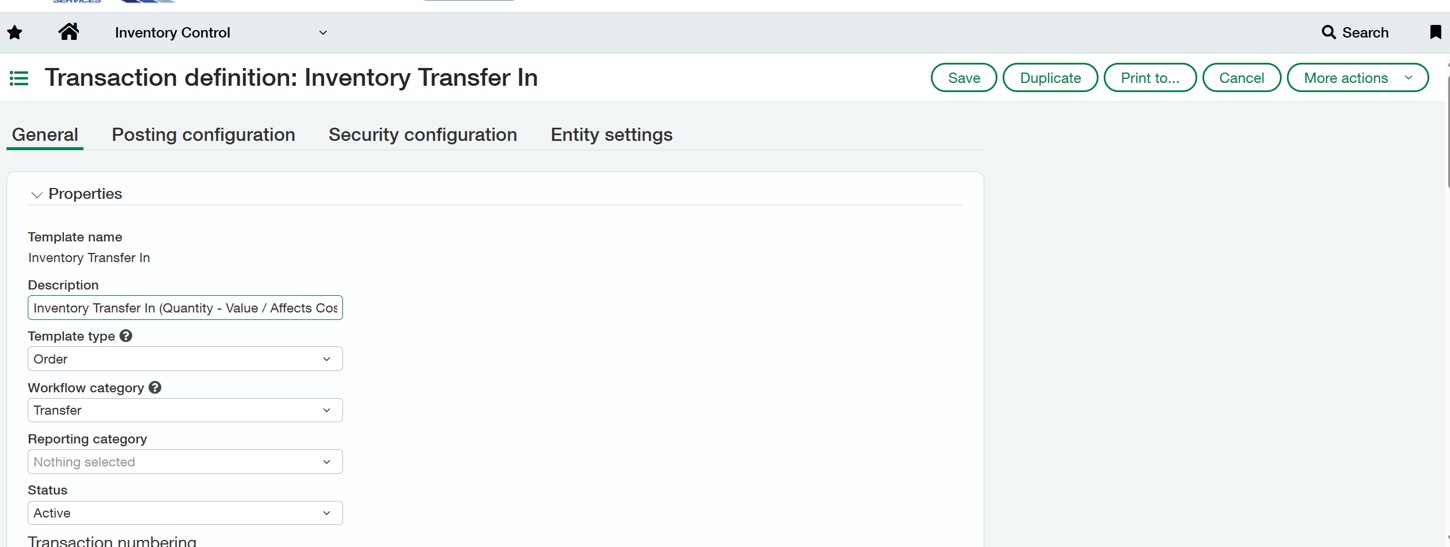
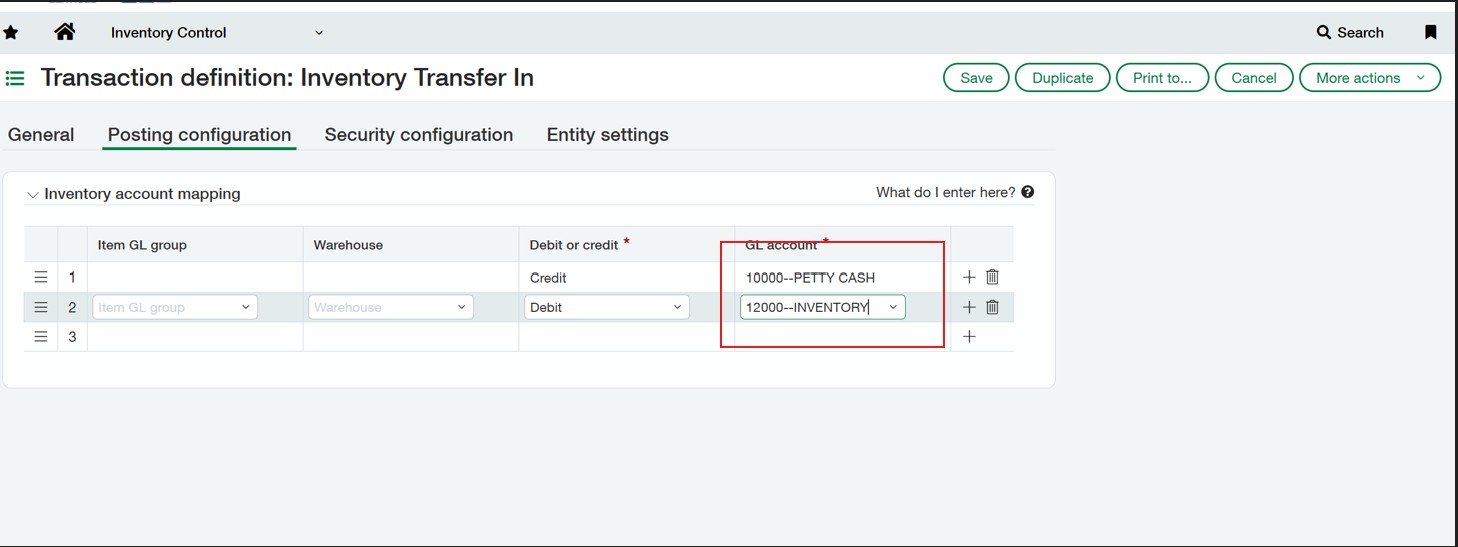
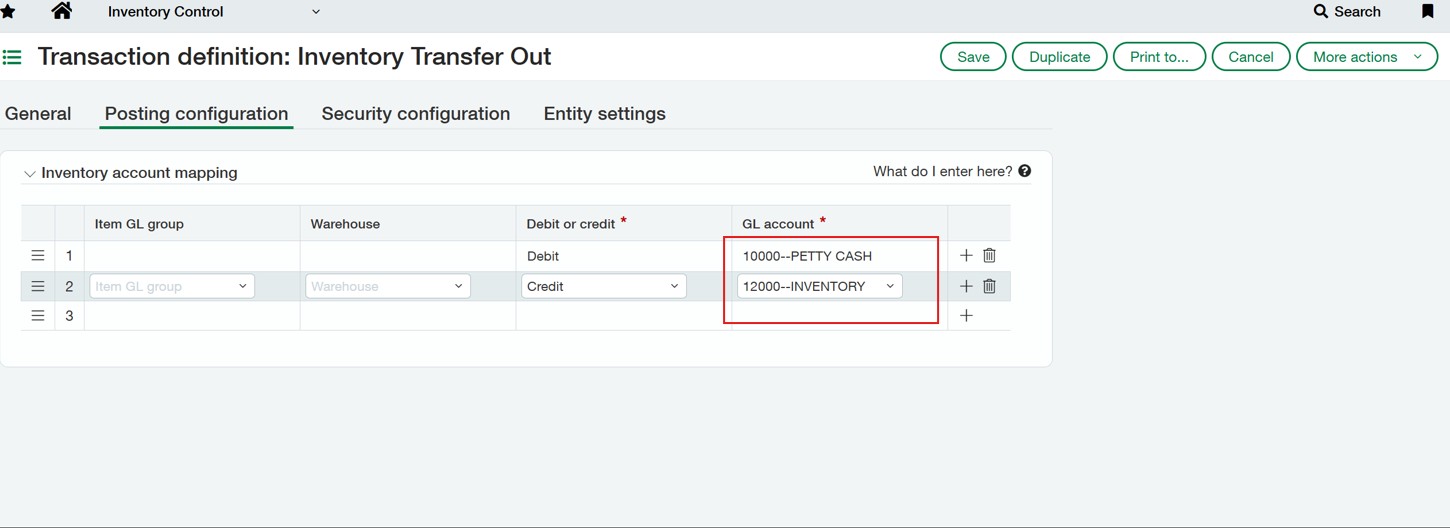
While making Transaction Definition in the posting configuration tab we need to use same account for Out and IN Inventory Transfer.
1)Inventory IN Posting Configuration:
2)Inventory OUT Posting Configuration:
Here’s the Quick Guide:
Inventory Control > ALL > Items > View.
After that, we can do an inventory transfer out from the warehouse.
Inventory Out:
To transfer an item to a different warehouse, we must remove it from the current warehouse.
1. Launch the Inventory Control program.
2. Navigate to Transactions.
3. Select Inventory Out from the Transfer menu, click Add, and then enter the item and warehouse information.
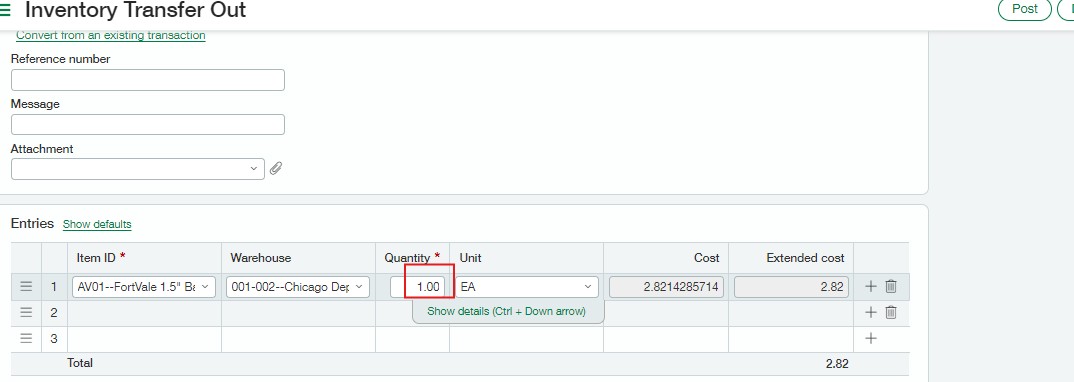
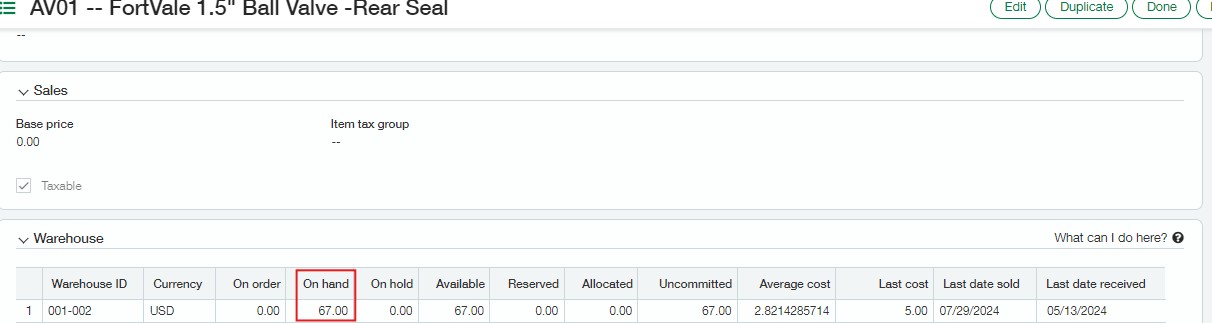
As mentioned above, I completed the inventory out for the AV01 item in one quantity and posted the transaction.
The inventory out transaction will be recorded under the inventory transfer out transaction after it is posted.
The number of products in the present warehouse has decreased. It signifies that item 67 is in the warehouse.
Inventory IN:
To ensure the item we plan to transfer is properly accounted for, it must be added to the warehouse inventory.
To do this,
1. Open the Inventory Control module.
2. Go to the Transactions Section.
3. Choose Inventory IN to record the item into the warehouse system.
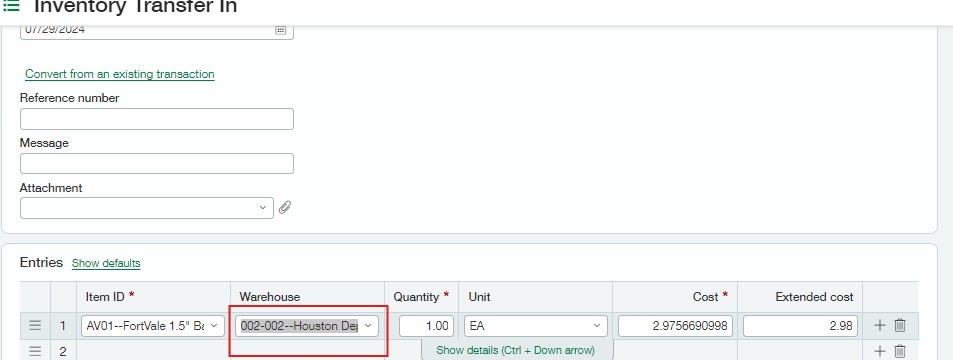
I added one unit of the item to a warehouse, specifically 002-002—Houston Depot Warehouse. Once the entry is posted, the inventory quantity for warehouse 002 will be updated, reflecting an increase of one unit in its stock.
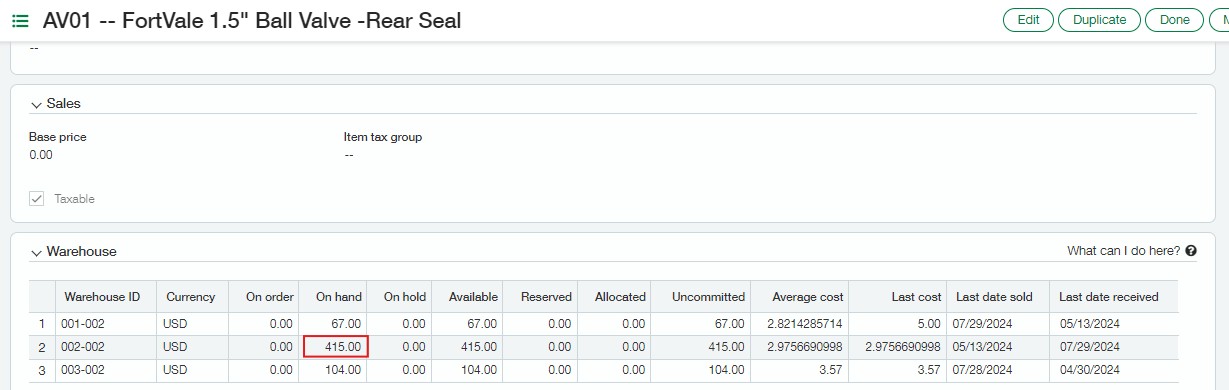
As we can see, the 002-warehouse item quantity is 415 now.
That was 414 before the inventory was posted into the transaction; now it has increased by one quantity.
Thus, item AV01 single quantity is moved from warehouse 001 to warehouse.
About Us
Greytrix has a wide product range for Sage Intacct- a Cloud ERP. This includes migrations from QuickBooks | Sage 50 | Sage 100 | Sage 300 to Sage Intacct. Our unique GUMU™ integrations include Sage Intacct for Sage CRM | Salesforce | FTP/SFTP | Rev.io | Checkbook | Dynamics 365 CRM | Magento | Rent Manager | Treez | Avalara Avatax | Blackline SFTP. We also offer best-in-class Sage Intacct Development Services, Consulting services, integrated apps like POS | WMS | Payroll | Shipping System | Business Intelligence | eCommerce for Sage Intacct to Sage business partners, resellers, and Sage PSG worldwide. Greytrix constantly develops apps, products, and add-ons to enhance user experience. Sage Intacct add-ons include AR Lockbox File Processing.
Greytrix GUMU™ integration for Sage CRM – Sage Intacct, Sales Commission App for Sage Intacct, and Checkbook.io ACH/Digital Check Payments for Sage powered by GUMU™ are listed on Sage Intacct Marketplace.
The GUMU™ Cloud framework by Greytrix forms the backbone of cloud integrations that are managed in real-time for the processing and execution of application programs at the click of a button.
For more information on Sage Business Cloud Services, please contact us at sagecloud@greytrix.com. We will like to hear from you.