In our previous blog, “How to send Emails from Sage 300 ERP ” we illustrated the way of sending mails to our customers at the time of item dispatch, invoice creation etc. Here, in this blog we will consider the case of vendors instead of customers where we can intimate our vendors in different situations like where we have received the goods dispatched by them, or are waiting to be in receipt of the goods for a particular date. On the Vendor side also we have three options available in Sage 300 ERP wherein we can send the mail: at the time of raising Purchase order or Goods Receipt Note (GRN) or at the time of sending Letter to the vendor.
New Stuff: O/E Current Order Inquiry in Sage 300 ERP
Procedure to send email to Vendor:
1. Email configuration at Vendor Master level
Navigate to Accounts Payable >> A/P Vendors >> Vendors and move to processing tab to select the Delivery method as “Contact Email” if you want to pick the vendor’s email id from Email field on Contact tab of Vendor screen or select “Mail” if you want to pick the vendor’s email id from Email field on Address tab of Vendor screen.
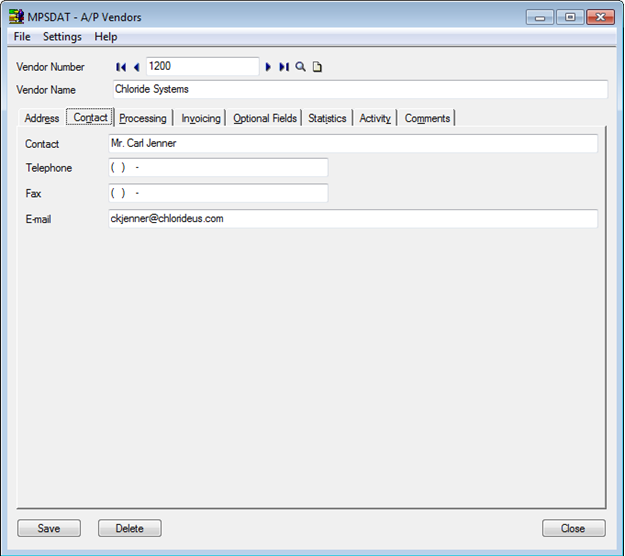
Next, depending on the selected Delivery method enter the email id of your vendor in the respective field. For example: we have selected the delivery method “Contact Email” so we are entering vendor’s email id in email field of contact tab as shown below:
Note: To send one email to multiple ids you can key in all ids in same “Email” field separated by semi colon.
2. Email message body Configuration
To avail this feature we have two options:
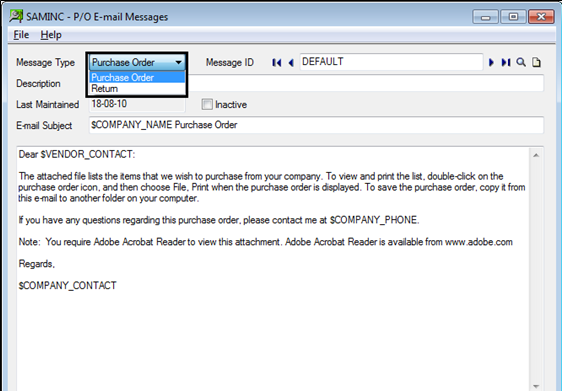
a. Navigate to Purchase Order >> P/O Setup >> Email messages
Here you can define the message body which you want to use for the purpose of Purchase Order and GRN.
Note: Use F1 key to know about the e-mail message variables which you can use in email message body. Sage help file will give you the list of variables that system can pick directly from your database as per your attached file (PO\GRN\Letter).
For example: To print contact person’s name in message body you can use “$VENDOR_CONTACT” which will pick the contact person’s name from contact field in contact tab of vendor’s screen.
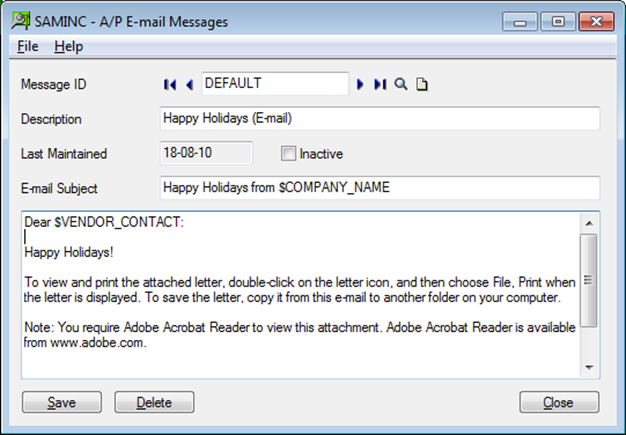
b. Navigate to Accounts Payable >> A/P Setup >> Email messages
In this screen of AP Email Messages, you can define the message body of the letter which you send to your vendor.
Note: You can create multiple message body templates for single type of transaction by clicking on new button just beside Message ID.
3. Send Email
Finally, our last step will be to send the email to the vendor.
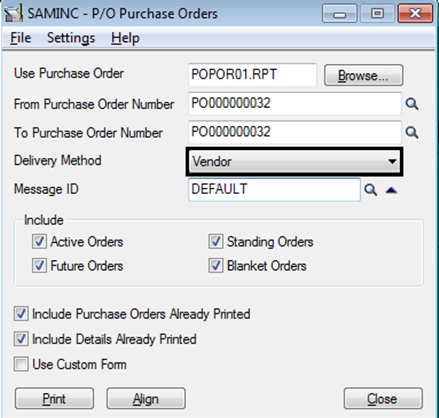
To send email to vendor move to the respective report, enter required info and change delivery method to “Vendor”
Just an instance, move to Purchase Order >> PO Forms >> Purchase Order to send email for Purchase Order. After that, enter PO number and select delivery method as “vendor” with the required message body template.
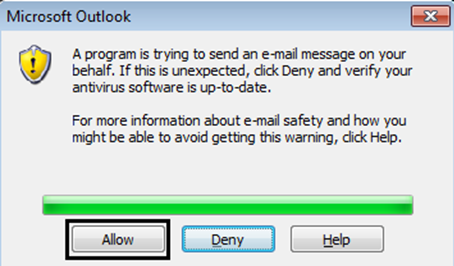
Lastly, click on Allow to shoot the mail.
I hope this blog will help you in maintaining virtuous flow of your business with your vendors.

