Acumatica comes with a range of pre-built standard reports that cover different areas of business operations. These reports provide insights into financial statements, sales orders, purchase orders, inventory levels, and more. These reports serve as a starting point and can be customized to meet specific business requirements.
However, did you know that Acumatica also lets you add Clickable image. The best part is that you don’t need any coding skills to take advantage of this feature. Even as an end user, you can benefit from it.
In this blog post, we’re going to look at how you can insert an image that you can click on, and then it will take you to a specific link mentioned in the report designer. Let’s go through the steps to make this reporting feature work .
Step1: First, open the report designer. You can do this by going to the “File” menu and selecting “Open.” If the report is saved on your desktop, find it there, or if it’s saved in Acumatica, open it from the server. Once you’ve opened it from the server, you’ll need to provide your login details and the report’s name to access it.
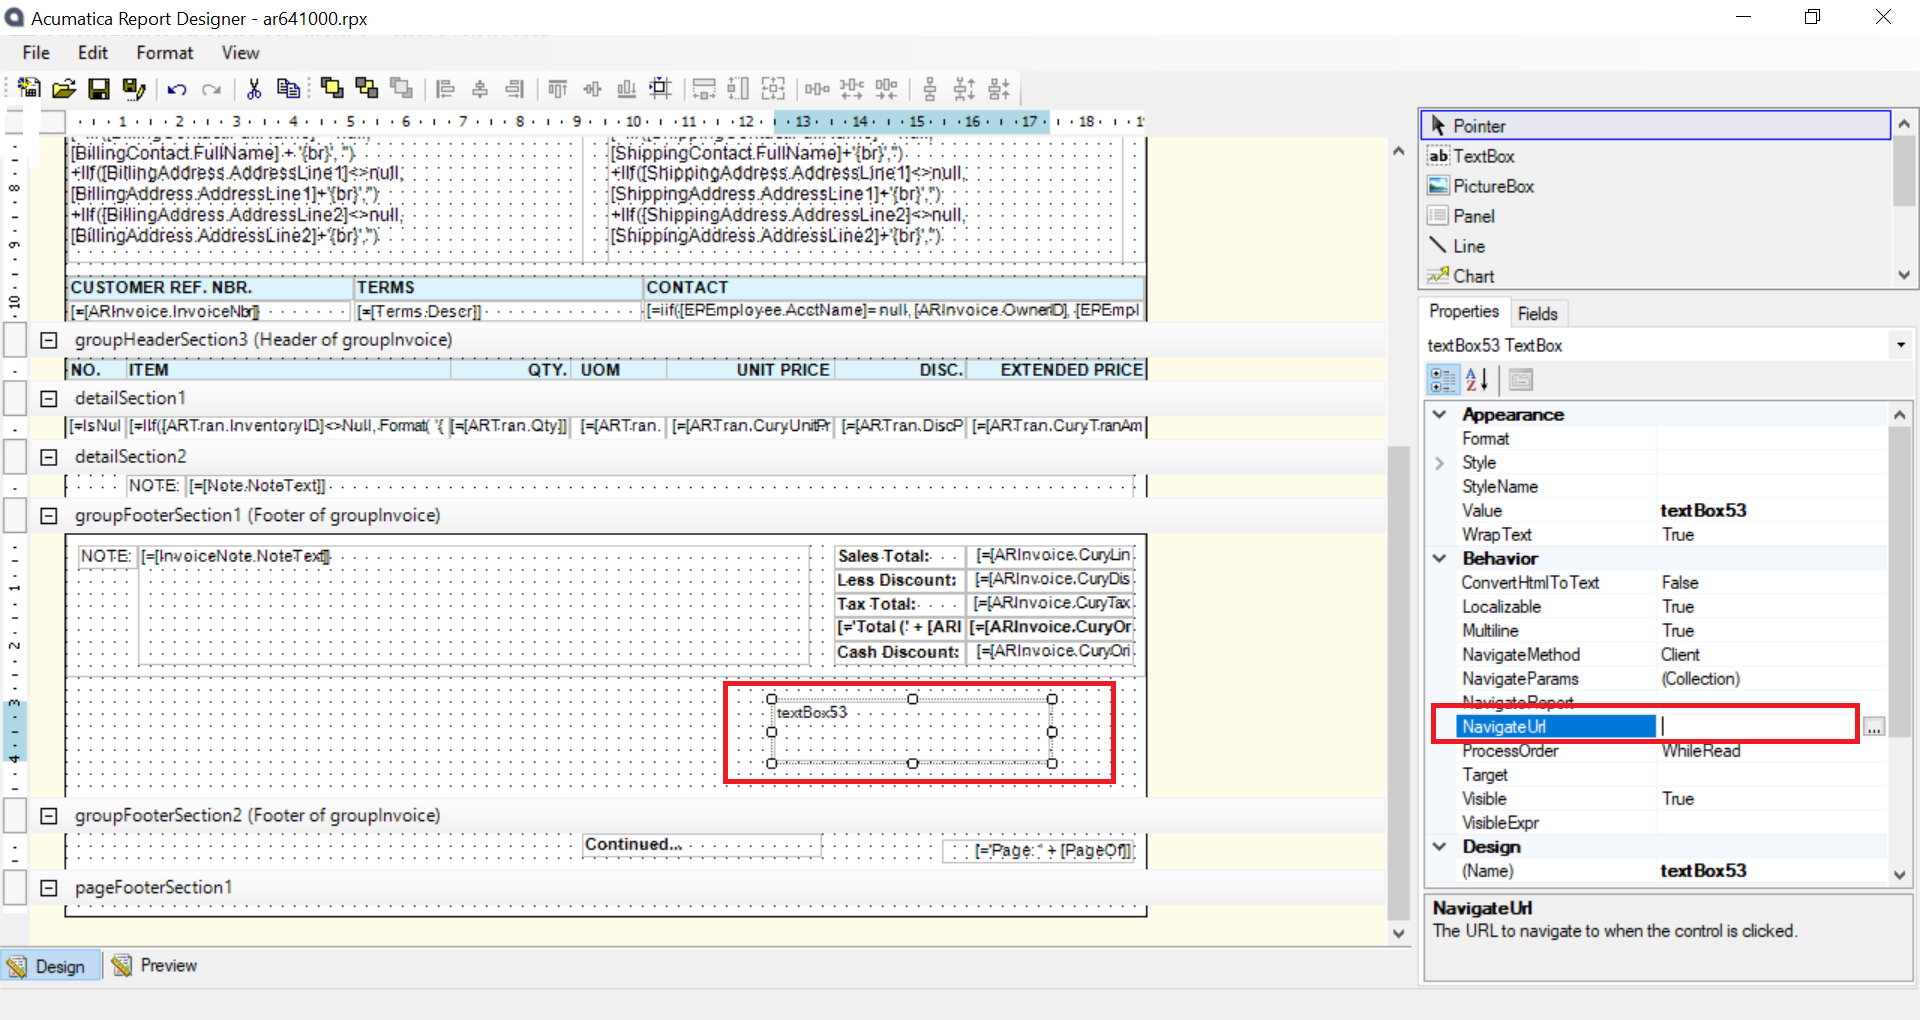
Step2: Drag and add textbox to the place where you want it in the designer.
Step3: After you’ve added the textbox, when you click on it, you’ll notice an option called “Navigate URL” in the Properties section under Behavior. Here, you can specify the URL field using the Expression Editor. Once you’re done, make sure to save the changes. This way, you’re setting up the link that the textbox will take you to when clicked.

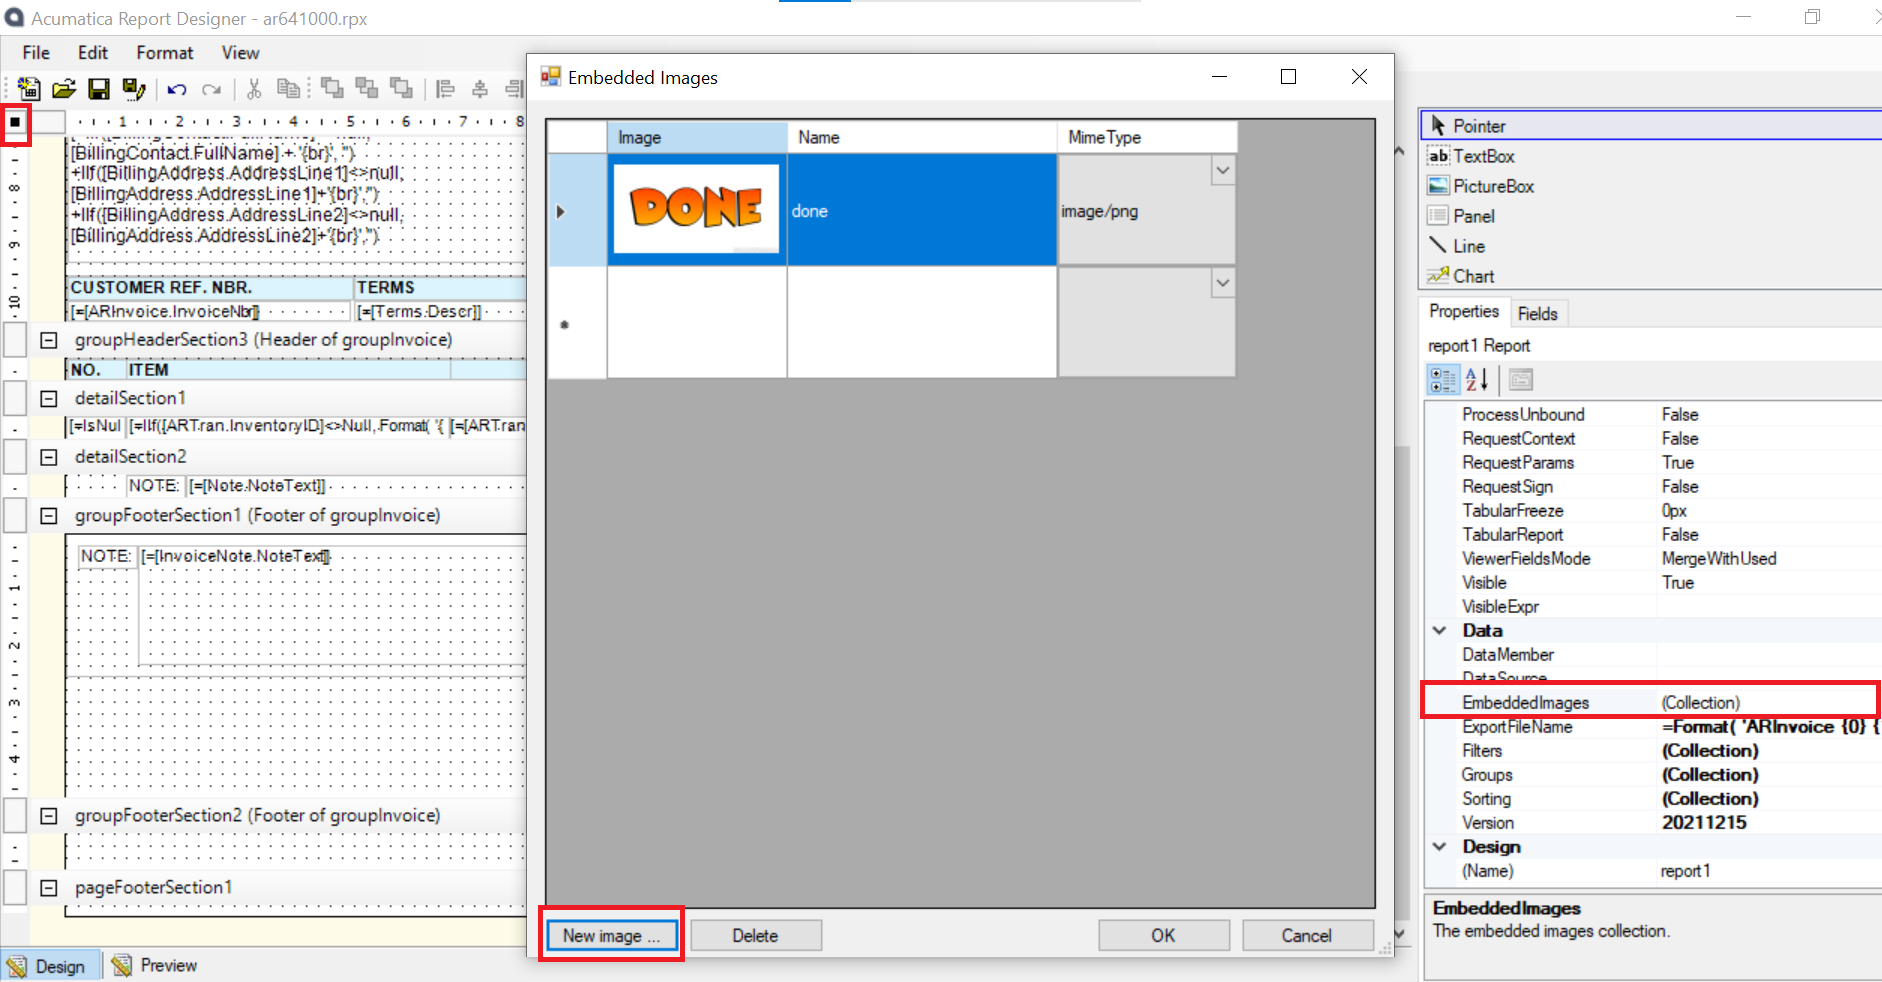
Step4: Now it’s time to insert the image. To do this, head over to the upper left corner and click on the small box. After that, under the properties panel on the left, find the “Data” section. Within this section, you’ll see the “EmbeddedImage” field. Click on the three dots next to it. When you click those three dots, a window for the “EmbeddedImage” will pop up.
In that window, select “New Image.” Here, you can upload and add the image you want to use. Select the Done image under the Image property. Invoices will now have a clickable image link to the customer’s invoice.
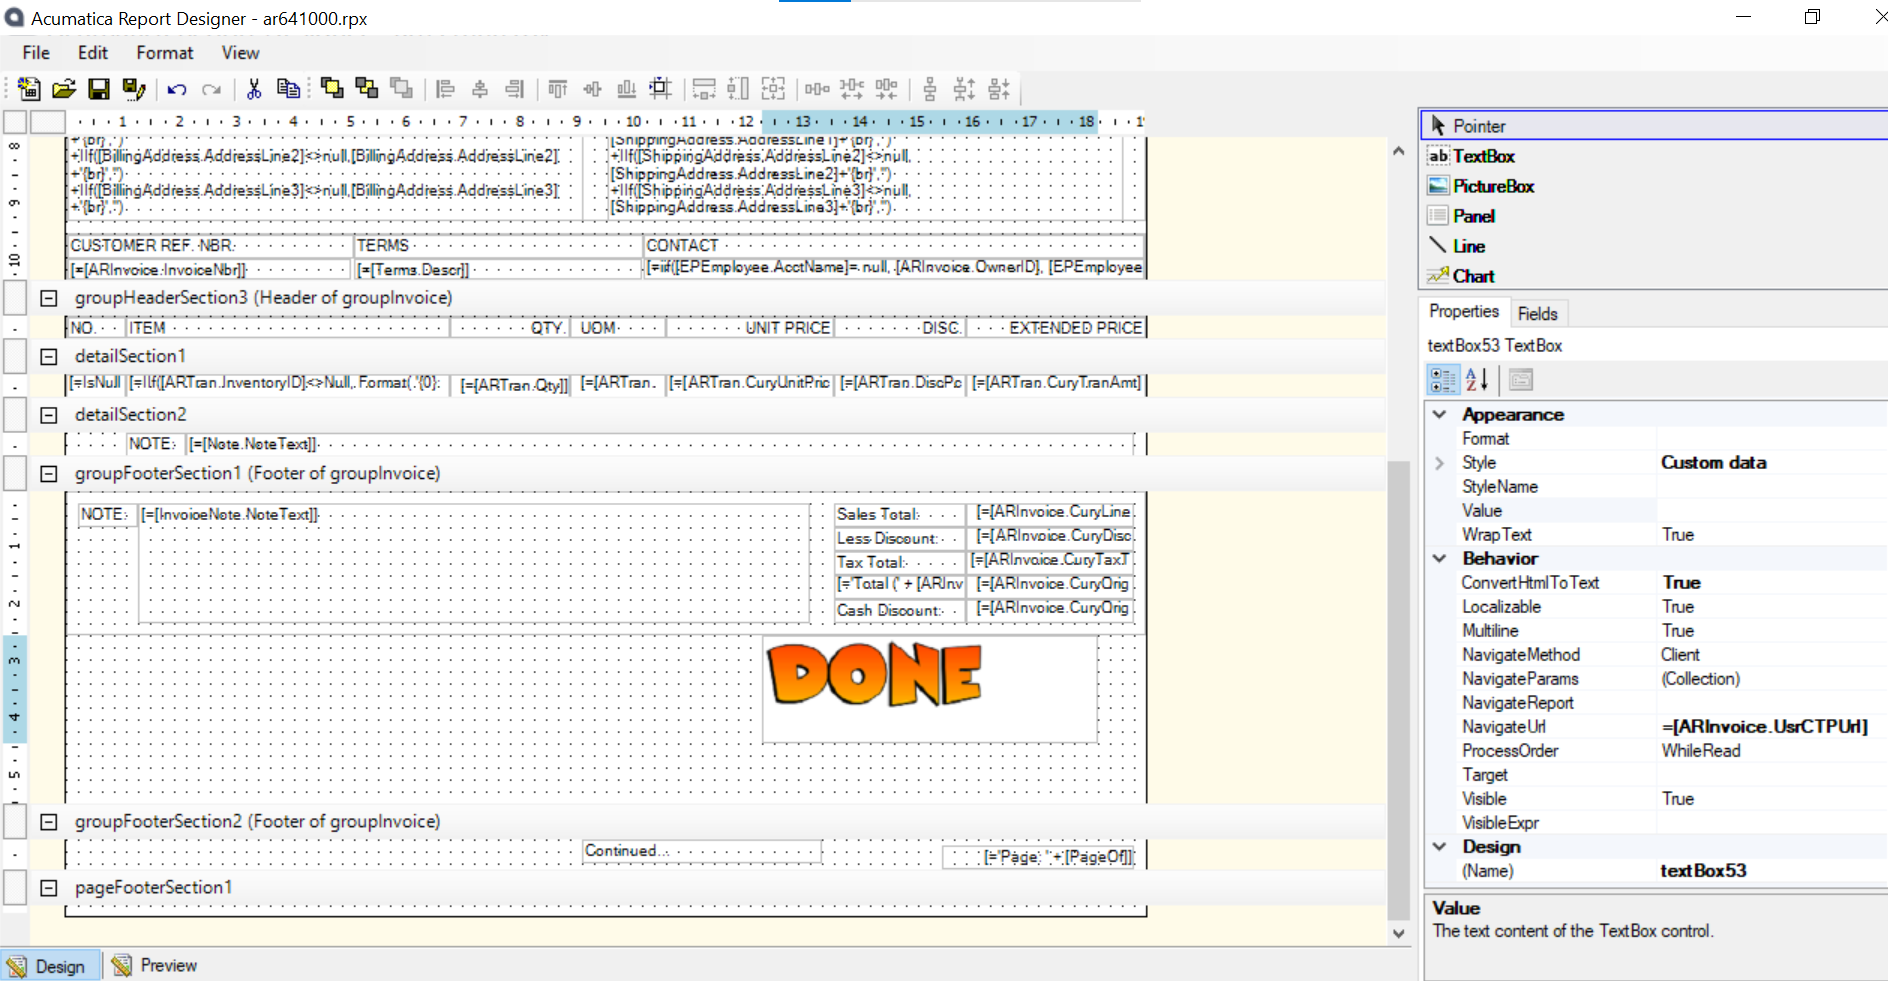
When you do this, Select the textbox on the form. In Properties, under Appearance->Style->Back Image, Style, expand Back Image, Change the Source from External to Embedded. Select the image name and you’ll see a list of all the embedded images you’ve added. Select the image you want, click “OK,” make sure to save the changes you’ve made. This way, you’re getting the image into your report.

Then you will see the report designer with the image added.

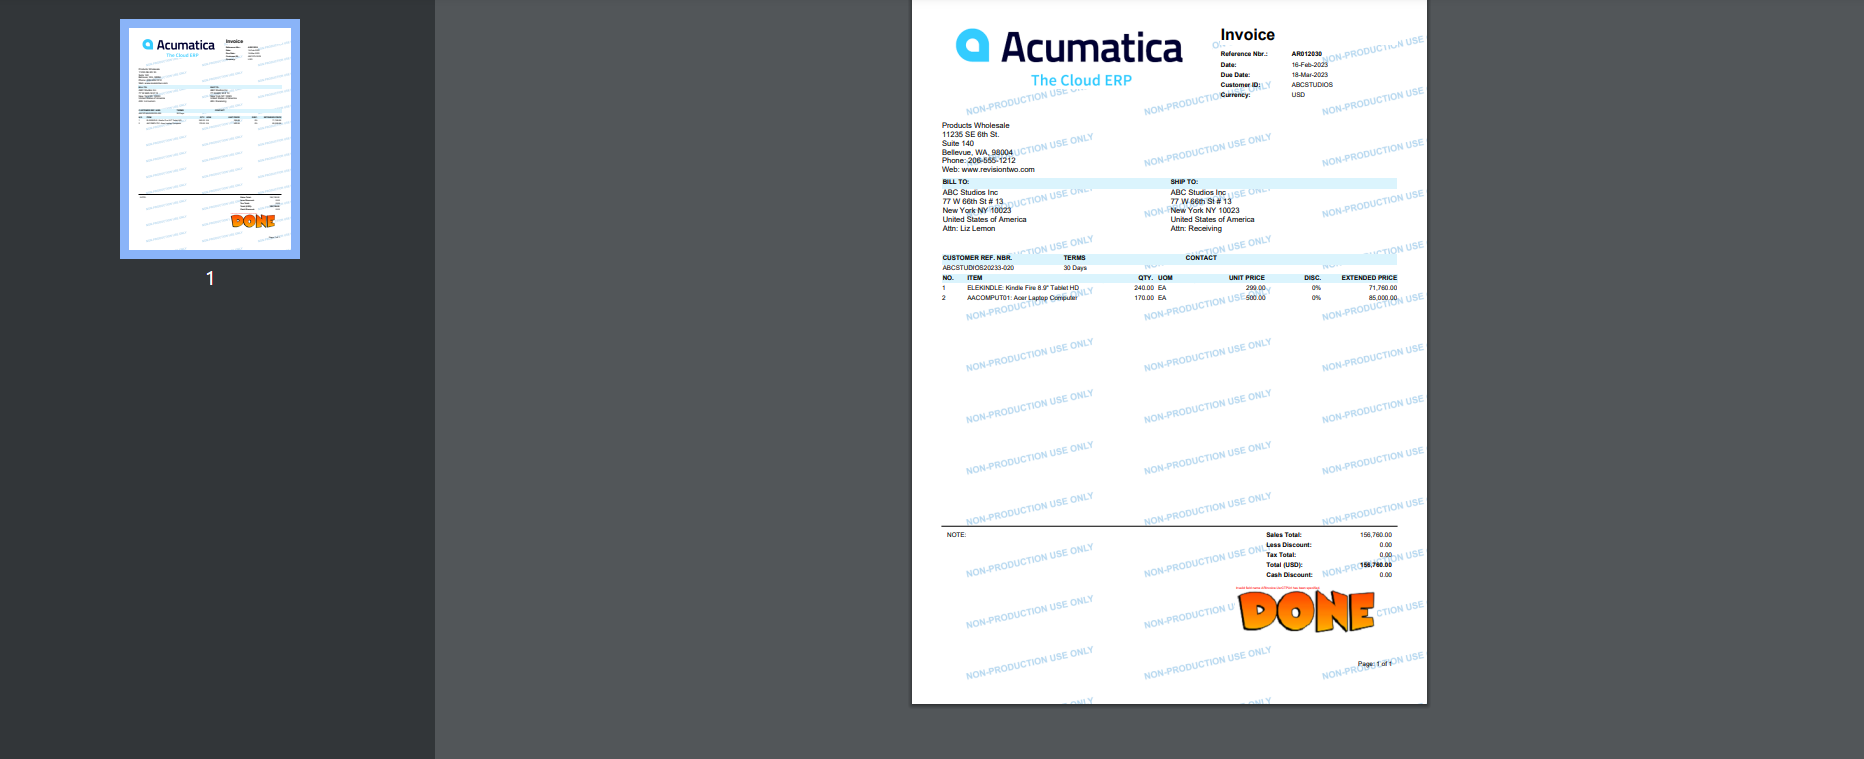
From the Acumatica the report gets navigate to weblink where it has been provided.


