The new Self Service Portal is taking Sage CRM to the next level. With the help of this portal you can provide your customers with anytime, anywhere access to resources and information. Customers can log into New Self Service portal and typically perform following tasks:
- View Account Information: They can view the cases logged through New Self Service.
- Report a Problem: Customer can report a problem using Create Case/Ticket functionality
- Request a Product Information: Customer can request a product information through Newsletter functionality available in Self Service.
New Stuff: Incorporate Case filter screen in Self Service portal
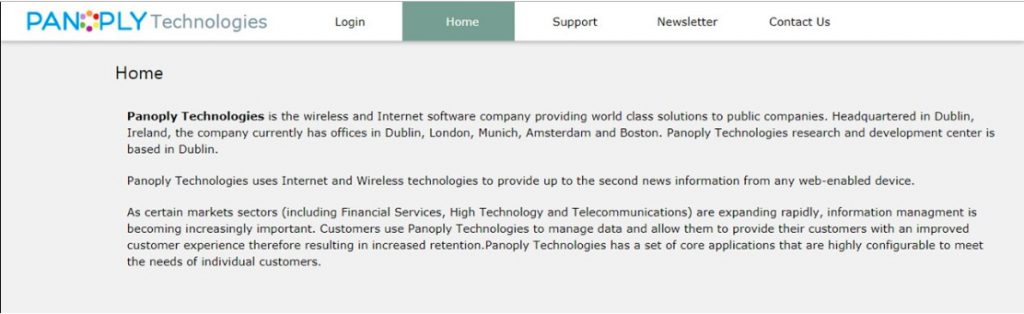
From the release of Sage CRM 2019 R1, a new version of self service has been launched. Below is the screenshot of the same.
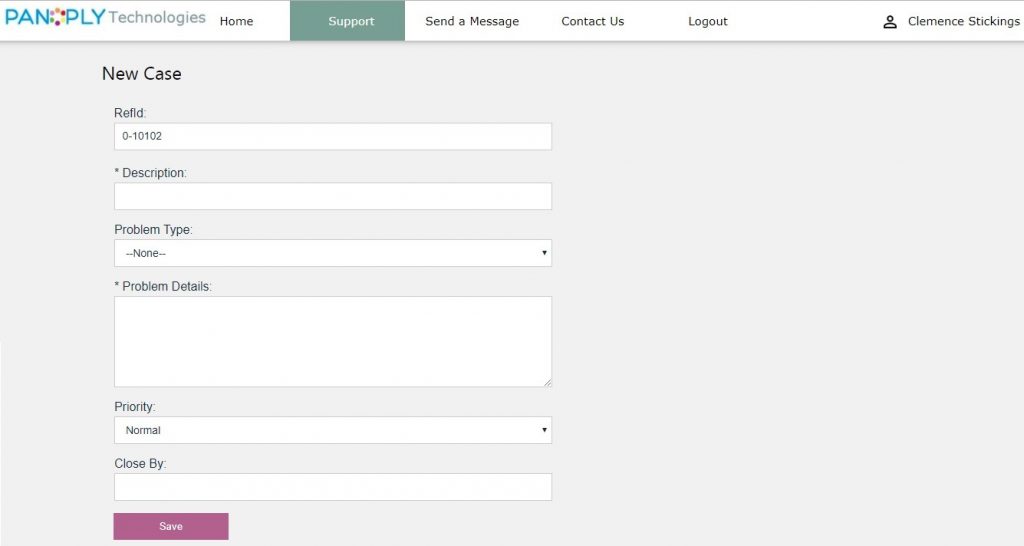
For one of our customer, we have installed Sage CRM 2019 R1 and integrate it with Self Service portal. As per the Customer’s requirement, we modified standard new case screen and added few additional fields as per mention in below screenshot.
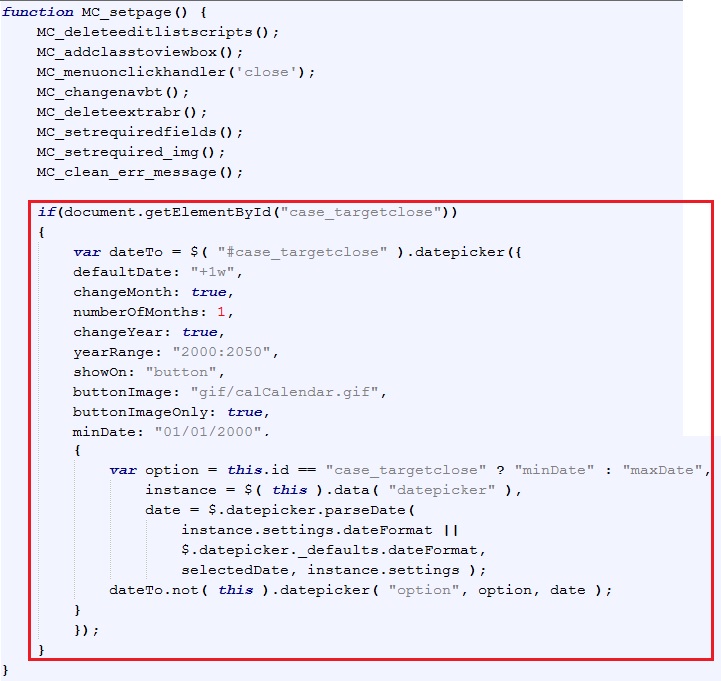
As you all know, Close By field is a date field in Sage CRM. But, in Self Service Portal, it is showing as text field and you need to convert the same into date field manually in order to view calendar control. Follow below steps to do the same.
- Copy “jquery-ui.min.js” file from “<CRM Directory>\<CRMName>\WWWRoot\js\lib\” folder to “<CRMSelfservice Directory>\script\client\” folder.
- Copy “jquery-ui.css” from “<CRM Directory>\<CRMName>\WWWRoot\Themes\jquery\” folder to “<CRMSelfservice Directory>\css\” folder.
- Copy “calCalendar.gif” image from “<CRM Directory>\<CRMName>\WWWRoot\Themes\Img\Ergonomic\Buttons\” folder to “<CRMSelfservice Directory>\gif\” folder.
- Open “mc_client.js” page from “<CRMSelfservice Directory>\script\client\” folder. Add below code in “MC_setpage()” function.
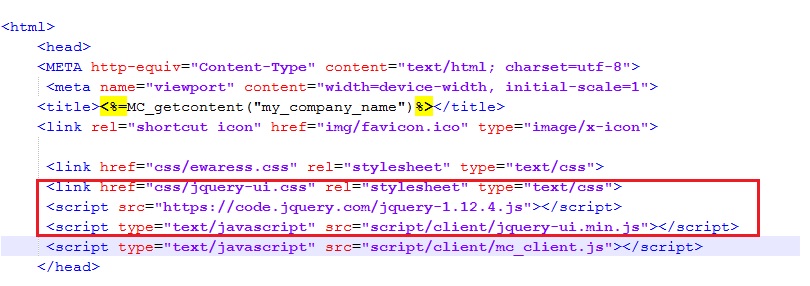
- Open the “Index.asp” page from “<CRMSelfservice Directory>” folder.
- Write below lines in the <head> section as shown below.
After doing above changes you will be able to view the calendar control for date field.

About Us
Greytrix – a globally recognized and one of the oldest Sage Development Partners is a one-stop solution provider for Sage ERP and Sage CRM organizational needs. Being acknowledged and rewarded for multi-man years of experience and expertise, we bring complete end-to-end assistance for your technical consultations, product customizations, data migration, system integrations, third-party add-on development, and implementation competence.
Greytrix has some unique integration solutions developed for Sage CRM with Sage ERPs namely Sage X3, Sage Intacct, Sage 100, Sage 500, and Sage 300. We also offer best-in-class Sage ERP and Sage CRM customization and development services to Business Partners, End Users, and Sage PSG worldwide. Greytrix helps in the migration of Sage CRM from Salesforce | ACT! | SalesLogix | Goldmine | Sugar CRM | Maximizer. Our Sage CRM Product Suite includes add-ons like Greytrix Business Manager, Sage CRM Project Manager, Sage CRM Resource Planner, Sage CRM Contract Manager, Sage CRM Event Manager, Sage CRM Budget Planner, Gmail Integration, Sage CRM Mobile Service Signature, Sage CRM CTI Framework.
Greytrix is a recognized Sage Champion Partner for GUMU™ Sage X3 – Sage CRM integration listed on Sage Marketplace and Sage CRM – Sage Intacct integration listed on Sage Intacct Marketplace. The GUMU™ Cloud framework by Greytrix forms the backbone of cloud integrations that are managed in real-time for the processing and execution of application programs at the click of a button.
For more information on our integration solutions, please contact us at sage@greytrix.com. We will be glad to assist you.