In this blog post, we will discuss the process of the IIS Default Configurations for Sage 100 SData.
Steps to Set the IIS Default Configurations
-> Localhost Settings
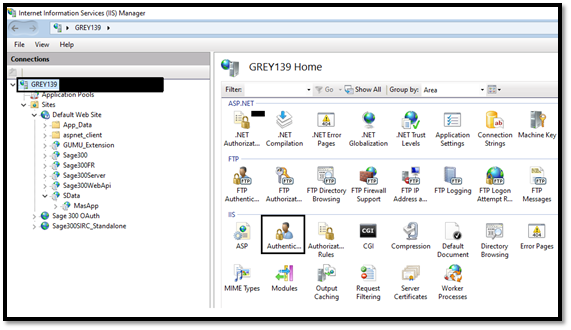
- Navigate to IIS (Internet Information Services).
- Navigate to the localhost and click on Authentication.
- Click edit against the anonymous authentication and set user as an Application pool identity.
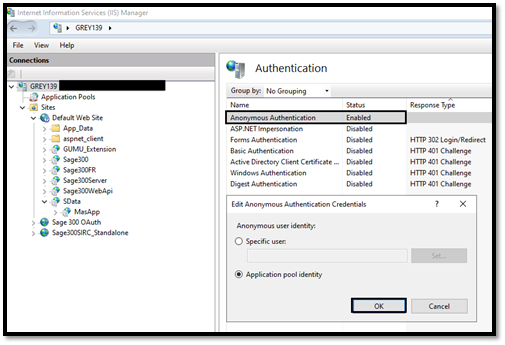
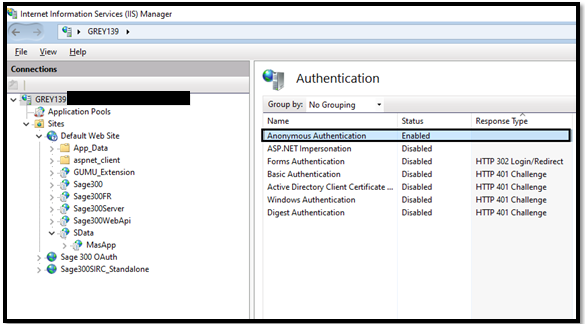
- Click on ok and check the status is enabled.
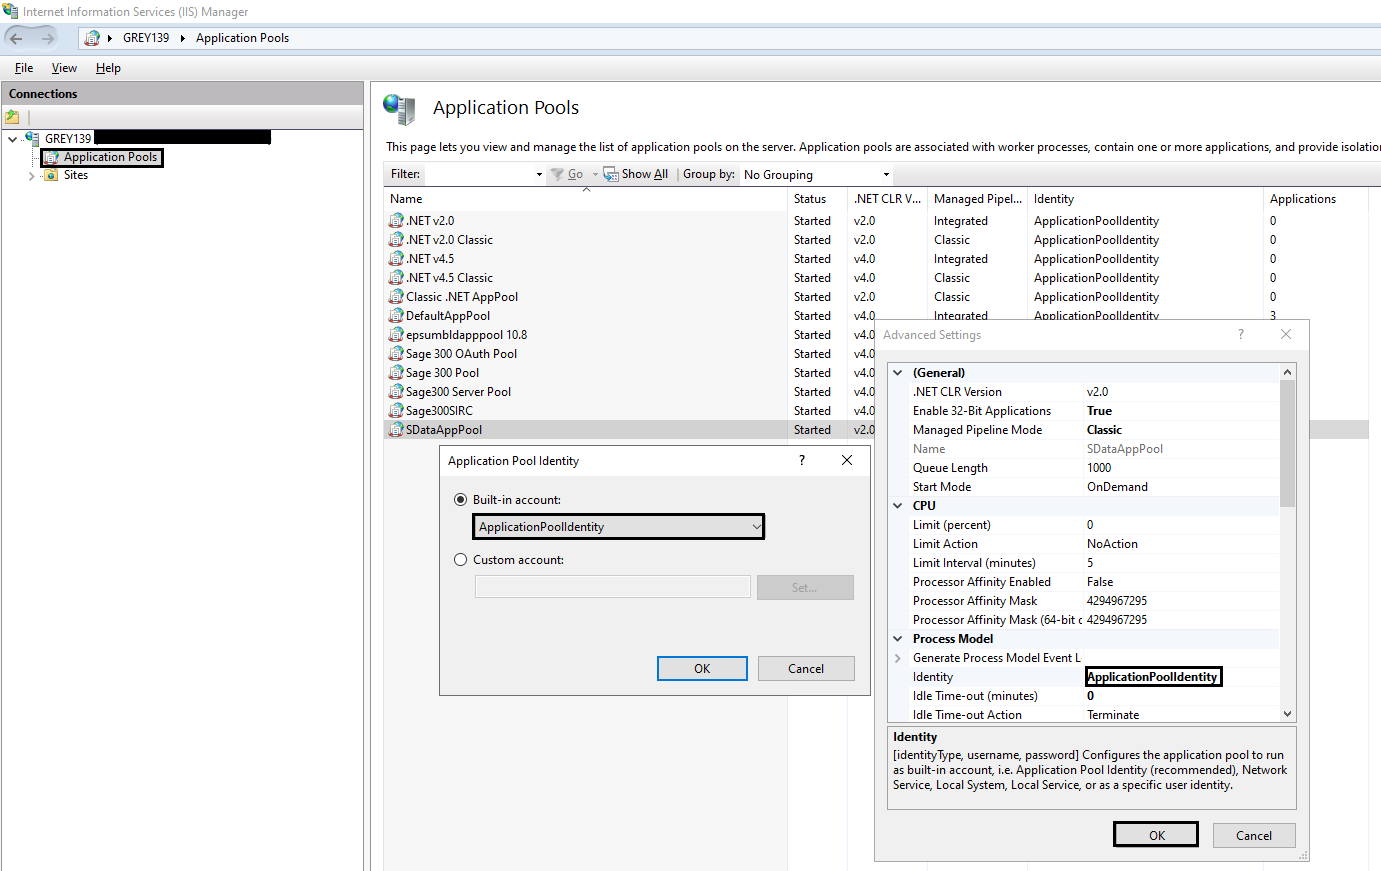
-> Application Pools Settings
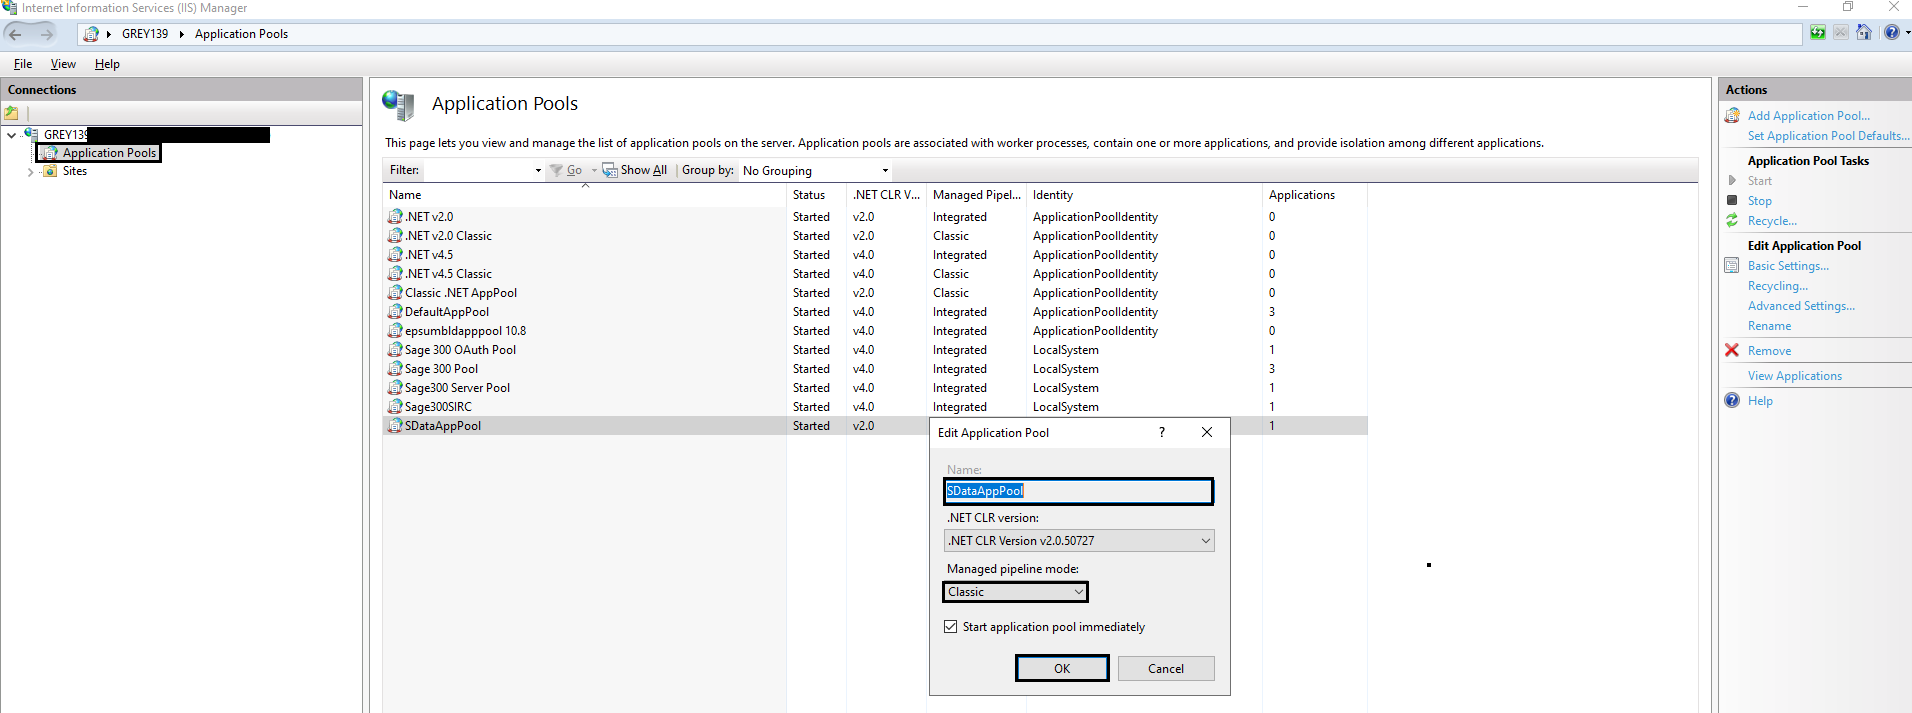
- Navigate to the Application pool and right click against the SData.
- Click on basic setting and click on ok button.
- Click on Advanced setting and set identity as Application Pool Identity in Built in Account.
-> Default Website Settings
- Navigate to Default Web Site and click on basic setting.
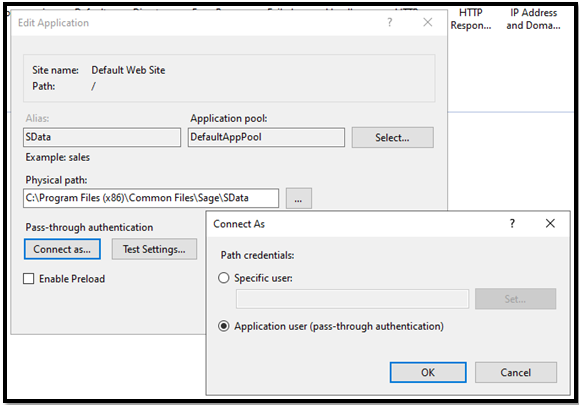
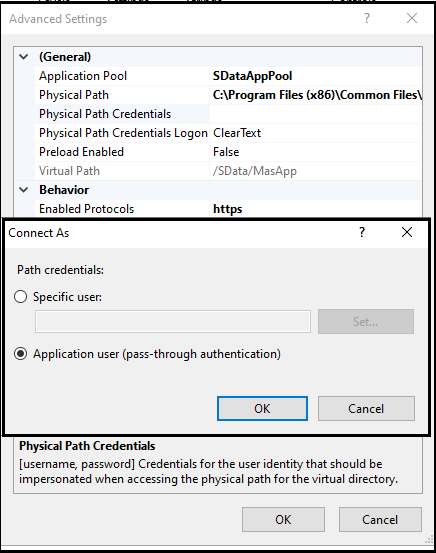
- Click on Connect as button and set user as Application User by clicking on checkbox and click on ok.
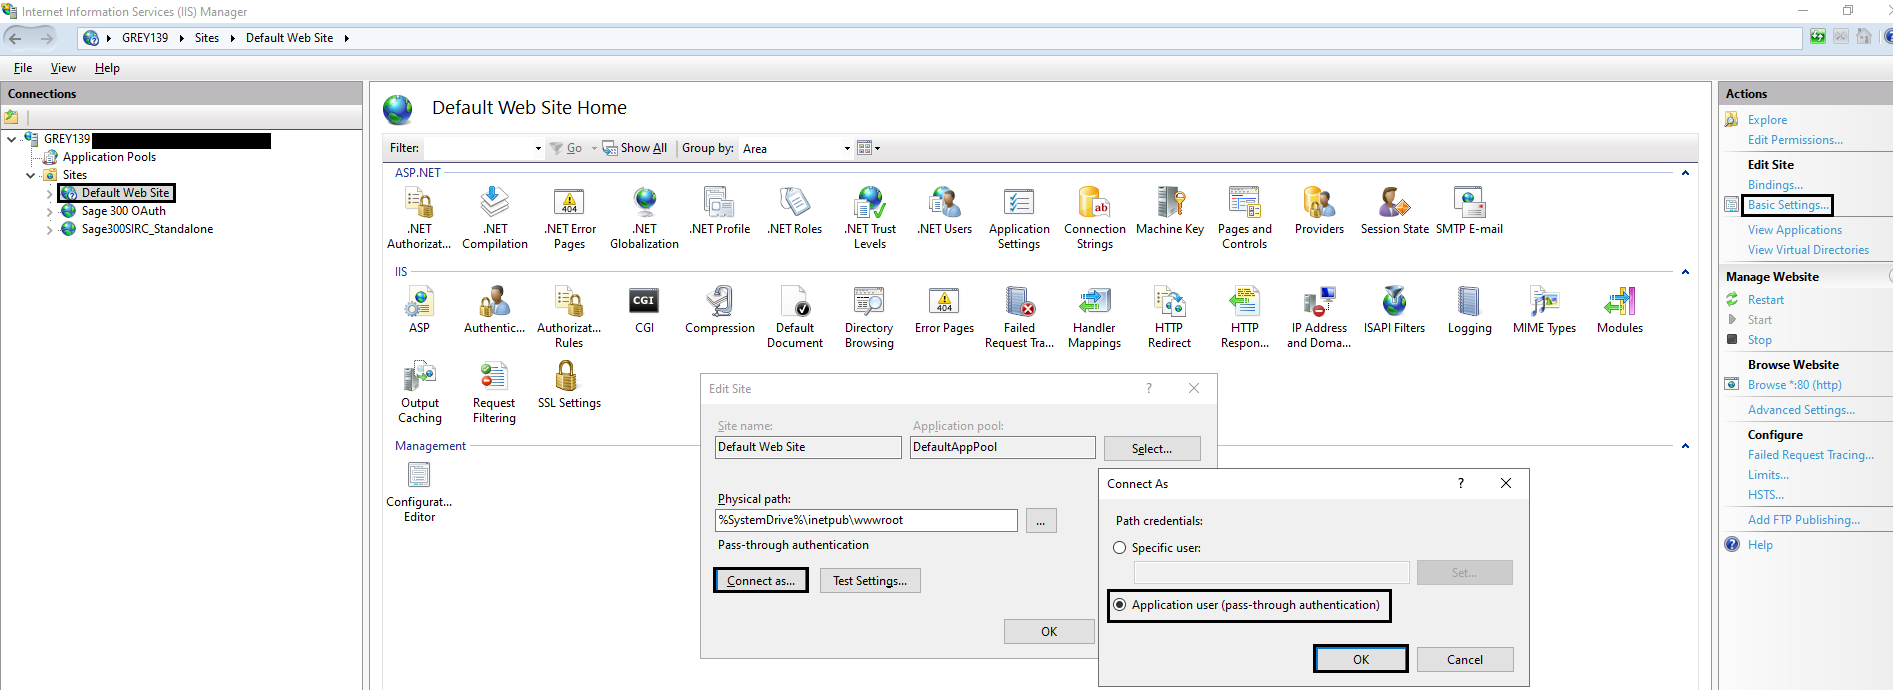
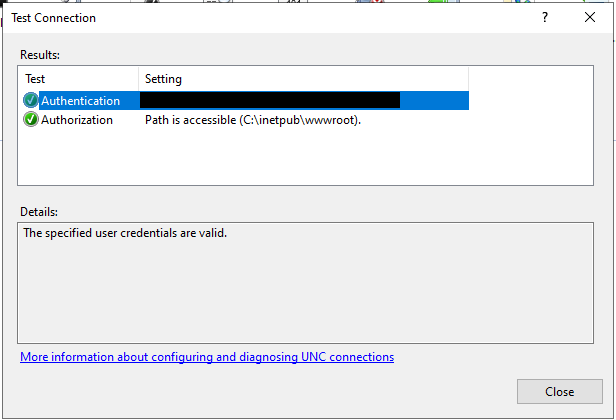
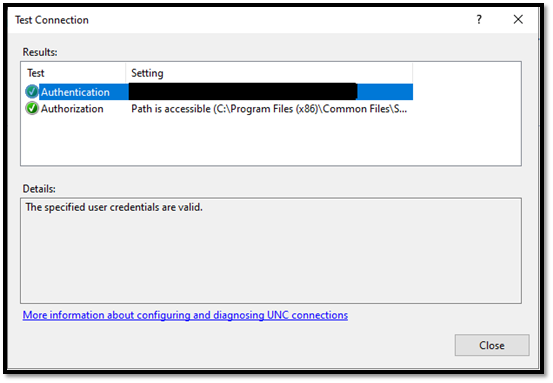
- Click on Testing Setting to verify the connection is successful.
- Click again ok button.
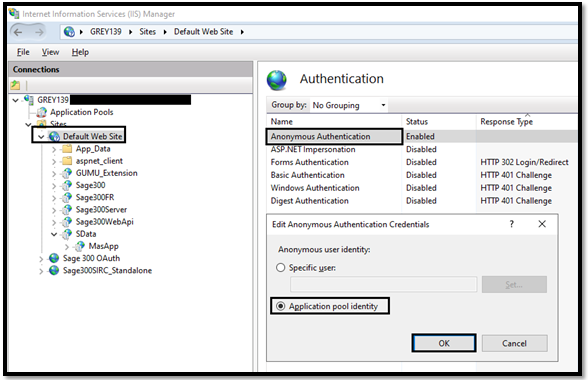
- Click on Authentication and click edit against the anonymous authentication and set user as an Application pool identity.
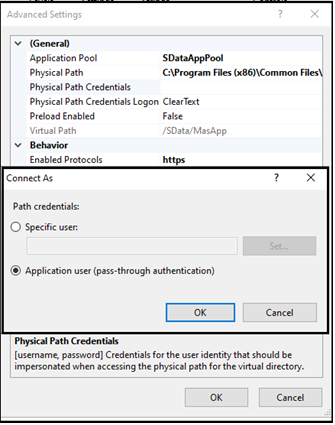
- Click on Advanced setting and set user as an Application User Physical Path Credentials.
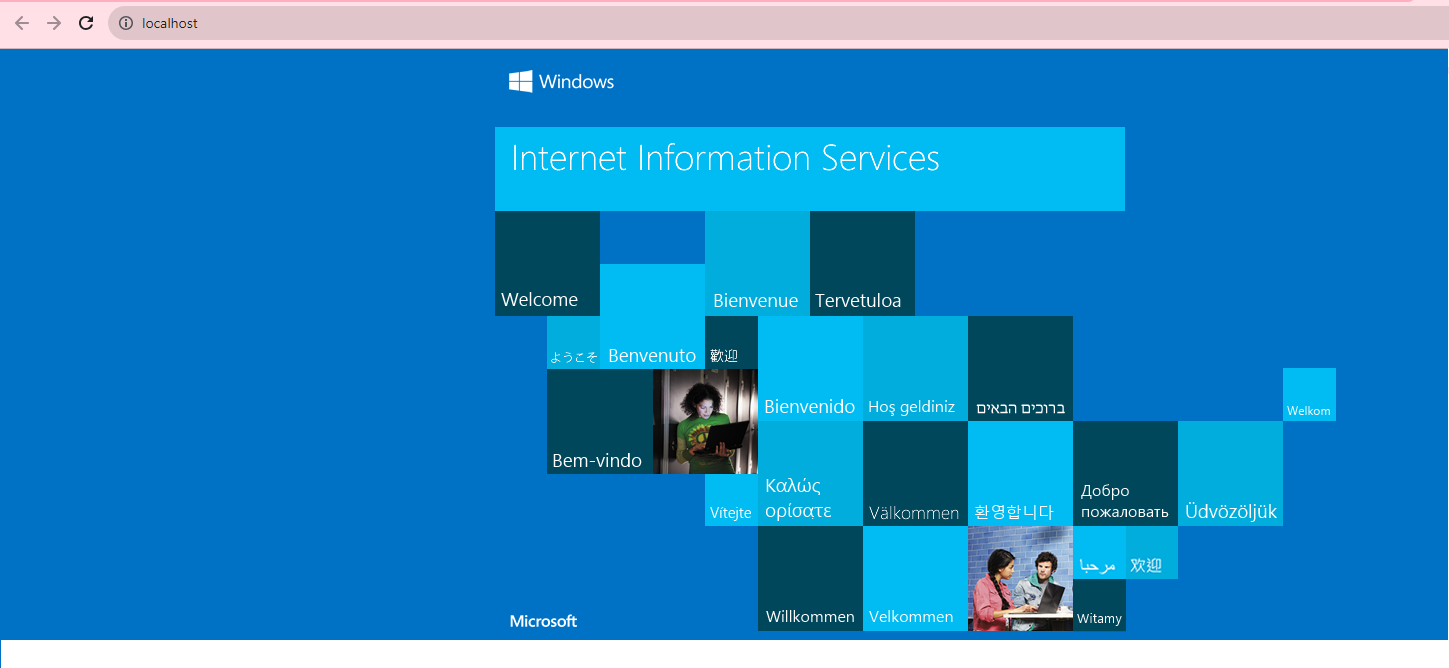
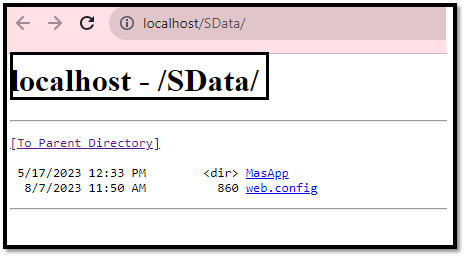
- Click on Browse*:80(http) to test whether the localhost is working properly. This window should be opened.
- Navigate to the SSL Settings and click on binding.
- Click on add button and set the values.
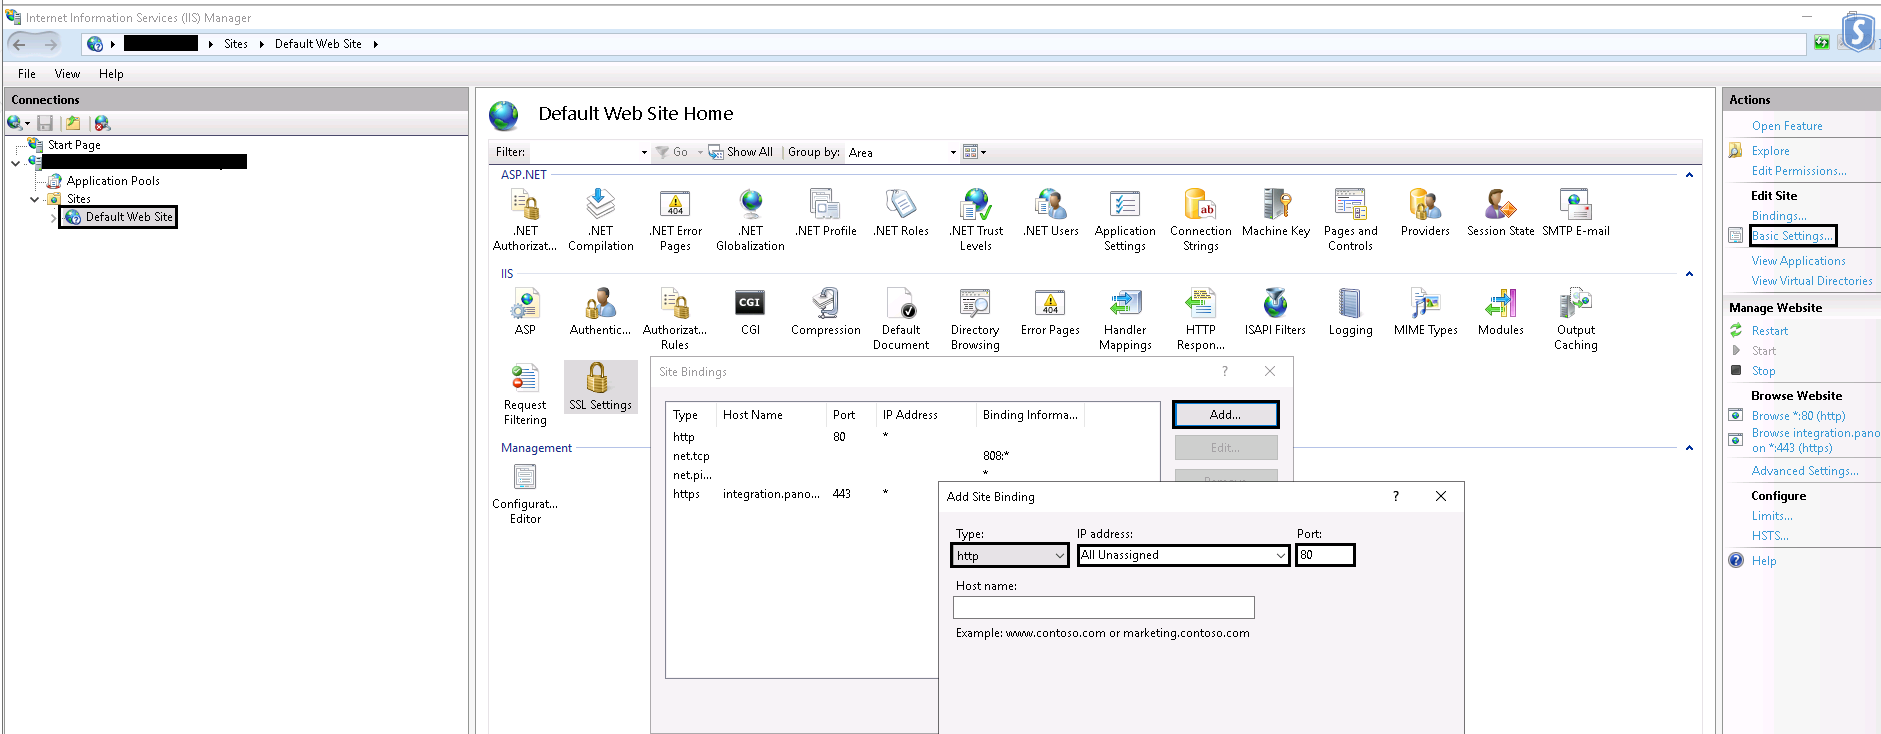
- Click on Ok button and close the window.
-> SData Settings
- Navigate to SData and click on basic setting.
- Click on Connect as button and set user as Application User by clicking on checkbox and click on ok.
- Click on Testing Setting to verify the connection is successful.
- Click again ok button.
- Click on Authentication and click edit against the anonymous authentication and set user as an Application pool identity.

- Click on Advanced setting and set user as an Application User Physical Path Credentials.
- Click on Browse*:80(http) to test whether the localhost is working properly.
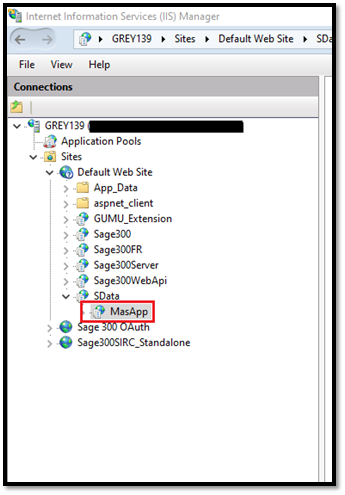
-> MasApp Settings
- Navigate to MasApp under SData and click on basic setting.
- Click on Connect as button and set user as Application User by clicking on checkbox and click on ok.
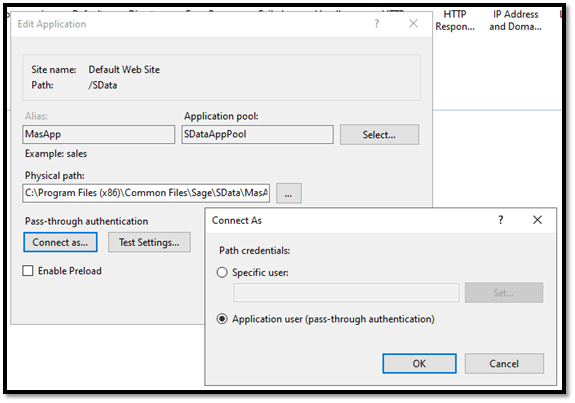
- Click on Testing Setting to verify the connection is successful.

- Click the OK button again.
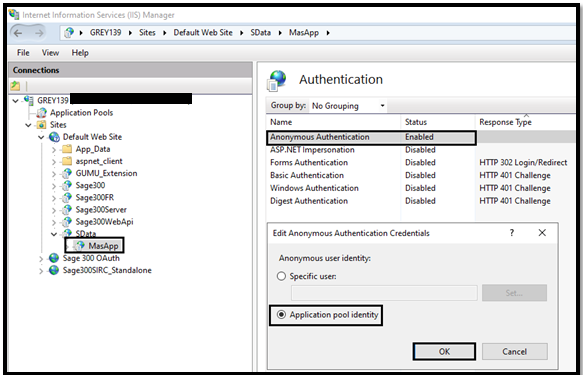
- Click on Authentication and click edit against the anonymous authentication and set the user as an Application pool identity.
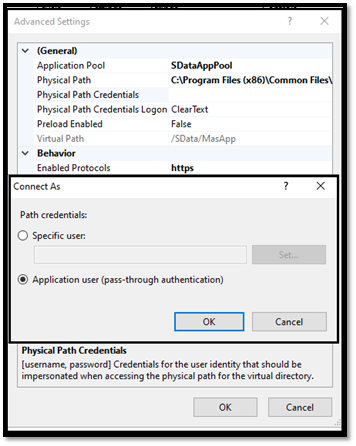
- Click on Advanced setting and set user as an Application User in Physical Path Credentials.
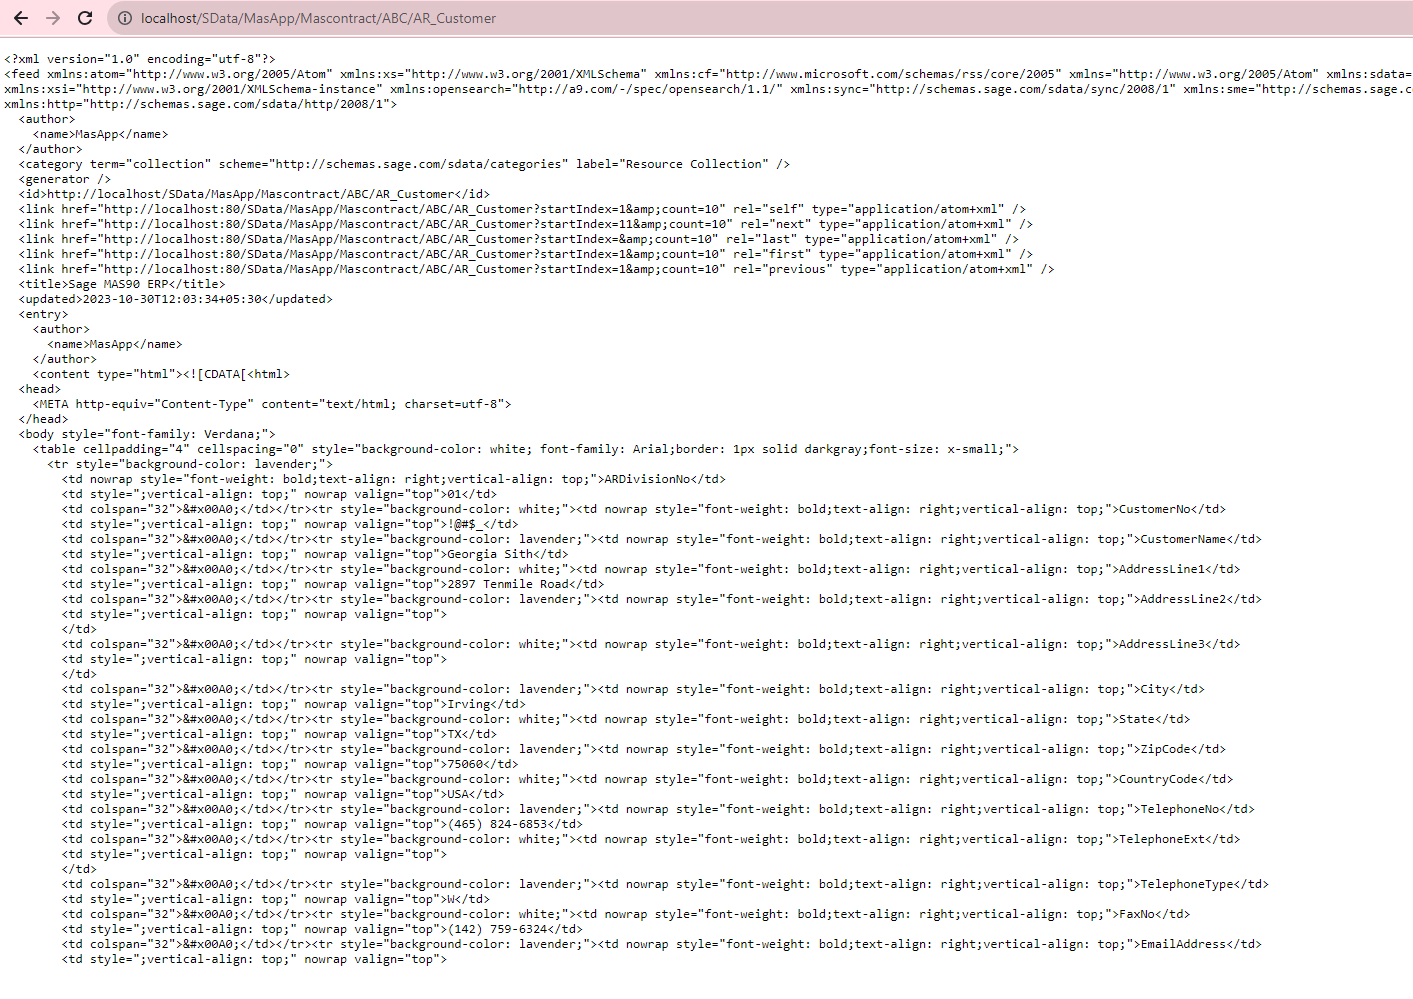
- Click on Browse*:80(http) to test whether the localhost is working properly.
By following the above blog instructions, you will be able to set the usage of “SData settings in IIS Default Configuration”. If you still have queries or any related problems, don’t hesitate to contact us at salesforce@greytrix.com. More details about the Product are available on our website and Salesforce AppExchange.
We hope you find this blog resourceful and helpful. However, if you still have concerns and need more help, please get in touch with us at salesforce@greytrix.com.
About Us
Greytrix – a globally recognized and one of the oldest Sage Development Partner and a Salesforce Product development partner offers a wide variety of integration products and services to the end users as well as to the Partners and Sage PSG across the globe. We offer Consultation, Configuration, Training and support services in out-of-the-box functionality as well as customizations to incorporate custom business rules and functionalities that require apex code incorporation into the Salesforce platform.
Greytrix has some unique solutions for Cloud CRM such as Salesforce Sage integration for Sage X3, Sage 100 and Sage 300 (Sage Accpac). We also offer best-in-class Cloud CRM Salesforce customization and development services along with services such as Salesforce Data Migration, Integrated App development, Custom App development and Technical Support business partners and end users. Salesforce Cloud CRM integration offered by Greytrix works with Lightning web components and supports standard opportunity workflow. Greytrix GUMU™ integration for Sage ERP – Salesforce is a 5-star rated app listed on Salesforce AppExchange.
The GUMU™ Cloud framework by Greytrix forms the backbone of cloud integrations that are managed in real-time for processing and execution of application programs at the click of a button.
For more information on our Salesforce products and services, contact us at salesforce@greytrix.com. We will be glad to assist you.
Related Post