In Sage X3, whenever we do any change on transaction screens like order, shipment, receipts or any other screens, we need to validate Entry Transaction. But, we may come across a scenario where user wants the modifications to behave differently depending on the transaction selections.
For e.g., A customized field on Sales Order is to be enterable in transaction ALL but, to be displayed in another transaction ZALL. If we do so and later, user wants the Customer field input set to be as displayed in ALL transaction then performing the modifications on SO screen again, takes significant time. We can avoid these steps by using entry transaction screen.
Perform following steps to achieve the same:
Steps:
- Navigate to: Setup > Sales > Entry Transactions > Order
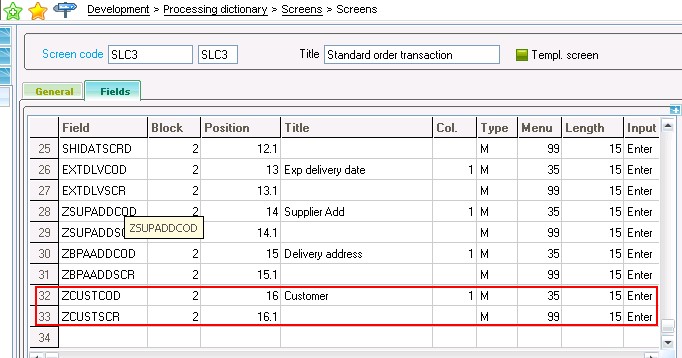
- Navigate to: Development > Processing dictionary > Screens > Screens
- Add field on Entry Transaction screen. Refer the screenshot below for the same:
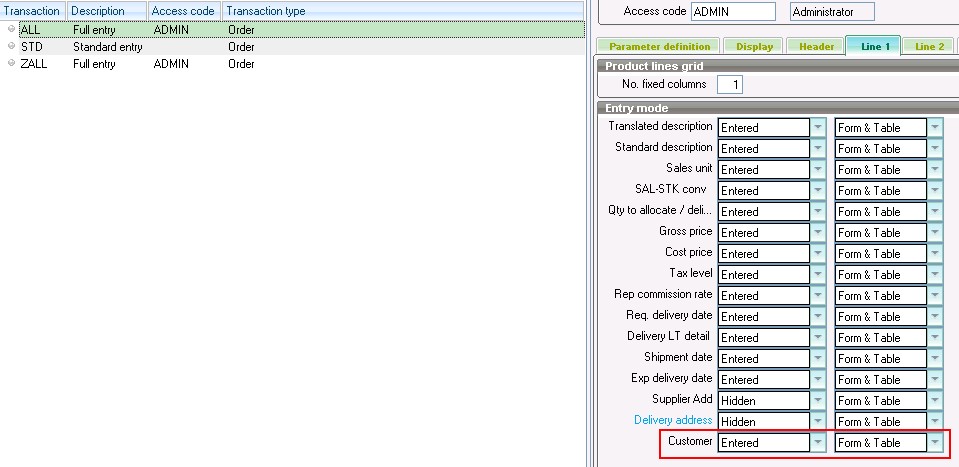
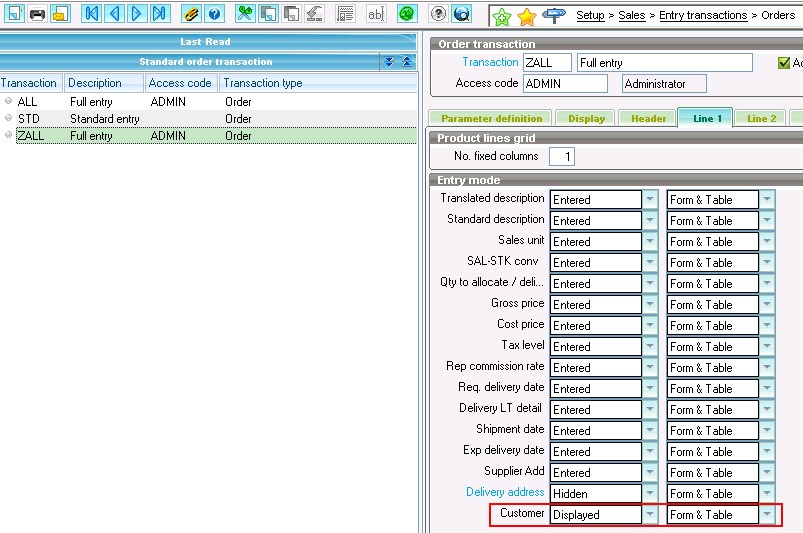
 4. Set the values of Input (Entry/Displayed/Hidden) and Mode (Form/Table/Form & Table) as per requirement.
Refer the below screenshot for the same.
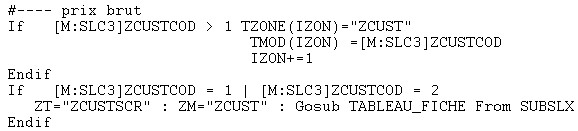
5. Refer following snippet of code to make this functionality work:
6.Perform Entry Transaction validation.
