Case: There are General ledger Accounts in Sage (Accpac) 300 ERP, which might no longer be required for future use. We want to delete them but can’t do it, as there are historical transactions posted against it. In such case, we don’t want to allow user to use or post transactions on it. Also, we want to restrict user from using those GL Accounts for other departments. They should have access only to limited accounts of General Ledger. How we can achieve it?
Solution:
There are three ways to restrict user from posting or using such Accounts in Sage 300 ERP;
1. Make GL Accounts as Inactive:
In this option, User just need to set status of GL Account as Inactive as shown in below screenshot. Inactive GL Account will neither be available to use anywhere in Sage 300 nor it will be available for posting transactions against it. It’s the easiest way to restrict users from using any Account in Sage 300 ERP.
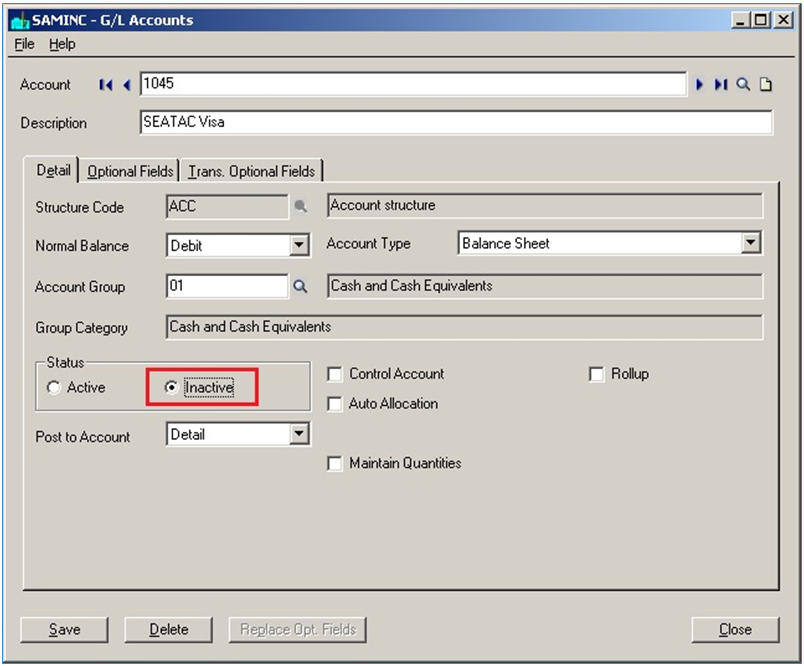
This feature is applicable when user wants to block GL Account for every user of Sage 300 ERP.
2. Set ‘Post to Account’ as Prohibited:
As shown in below screenshot, set status of ‘Post to Account’ as ‘Prohibited’. After that, it would be available for use in accounting but would not allow posting against it.

3. General Ledger Security:
Another exciting option is to restrict the specific user from using GL Accounts is GL Security. Suppose Account manager wants to restrict Sales Department users from using GL Accounts of other departments. He wants to allow them to use only those GL Accounts, which has been defined for sales department. In such cases, GL security plays a major role in Sage 300 ERP. It will allow user to access only those GL Accounts which has been assigned to them.
Follow the below procedure to attain the GL Account security;
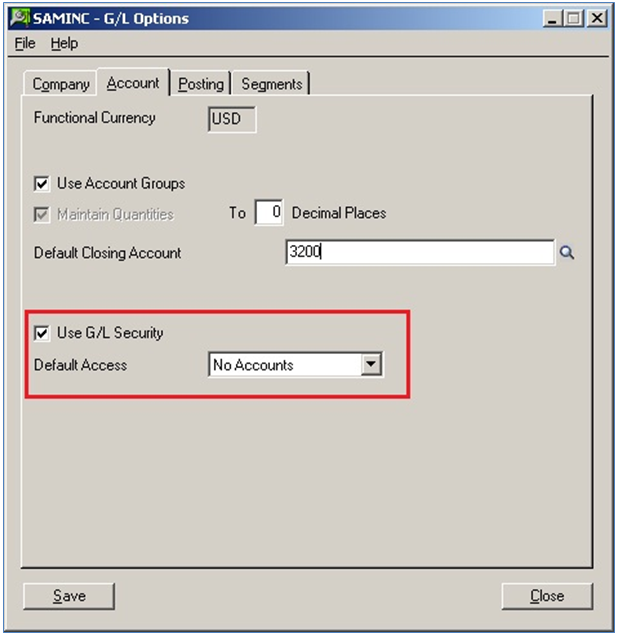
1. Navigate to General Ledger>>G/L Setup>>Options>>Account Tab and check option GL Security.
2. Once it gets checked, the Default Access option will be available with values in dropdown as ‘No Account’ and ‘All Account’. Select option ‘No Account’ as shown in below screenshot. Save the option screen and reopen Sage 300 Company.
3. A New screen\form will be available in Sage 300 at, General Ledger>>G/L Accounts>> Account Permissions. Open the screen and you will notice that screen contains input option for User ID as shown in below screenshot.
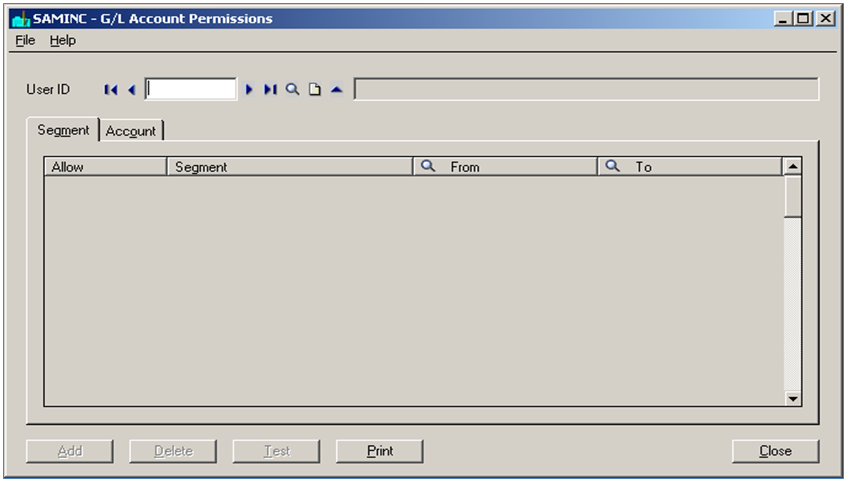
4. There are two options to set access for GL Accounts;
a) Segment: In this option, you can select segment and their relative segment codes which has been declared in General ledger segments codes.
b) Account: Select User Id to assign the range of GL Accounts to the selected user. Set Allow as ‘Yes’ and select the “From” and “To” range of Accounts as shown in below screenshot.
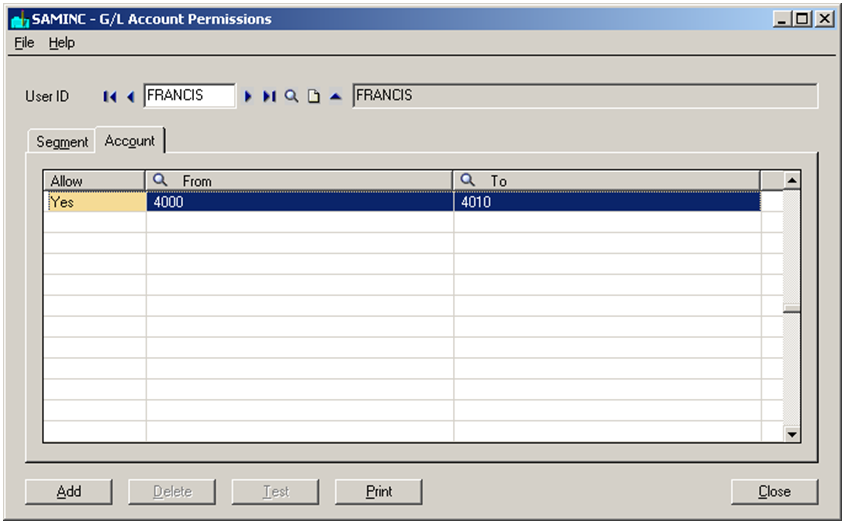
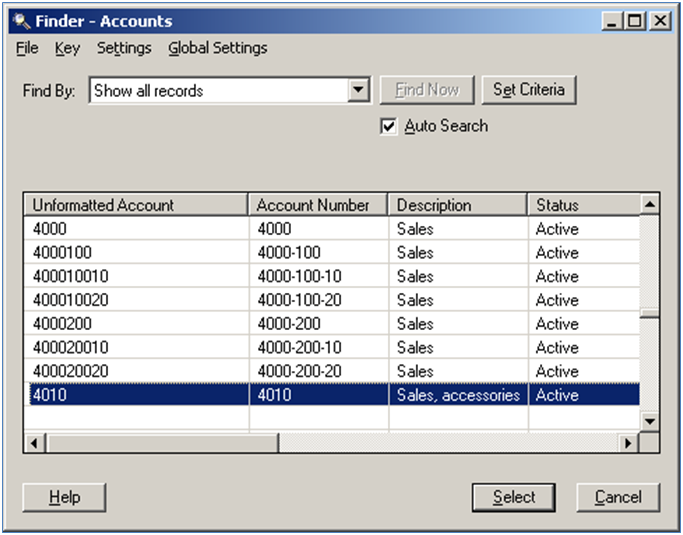
As per requirements, we have selected an User and assigned the GL Account which belongs to Sales. So the domain user ‘FRANCIS’ will have access only to GL Accounts ‘4000’ to ‘4010.
5. Now login as domain user and check the available GL Accounts for him to use in Sage 300. Check the below screenshot of GL Account Finder from general ledger which contains only assigned list of Account available in window.
With these options, Sage 300 Administrator could assign appropriate rights to users, so they can only access those accounts of general Ledger, which are assigned to them in Sage 300 ERP.