Many a times, Sage 300 (formerly known as Sage Accpac ERP) User come across a situation, where they want to propagate the optional field value directly from an entry (Invoice, payment….) to GL Entry after posting the same.
Let’s take an example of AR Module to know how optional fields get propagate to GL Entry.
We would be using below given value to move optional field at transaction details of General Ledger Batch entry for Account from AR Entry.
Thus, follow below given steps;
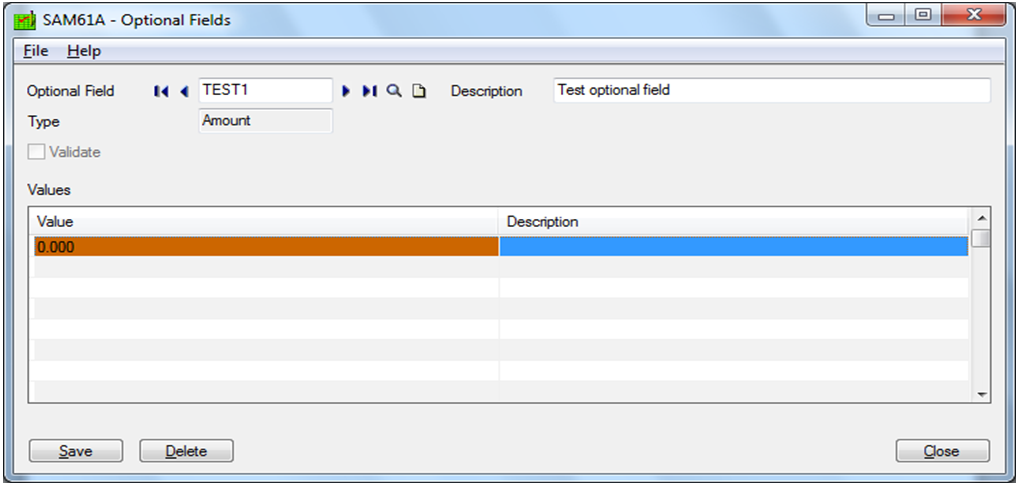
1. Create optional field, Say Test1 in Common services >> Optional field.
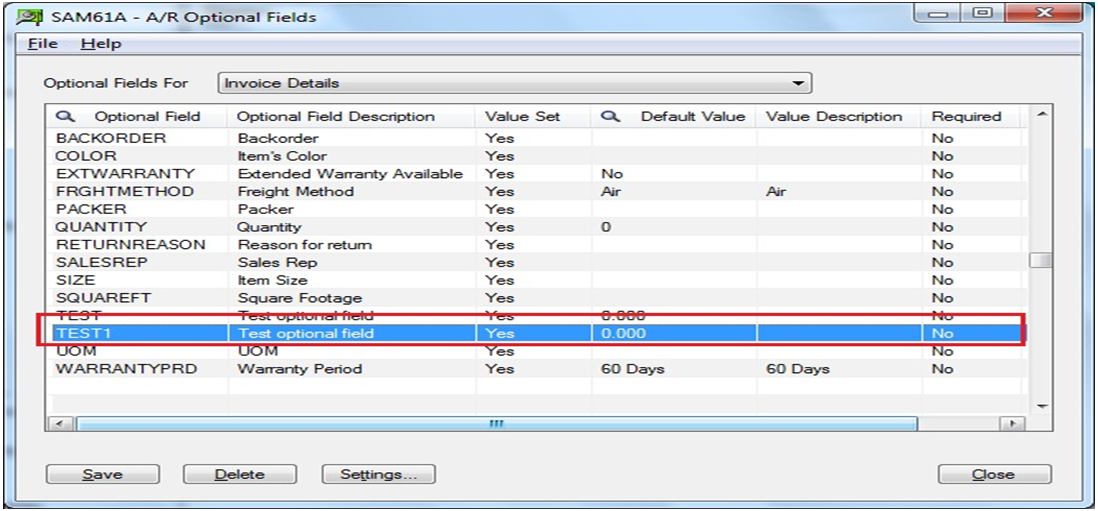
2. Navigate to Account Receivable Module >> A/R Setup >> Optional field and add Test1 to Invoice details.
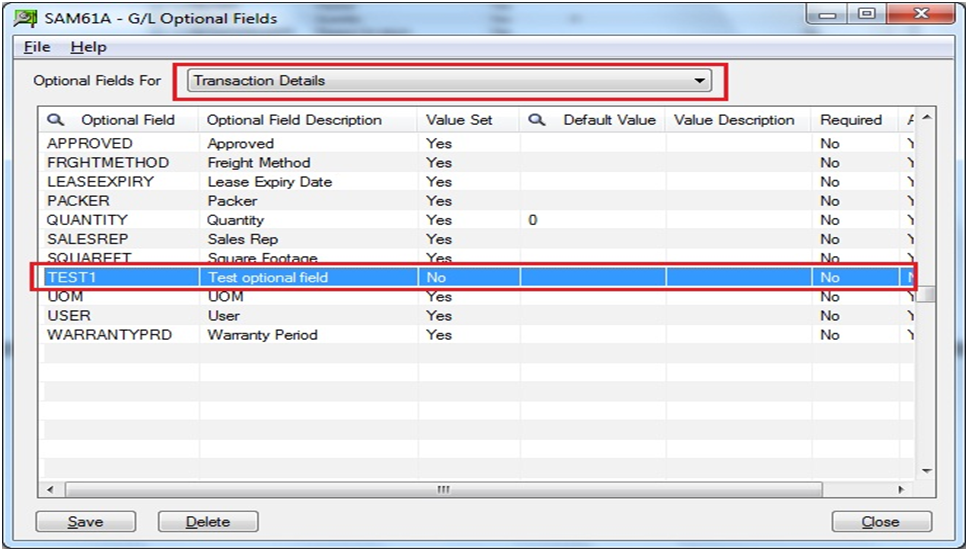
3. Then Navigate to General Ledger Module >> G/L Set Up >> Optional field and add Test1 to Transaction Details.
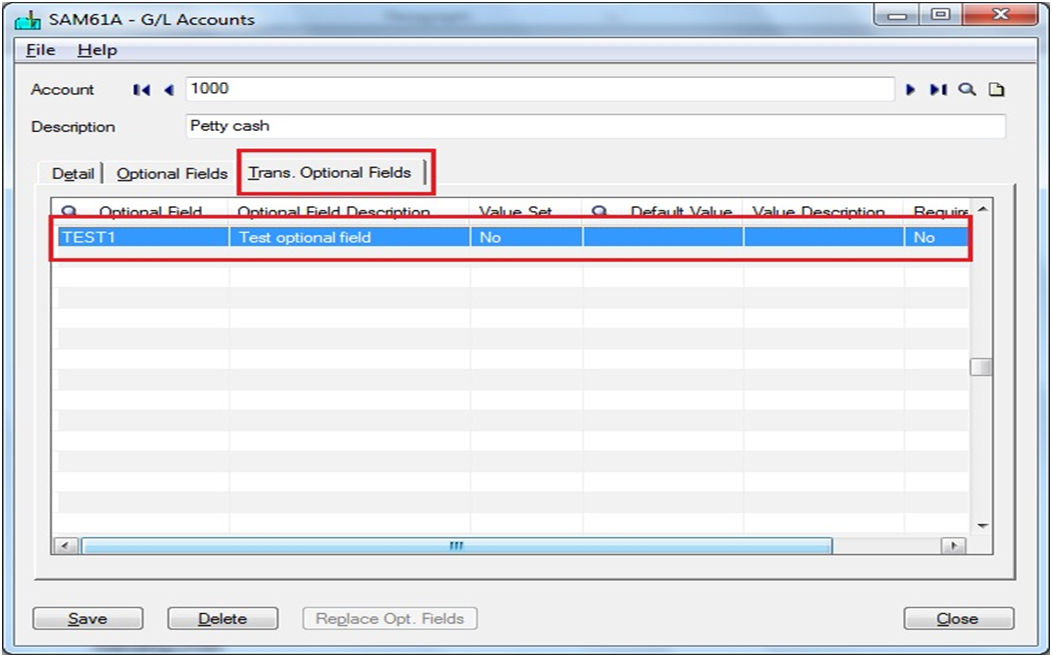
4. Also add the same optional field to GL Account at Trans.optional fields at GL Account >> Accounts >> Transaction Optional field Tab.
5. In order to check optional field value carried from Account Receivable Invoice transaction details to GL Journal Entry,
a. Create an AR Invoice.
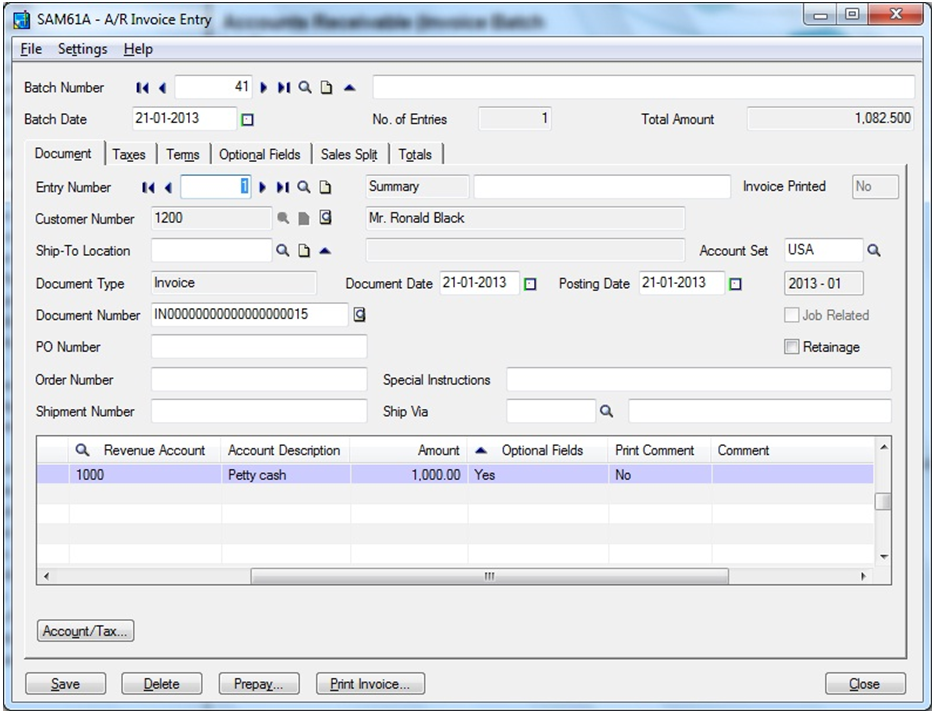
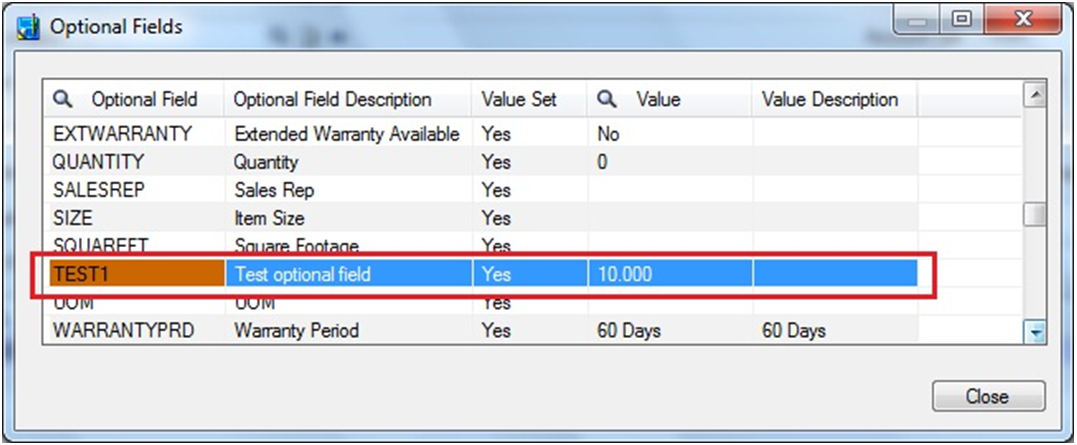
b. Set the value for optional field as TEST1 at detail line
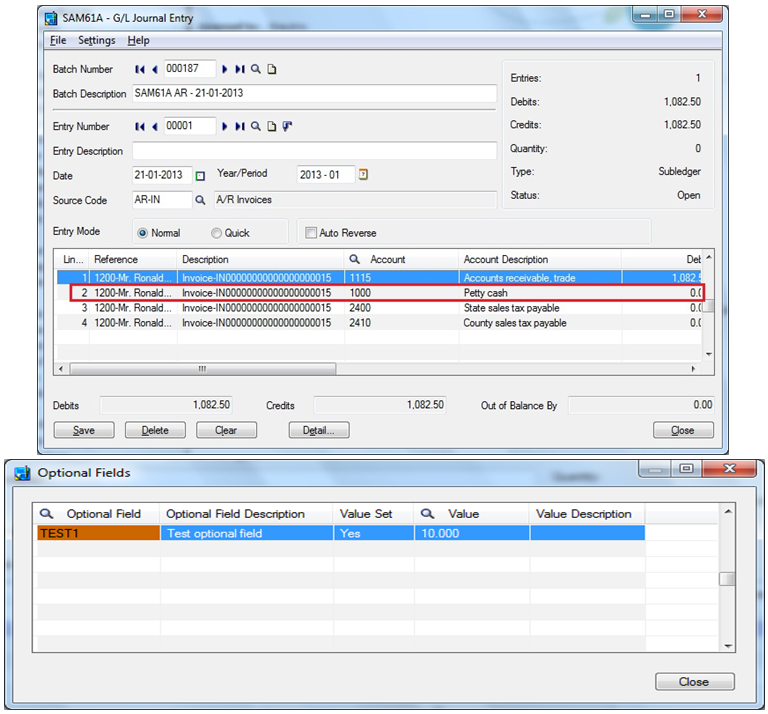
c. Post the Invoice batch and create GL batch for the same.
6. Now navigate to General Ledger >> GL Transaction >> Batch list. Check GL batch created for the Invoice and Value of optional field TEST1 for GL Account at detail line. It should be the same as that was assigned in AR invoice detail line.
You can follow above steps for propagating optional field for rest of the modules in Sage 300 ERP to GL Entry.
Note: This functionality is available in Sage 300 ERP for all the modules.