Sage 300 ERP – Tips, Tricks and Components
Greytrix is one of the oldest Sage Development Partner of two decades and Reseller of Sage 300 ERP (formerly known as Sage Accpac ERP) and has been awarded "Sage Partner of the Year" multiple times for rendering quality services for Sage product lines both as developers and resellers. Greytrix has accumulated hundreds of man years of experience in Sage 300 ERP. In these blogs, Greytrix will endeavour to share its knowledge with regards to implementation, training, customisation, components, current technology trends and help users to understand in depth techno – functional aspects of Sage 300 ERP! Contact our team at accpac@greytrix.com
Follow us on LinkedIn Follow us on Twitter Follow us on Facebook Follow us on YouTube
Skip to content
  • Home

Replace Optional Fields in GL Accounts of Sage 300 ERP

By sageaccpac | March 8, 2013
0 Comment

Sage 300 ERP (formerly Sage Accpac ERP) provides a “Replace Optional Fields” option in General Ledger Accounts to replace (copy) optional field assigned to GL Account in transaction details while creating new Account.
In this blog, we would be discussing this feature in detail;
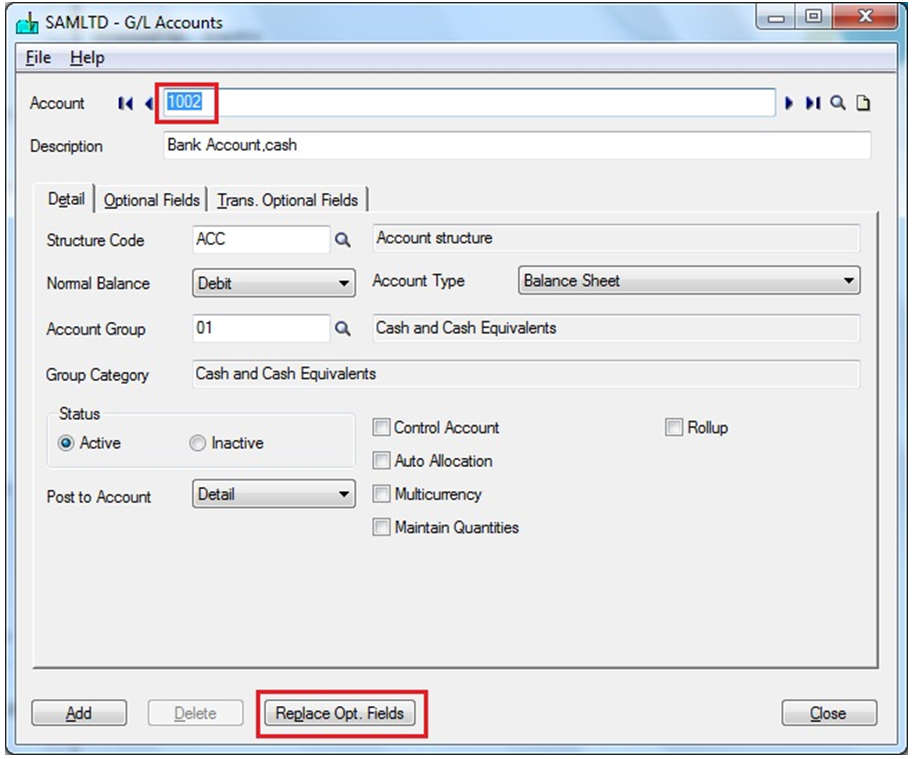
In Sage 300, to find Replace optional field Button navigate to General Ledger >> G/L Accounts >> G/L Account screen.

Its Use: Replace optional field button is used to set the same optional fields that are used for the GL account to GL Account transaction details.

For using this feature, user have to set up matching optional fields for accounts and transaction details in G/L Optional Fields. By clicking on Replace optional field Button in Sage 300 ERP, it replaces optional fields in GL Account transaction details tab with optional fields that match those used in the Accounts Optional Fields tab.

Note: If an optional account field has no matching optional transaction field in G/L Optional Fields, then that field will not be used in transaction details.

Steps to Use: Follow below mentioned steps to use Replace optional fields option;

1. First, create optional field in Common services which you want to use for G/L account as well as for G/L transaction.

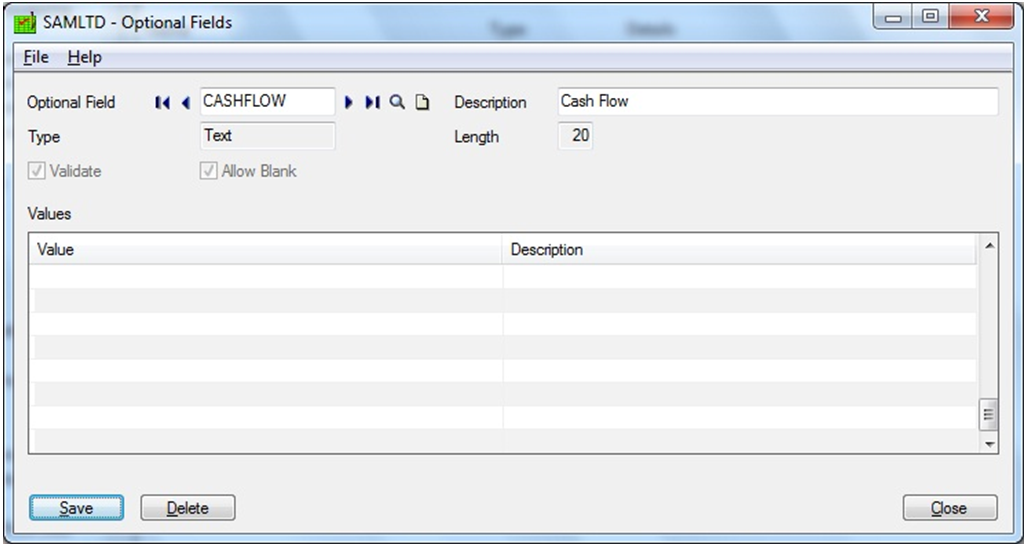
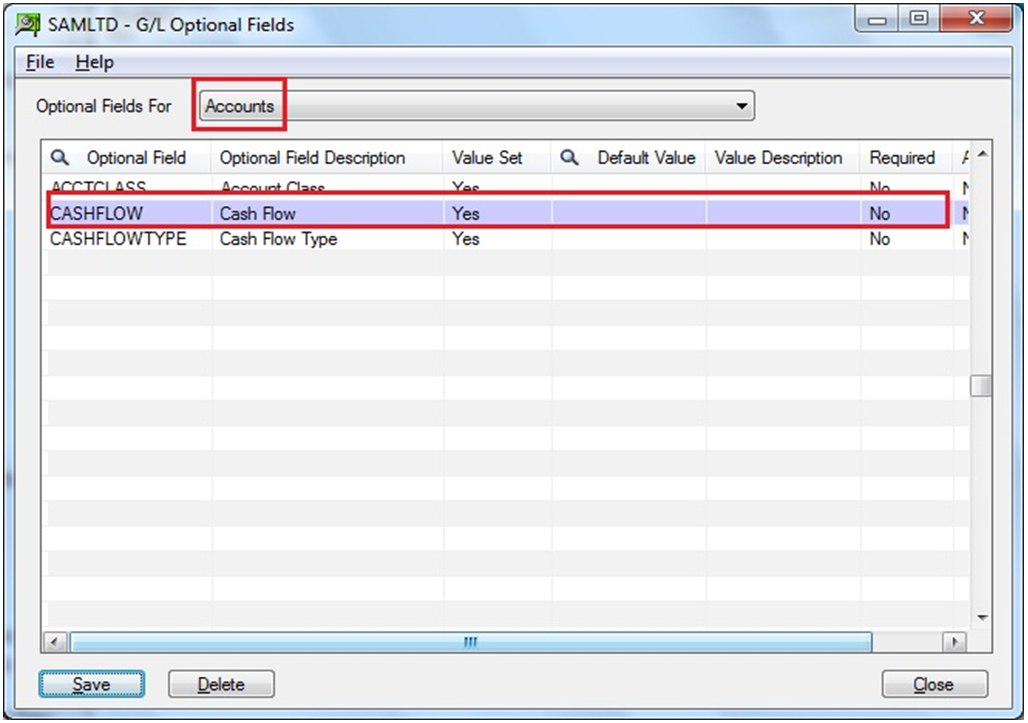
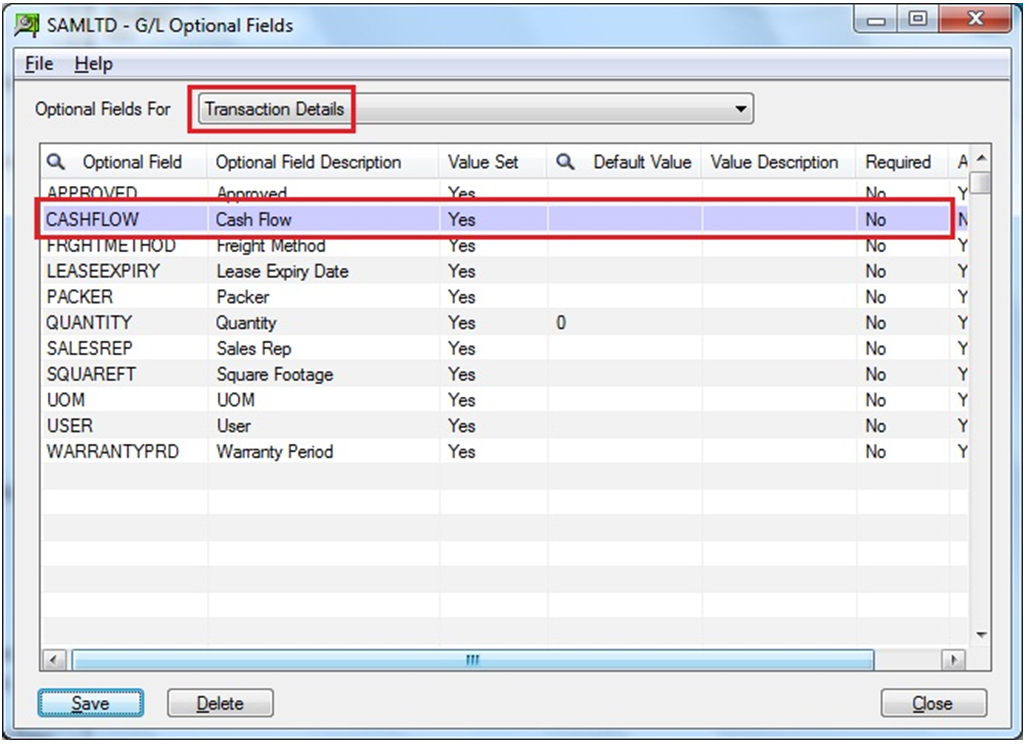
2. Assign same optional field to Accounts as well as to the Transaction Details in G/L Set up >> Optional field screen with Auto Insert field value as No.

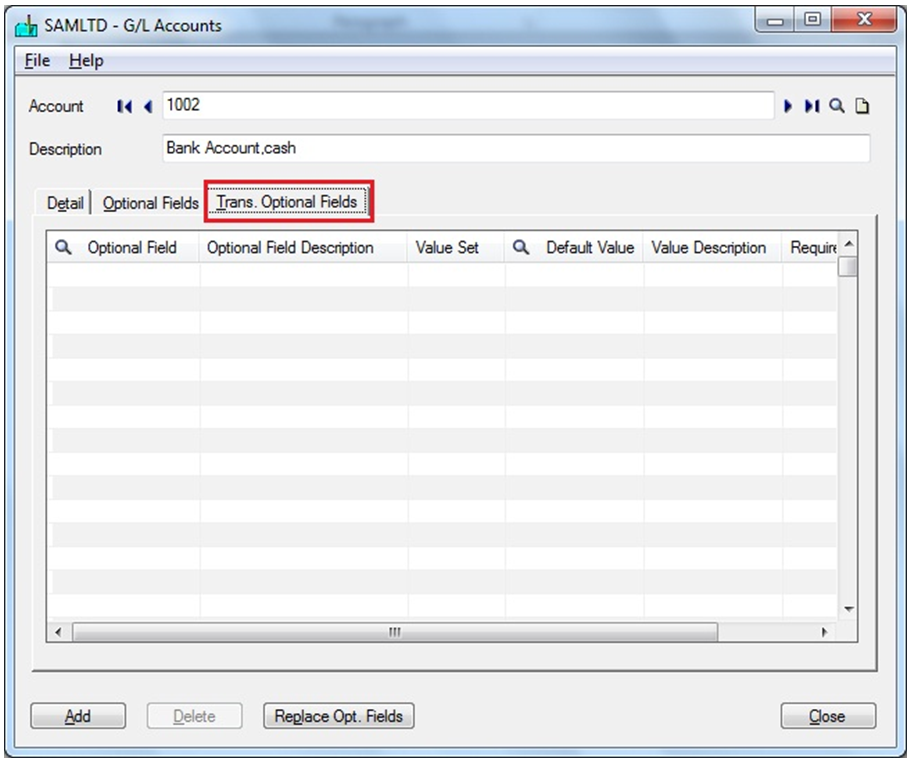
3. Now, to enable Replace Optional field Button create a new account, thus navigate to G/L Accounts >> G/L Account and create new account, Say 1002. Hence, the Replace opt Field button, would get enabled.

4. Check the Trans.Optional Fields tab before clicking on Replace Opt. Fields button.

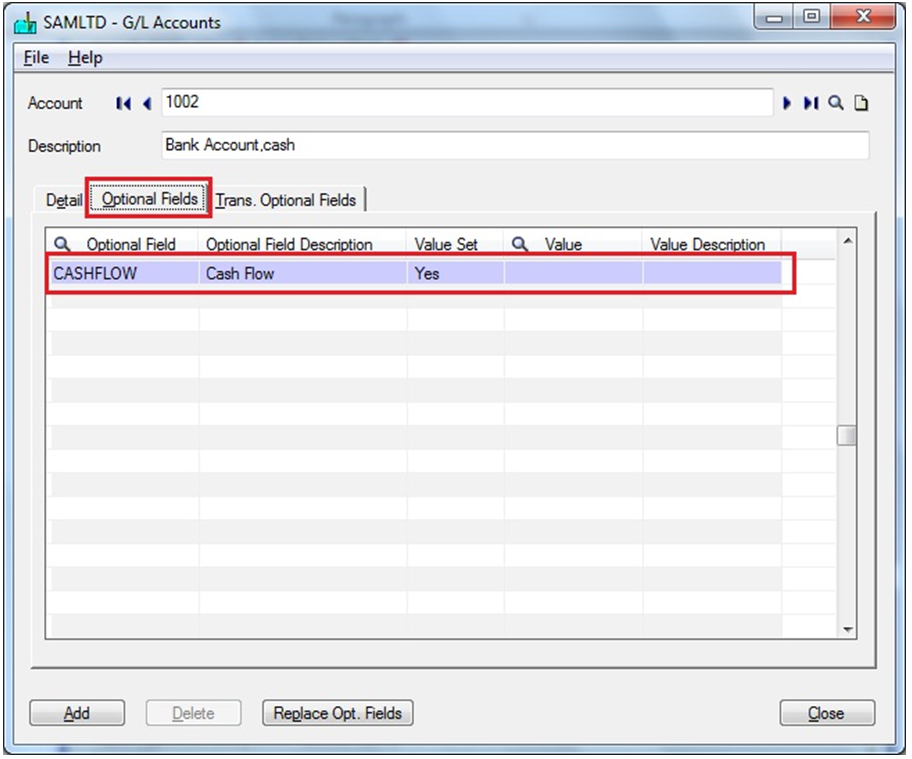
5. Insert the optional field in Optional field tab, which you want to assign for both Account and Transaction Details.

6. Click on Replace Opt. Fields button and check the optional field from Optional Field tab, as it would get replaced to Trans. Optional Field tab.

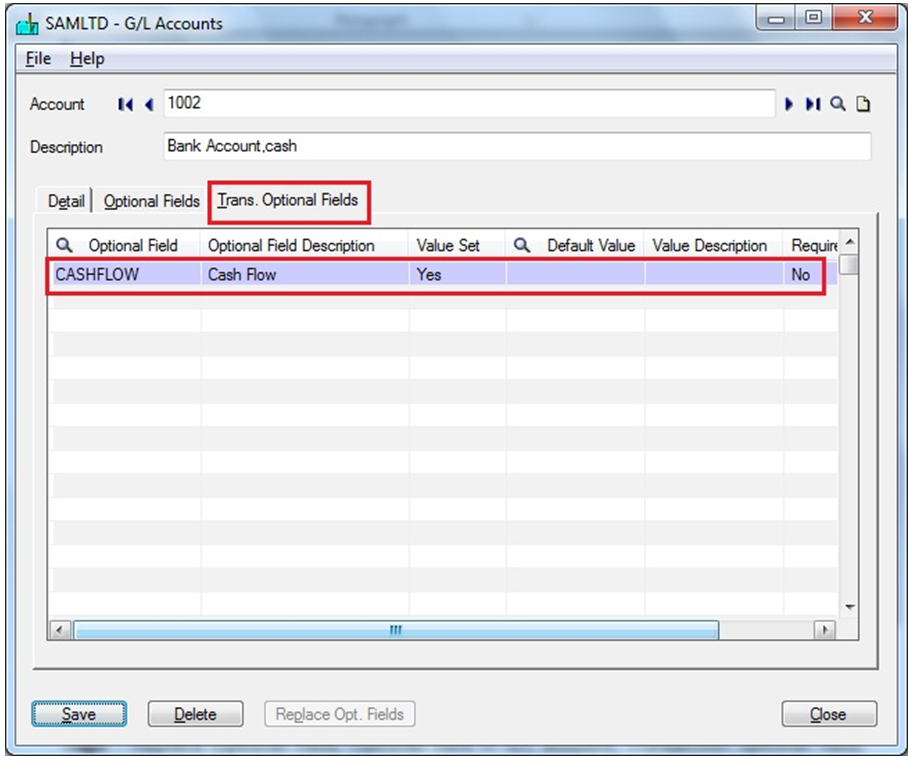
Hence, with Replace Opt. Field feature users can use same optional field for Accounts and Transaction details for new G/L Account.
Related Posts:

1. Propagating Optional Field Value from Posted AR Invoice into GL Entry in Sage 300 ERP

Related Posts

  • GL Clearing Report in Sage 300 ERP
  • Validate Optional Field in Sage 300 ERP
  • Migration of GL accounts from Sage BusinessWorks to Sage 300 ERP
Category: Sage 300 Tags: General Ledger, GL account, Optional field in GL account, Replace Optional field, Sage 300 ERP, Sage Accpac ERP, Transaction optional field
Post navigation
← Exclude Inactive Accounts option in GL Chart of Accounts Report of Sage 300 ERP Use Reverse Charge Mechanism for Service Tax in Sage 300 ERP →

Greytrix Websites and Blogs

  • Greytrix
  • Greytrix Africa
  • Greytrix Australia
  • Sage X3 – Tips, Tricks and Components
  • Sage 100 & 500 ERP Tips and Tricks
  • Sage CRM – Tips, Tricks and Components
  • Salesforce.com Tips and Tricks by Greytrix
  • Sage Intacct– Tips, Tricks and Components
sage crm and sage 300 integration

Categories

  • Sage 300
    • ACCPAC SDK
  • Sage 300 People
  • Sage 50 US
  • Sage Business Cloud
  • TDS
  • Uncategorized

Recent Posts

  • Configuring Store and Vault Database in Sage 300 v2023 PU2
  • Configuring User Settings in Sage 300 v2023 PU2
  • Empowering Security in Sage 300 v2023
  • Stock Report Batch Wise
  • Types of OE Orders in Sage 300

Archives

Awards

Greytrix Top ISV Partner
Greytrix Revenue Growth Enterprise Business
Greytrix Africa Highest Revenue
Greytrix Prtner of the Year
Greytrix Partner Award
Copyright 2023
Sage 300 ERP – Tips, Tricks and Components
Iconic One Theme | Powered by Wordpress