In our previous blog, we discussed about “Change Print Destination in Sage 300 ERP”. Now, we would discuss about the Print Destination in detail.
Sage 300 ERP (formerly Sage Accpac ERP) provides various features for Reports; users can print report, preview, export, make a file for it or can directly send report through an email. Users can also manage paper size as per their organisational needs.
Hence, follow below mentioned steps for printing reports using different destinations:
1. In Sage 300 ERP, navigate to File menu >> Print Destination or user can use bottom left hand side corner print icon to change Print Destination.

2. A standard Print screen will appear where users can select Print Destination.
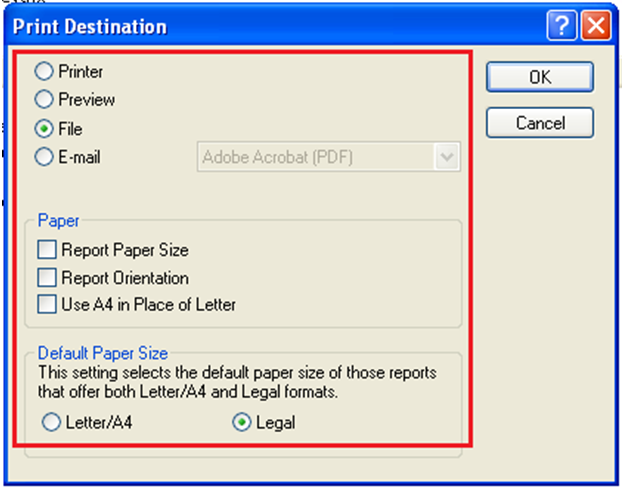
Whenever, user click on any one of the print options a screen pop-ups. Here they can set printing destination as per their requirement.
Printing Destinations:
1. Printer: You can print reports using this option. After selecting Print Destination as Printer, navigate to Purchase Order module >> PO Forms >> Purchase Order Report and Print purchase order

Click OK button and select path of Printer to Print report.
Note: Printer should be installed on your machine. It also works for printer linked to other networks.
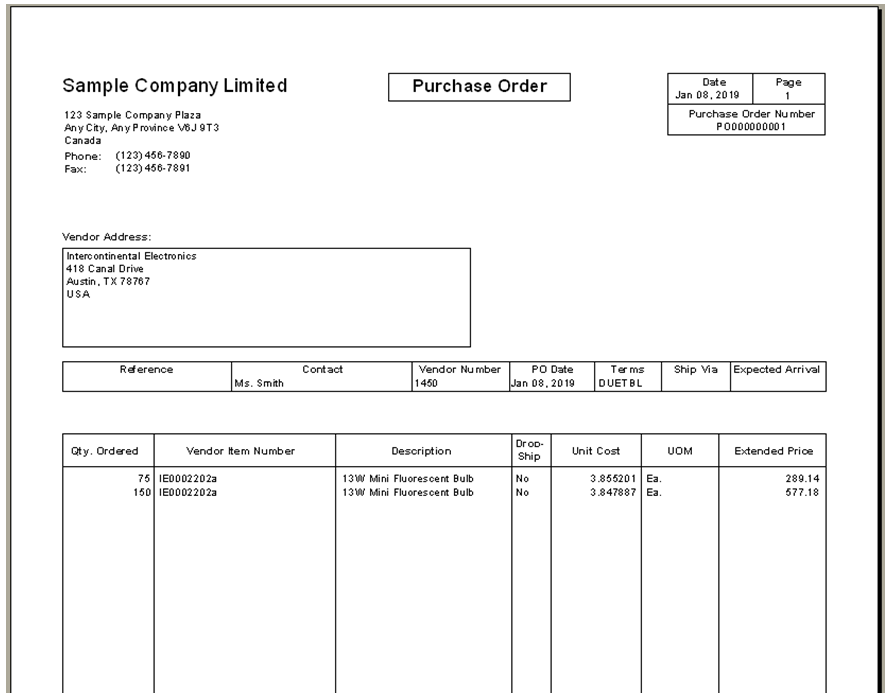
2. Preview: You can view Standard Sage 300 ERP reports using this option. Hence to view,
a. Select Preview option and navigate to Purchase Order module >> PO Forms >> Purchase Order Report and Print purchase order.
b. You can view Sage 300 ERP’s standard report as shown below
Also Read: Email Standard Order Entry Invoice Report in PDF or RTF Format
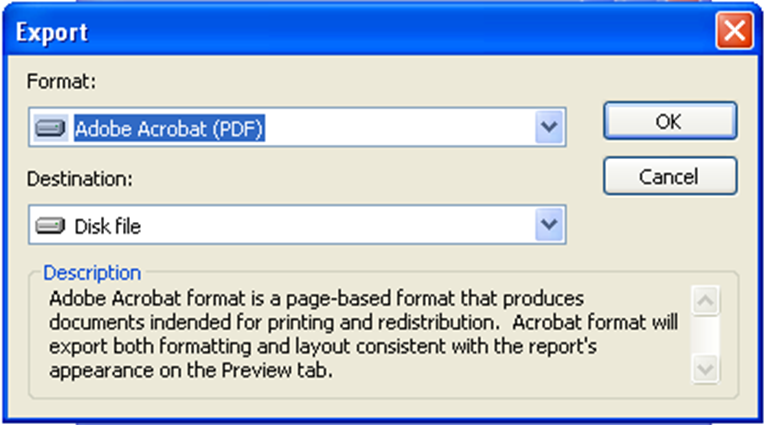
3. File: Here you can view report in any file format provided by Sage 300 ERP. Hence,
a. Select File option and navigate to Purchase Order module >> PO Forms >> Purchase Order Report and Print purchase order
b. Here you can export a report at path you want and in formats specified. Eg. Adobe Acrobat (PDF), Microsoft Excel 97-2000(XLS), etc.
c. You have option to select Destination for file, where you want to export the report
4. Email: Using this option, report can be email as an attachment provided you have Microsoft Outlook configured. As a result, to send report as an attachment,
a. Select File option and navigate to Purchase Order module >> PO Forms >> Purchase Order Report and Print purchase order
b. You can email report in either PDF format or Rich Text format.
c. Once selected report is attached directly to the Outlook as per the file format selected.
Note: Microsoft Outlook should be installed proper on your system for using this functionality.
The above explained is just an example given for printing Purchase Order; you can use these functionalities for almost all modules in Sage 300 ERP as this is an Inbuilt functionality. These features are reliable and flexible, also it is provided in all editions of Sage 300 ERP. It also works if you have added any customisations in Sage 300 ERP.