The intent of this blog is to help you in making advance payment in Sage 300 ERP with all possible scenarios. Here, in Sage 300 ERP, we call this advance payment as Prepayment and this prepayment can be done in both Account Payable and Account Receivable Modules. But at this moment we will be considering the Prepayment to a vendor only.
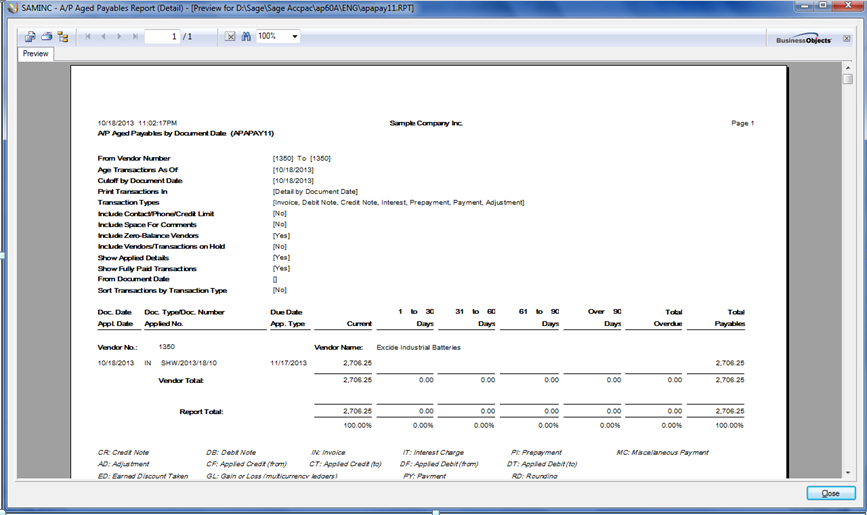
Let’s consider a case where we need to do an advance payment of Rs. 800 to a vendor against whom we already have one open invoice. Now, before creating prepayment entry we are printing following two reports just to check the effects of Prepayment entry before and after its posting:
The New One: G/L Segment Code Vs. G/L Optional Fields
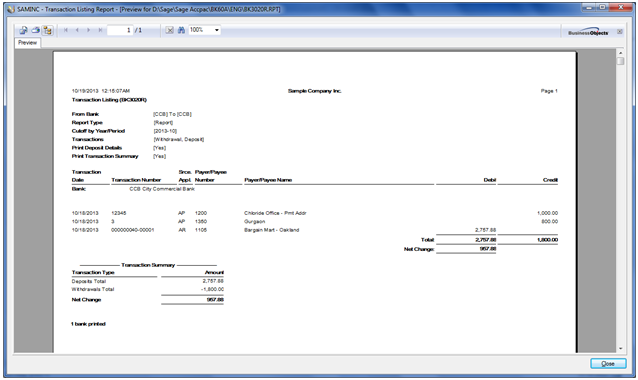
- The Transaction Listing Report of the bank which you are going to use at the time of creating Prepayment entry.

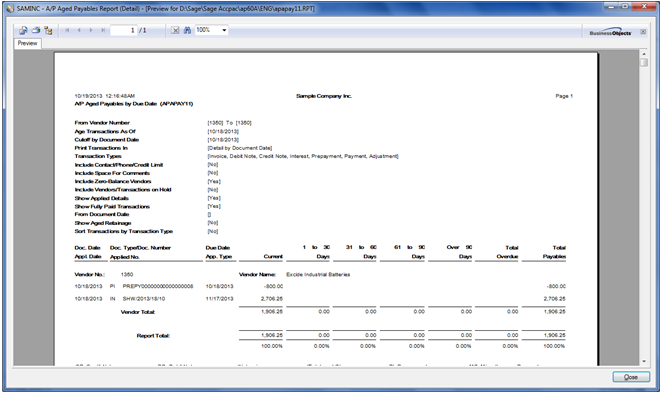
- The Aged Payable Report for the vendor to whom you are going to do the advance payment.
————————————————————————————————————————————
Tips and Tricks for Sage ERP X3… Greytrix Sage ERP X3 Blog
————————————————————————————————————————————
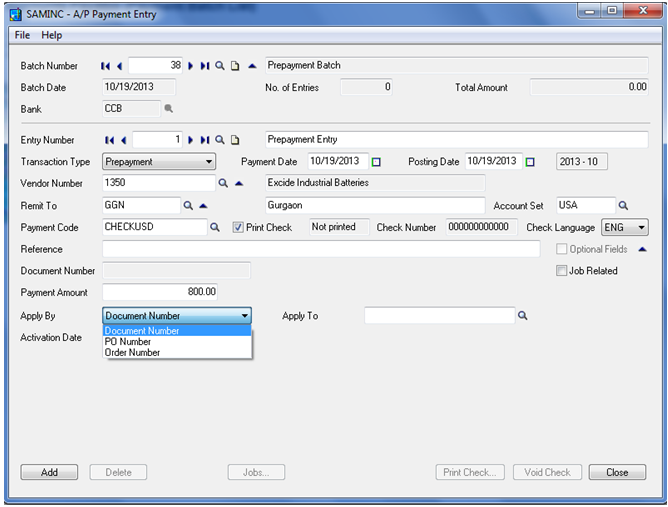
To issue prepayment, open Payment Entry form under A/P Transactions of Account Payable Module and follow the steps given below:
- Enter required bank code and Vendor number with all other details in prepayment screen.
- Select Transaction type as Prepayment and remit to location where you want to send payment to vendor.
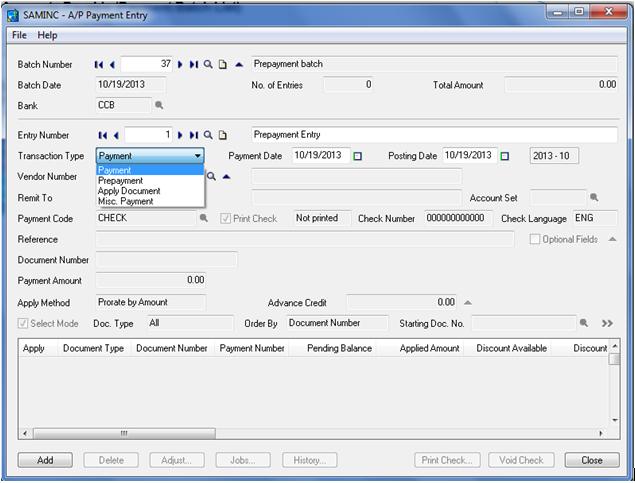
- Enter Prepayment amount which you want to pay in advance in Payment Amount field.
- Select Payment code defined in masters.
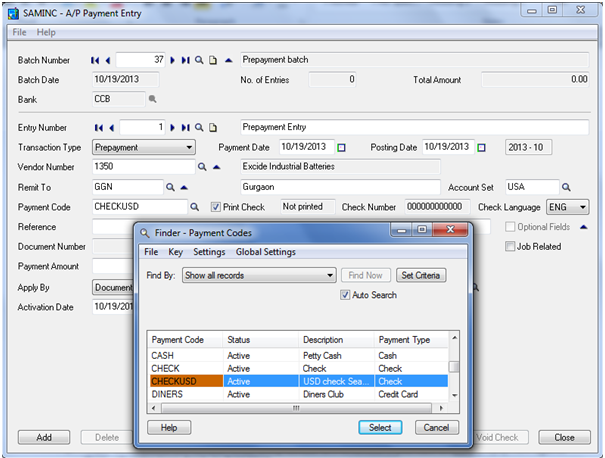
- If you select a code that uses a Check payment type, fill in the following fields:
- Print Check – mark the checkbox if you have check printing configured in system
- Check Number
- Check Language
- If you select a code that uses a Cash payment type, enter the cash account from which to disburse the payment. If you do not enter a cash account, Accounts Payable credits the bank account.
Then, select Apply By as Document number, Order Entry number or PO number if you want to apply prepayment against any of them and accordingly select their transaction number in Apply To, otherwise keep Apply to field blank which will reduce the payable amount against selected vendor but does not knock off any balance from existing open documents.
Lastly, add and post the transaction to get its effect in Bank and Vendor’s account.
Now, it’s time to check out the effects of created Prepayment entry in our Sage 300 ERP system. To do this let’s print Bank’s Transaction Listing report and vendor’s Aged payable:
The Transaction Listing Report of the bank which shows Bank is credited by the amount entered in Prepayment Entry.
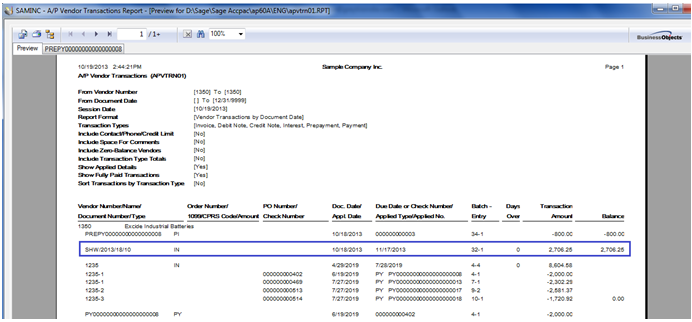
The Aged Payable Report for the vendor which shows vendor’s account is debited by prepayment amount
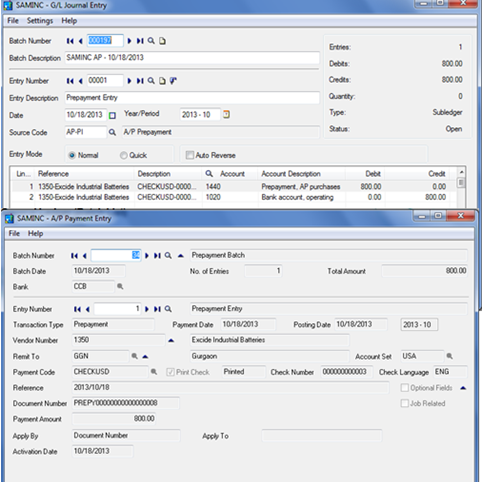
To see mentioned effects in one screen move to General Ledger’s Batch list and open the GL batch which is created during Prepayment posting:
Since we did not apply this prepayment against any open documents, it will appear under the open documents in Transaction Listing. If the document is applied against the said invoice, the transaction listing report would not display the Invoice and Prepayment under open documents but will appear only if show applied documents and fully paid transactions check-boxes.
Hence, with Sage 300 ERP we can create Advance Payments with every possible scenario like different Payment Mode and Apply Document.
Here we saw how to create prepayments (advance payments) to vendors using Sage 300 ERP. We would soon write about how to create AR Prepayments using Sage 300 ERP.
Also Read:
1. Print Customer Statements in Sage 300 ERP
2. Generate Reports for Slow Moving Items in Sage 300 ERP
3. Customer Transaction and Aged Trial Balance Report in Sage 300 ERP
4. Account Receivable Transaction Reports in Sage 300 ERP