In Sage 300 ERP, We have reports under PW Module, which are standard reports that provide basic information related to the transactions. Basically, existing reports carry the minimum required information and do not allow the users to have detailed knowledge. We have therefore introduced a new report to print transactions that are carried out in Requisition Screen of PW Module of Sage 300 ERP. This report will print the detailed information about every requisition (can be customized) along with some Auto selection of the segments required in Requisitions that will help save manual work of the Users in Organization.
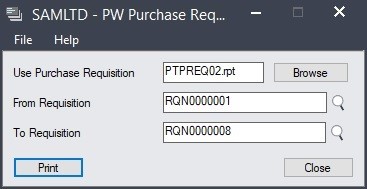
The User Interface of the Report will be as below:

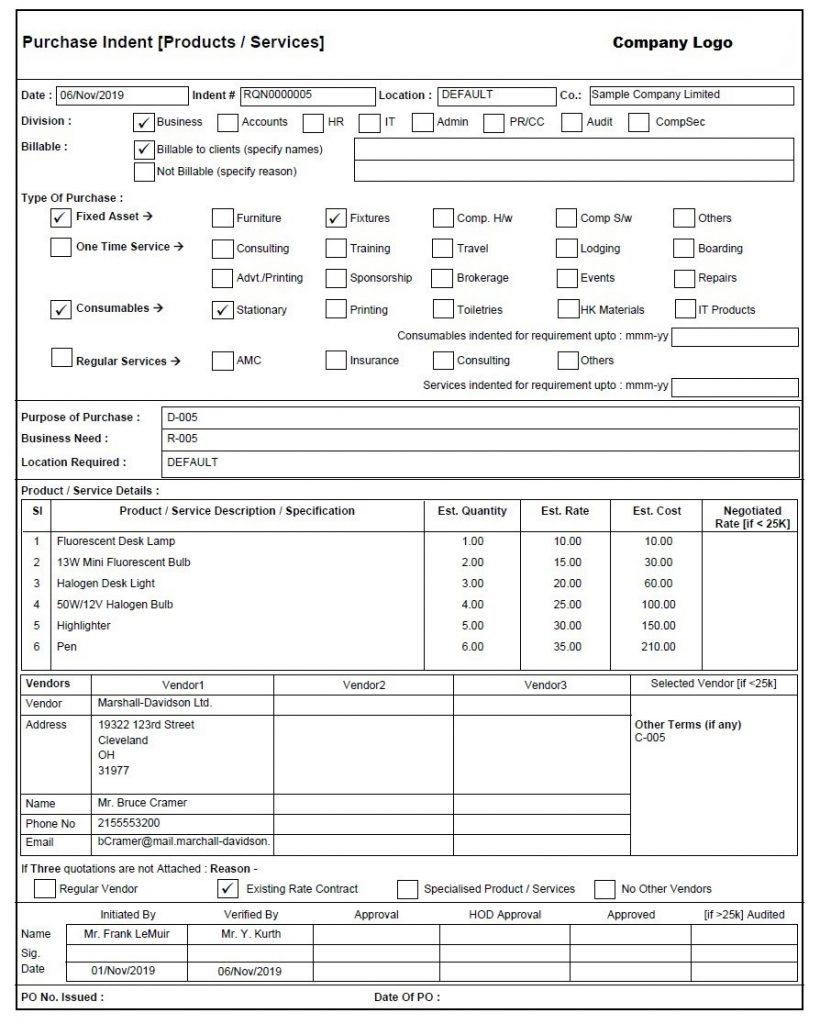
The Information Printed on report will contain data as follows: This data can be customized according to requirement.
- Requisition Date, Requisition Number, Location and Company name.
- Description, Reference and comments.
- Header level Optional Fields.
- Item Number & its Description, Quantity, Cost, Rate, etc.
- Detail level Optional fields.
- Vendor Details such as Vendor Name, Address, Contact No, Email Id, etc.
- Requester, Level 1 Approver, Level 2 Approver, Level 3 Approver & Level 4 Approver and its Name & Approval Date.
After selecting desired range of Requisition number the report will print as follows:

The main feature of this report is the Auto checked Check-box functionality. The user does not need to manually tick the check boxes after printing the report. This functionality is handled by using Optional fields and its values that will be defined in the requisition Entry. The Optional field that will be created will contain workflow name in its value and description will contain data as per the requirement.
Lets have a look at below example to understand how this functionality of Auto checking the check-boxes will work.
In this example, we will consider the ‘Division’ part of the Report. There are many options under division.
We will create an Optional field “DIVISION” and its value will be the Workflow name.

User will create a Requisition Entry. The report will determine the Workflow name and the Description. The description will determine which checkbox will be checked. For example: If user is using “PR” workflow for requisition entry then after printing the report, for “Division” section the Check-box of ‘Buisness’ will print a tick mark thus auto defining the options.

We have created all optional fields of sections which were required in the report and depending upon the value of optional field we have Auto checked the Check-boxes.

