In Sage X3 development, there are scenarios where developers need to change the screen title dynamically—either based on certain conditions or to avoid hardcoding changes through the development window. Fortunately, Sage X3 provides a way to do this through the Chgtfd instruction.
In this blog, we’ll explore how to change a screen title using the Chgtfd keyword in Sage X3, with examples and best practices.
What is Chgtfd?
The Chgtfd command in Sage X3 is used to change the title of a tab associated with a mask in a window. This is particularly helpful when:
You don’t want to change the screen title manually via the development window.
You want to display a dynamic title based on user input or specific conditions at runtime.
Syntax of Chgtfd
Chgtfd [CLASS] TITLE
Parameters:
[CLASS]: The abbreviation used for the mask. If omitted, the default mask is used.
TITLE: A string expression that represents the new title to be displayed.
Note: If you pass a blank string (“”) as the title, Sage X3 will display the default title configured in the screen design.
Example:
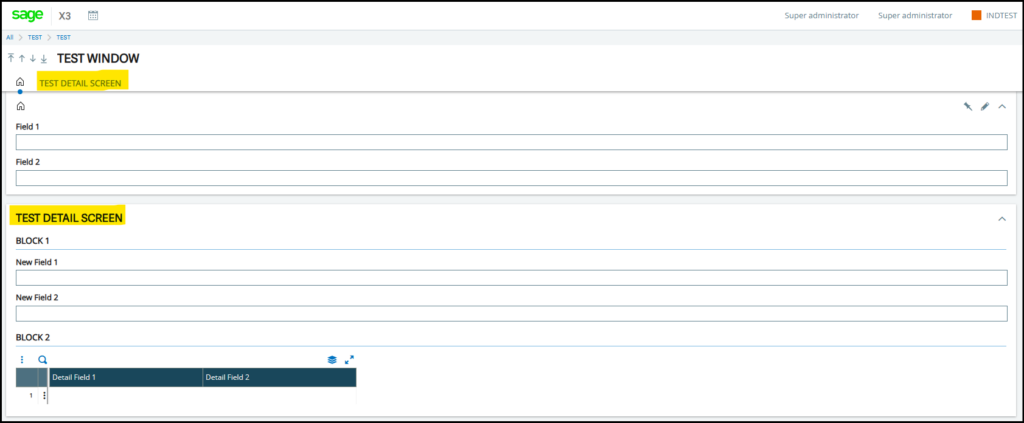
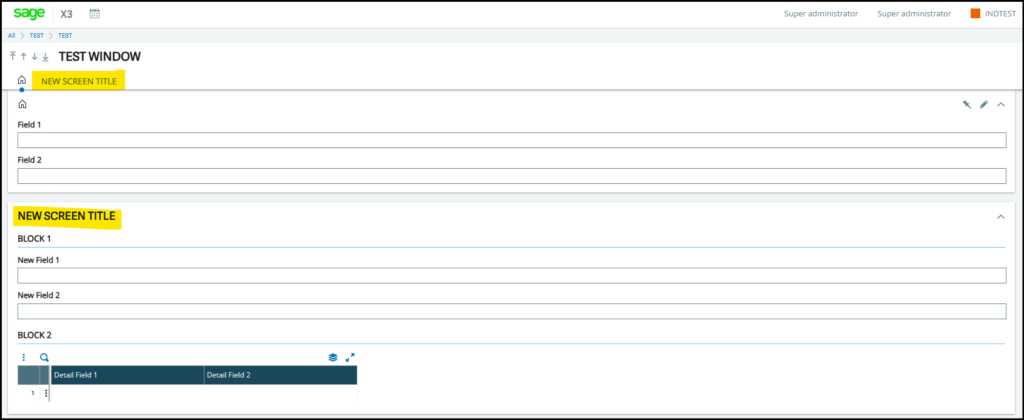
Let’s say we have a screen titled “TEST DETAIL SCREEN”, and we want to change it to “NEW SCREEN TITLE” at runtime.
Here’s how the code looks:
Chgtfd [M:ZTESTD] “NEW SCREEN TITLE”
New Stuff: Postal code customization in Customer and Supplier master in Sage X3.
Practical Use Case
Imagine you’re developing a custom screen where the title needs to reflect the type of transaction or user role. Instead of creating multiple screens or relying on static titles, you can simply write logic to update the title dynamically using Chgtfd.
If GUSER = “ADMIN”
Chgtfd [M:ZTESTD] “Admin View – Transaction Details”
Else
Chgtfd [M:ZTESTD] “User View – Transaction Details”
Endif
Final Notes:
Chgtfd is a powerful tool for dynamic UI customization in Sage X3.
Always ensure the mask abbreviation is correct to avoid runtime errors.
Avoid overusing this command unnecessarily, as too many dynamic changes can confuse users.