Sage 300 ERP provides Terms code feature which allows users to define due date, Discount rate and Period, Number of Payments in a multiple payment schedule etc.
The New Stuff: How to Use as Default option on the Bills of Material screen in Sage 300 ERP 2014
You can access the AR Terms code screen from the Menu Account Receivable>>AR Setup>>A/R Terms
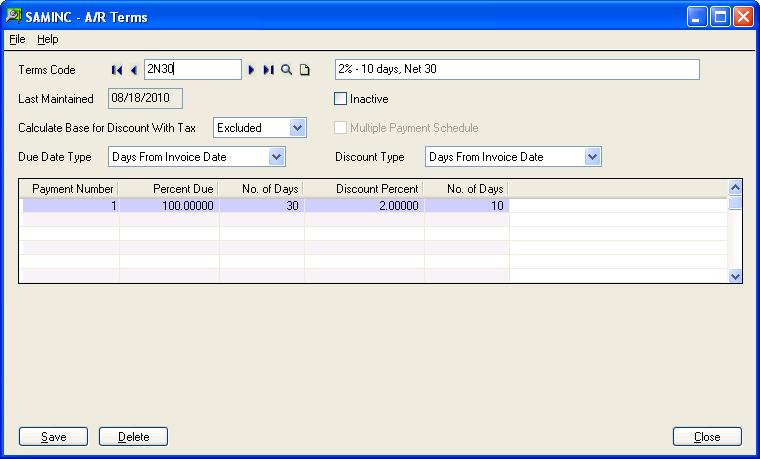
We will discuss the different features on the Terms code screen in brief:-
1. Terms Code: This will be the code up to six digits maximum used to define the terms code.
2. Last Maintained: This information field displays the date of the last change made to the terms code
3. Calculate Base for Discount with Tax: This will specify that whether the tax amount will be include in invoice amount while calculating the discount amount.
4. Discount Type: It will be used to select the discount date for the transaction.
a. Days from invoice date: Select this option if discount dates are calculated as a particular number of days from the document date.
b. End of next month: Select this option if the discount date is the last day of the next month, regardless of the document date or the number of days in the month.
c. Day of next month: Type the number of the day of the next month which is the desired discount date.
d. Days from day of next month: Type the number of days from a specific day of the next month. Example: If the discount date is 15 days after the first of the month, enter 15 in the Number Of Days field, and 1 in the Day Of Month field.
e. Due date table: Select this option if you use standard discount dates for invoices entered within specified range of days.
5. Due Date Type: This is the method we need to use for calculating the due dates for the Transactions.
a. Days from invoice date: This option is used if invoices are due by a particular number of days from the document date.
b. End of next month: Select this option if invoices are due on the last day of the next month, regardless of the document date or the number of days in the month.
c. Day of next month: Type the number of the day of the next month that is the due date.
d. Days from day of next month: Type the number of days from a specific day of the next month.
e. Due date table: This option is used if you use standard due dates for invoices entered within specified ranges of days.
6. Multiple Payment Schedule: Select this option to define a terms code that allows installment payments. When you select this option, the terms table expands to accommodate additional payments (otherwise, only a single line is displayed).
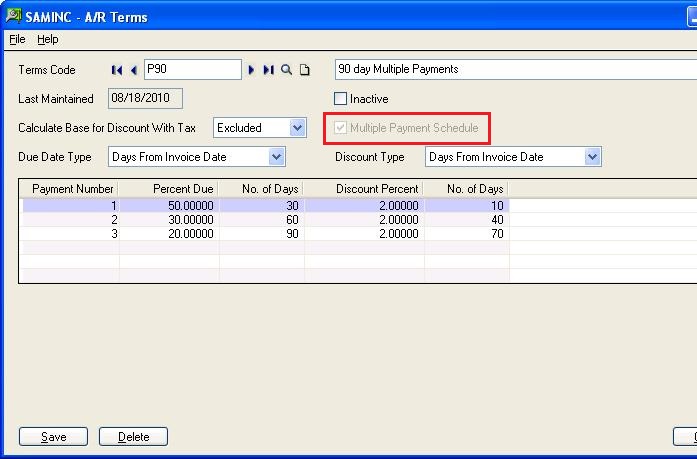
In above screen shot we have checked multiple payments schedule due to which we can set the number of payments and their respective discount, percent due etc.
a. Number of Days / Day of Month (discount): This column appears in the payment schedule to the right of the Discount Percent column by default. Its name depends upon your selection for the Discount Type field.
Number of Days: This column indicates that the discount period expires the specified number of days from the invoice date or number of days from Day of Next Month.
Day of Month Due: This column displays the day of the next month on which the discount expires.
b. Number of Days / Day of Month (due): This column appears in the payment schedule to the left of the Discount Percent column by default. Its name depends on your selection for the Due Date Type field:
Number of Days: This column indicates that the due date is the specified number of days from the invoice date or number of days from Day of Next Month.
Day of Month Due: This column displays the day of the next month that payment is due.
c. Payment Number: With multiple payments you can enter as many periods as you want.
d. Percent Due: Enter the percentage of the balance that is due for each payment number. The total amount entered should be equal to 100.
e. Discount Percentage: This field will be used to specify the discount percentage for the particular payment number.
Note: You cannot assign inactive terms code to any customer. Also before deleting any terms code record make sure that you have not assigned it to any customer.
Hence with terms code you can define due date as well as discount percentage for transaction.
Also read:
1. Interest Invoices for Overdue Receivables
2. Customer Credit Limit in Sage 300 ERP
3. Create Write-off Batches for Open Invoices in Sage 300 ERP
4. Auto Apply Option for AR Receipt in Sage 300 ERP
5. AR Customer Receipt Enquiry