While installing Sage CRM, most of the times we install demo data either purposely or by mistake. Demo data does help in case of product Demos, testing etc. however at the time of going live with implementation we do have to flush out the same.
GUMU Sage CRM Integrations: Sage 100 ERP | Sage 500 ERP | Sage Pro ERP | QuickBooks
Now coming back to our topic, easiest way to get rid of the data is by truncating entity tables. But it seems quite difficult job for non-technical users. Here is more simpler approach.
Note – Please ensure proper backups are taken before you do this.
Sage CRM installation creates “nodemodata.es” file at the path “C:\Program Files (x86)\Sage\CRM\CRM\Setup\ES”. This file is utilised by SageCRM installation process to flush demo data. This component itself can be run manually to truncate demo data. Here is how.
1. Prepare component folder structure for nodemodata.es by creating .ecf file. While doing the same, you need to remove few lines of code in nodemodat.es file. You have to remove syntax of the if loop.
e.g. After opening nodemodata.es file, you will see code written as below.
if (iDatabase == IOracle){
RunSQL(‘delete from Address’);
RunSQL(‘delete from Address_Link’);
RunSQL(‘delete from Campaigns’);
RunSQL(‘delete from CaseProgress’);
RunSQL(‘delete from Cases’);
RunSQL(‘delete from Communication’);
RunSQL(‘delete from Comm_Link’);
RunSQL(‘delete from Company’);
RunSQL(‘delete from Currency’);
RunSQL(‘delete from Email’);
RunSQL(‘delete from Marketing’);
……………………………………. continue
}
You need to modify code as below and save the file. I have removed only if loop.
RunSQL(‘delete from Address’);
RunSQL(‘delete from Address_Link’);
RunSQL(‘delete from Campaigns’);
RunSQL(‘delete from CaseProgress’);
RunSQL(‘delete from Cases’);
RunSQL(‘delete from Communication’);
RunSQL(‘delete from Comm_Link’);
RunSQL(‘delete from Company’);
RunSQL(‘delete from Currency’);
RunSQL(‘delete from Email’);
RunSQL(‘delete from Marketing’);
…………………..continue
2.Place these files under the “inf” folder under CRM directory with proper component.
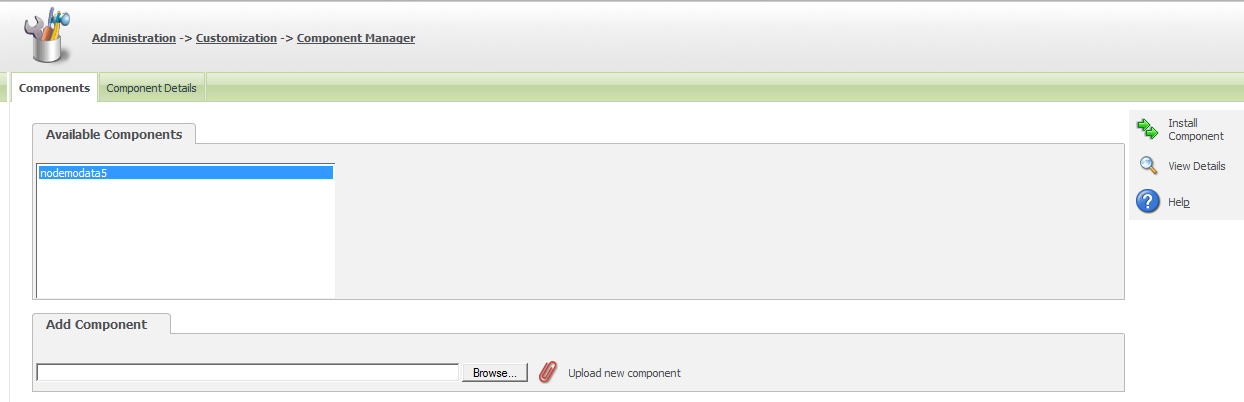
3. Now go to Administration || Customization || Component Manager
4. You will see respective component under Components Tab in Available Components window.
5. Select that component and Install. Refer below screenshot.
6. After running you will see notification on screen as “Component Installed” then click on “Continue” button and check.
7. You will see all demo data is deleted from system.
Also Read:
1) Advanced Options in Component Manager
2) Creating Component and generating Script files
3) Run SQL Queries through Sage CRM Components
4) Sage CRM 7.2 Facebook Component
5) Sage CRM Mapping Component