Generating E-Way Bills for various types of transactions like sales invoices, sales deliveries, and customer BP invoices is crucial for compliance with Goods and Services Tax (GST) regulations. Sage X3 provides an efficient E-Way Bill Generation screen that allows users to create multiple E-Way Bills and modify the From and To addresses from a single interface. Here is a step-by-step guide on how to generate E-Way Bills using this feature.
Step 1: Accessing the E-Way Bill Generation Screen
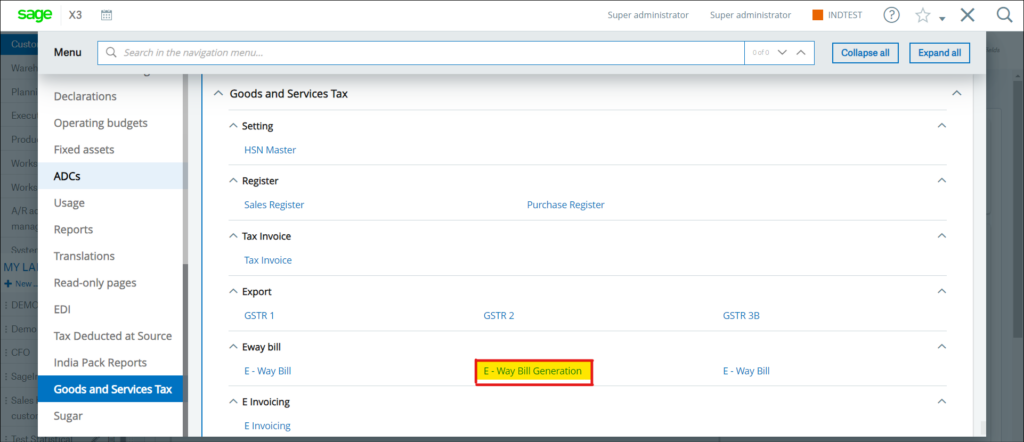
To begin, navigate to the Goods and Services Tax (GST) module within Sage X3. On the navigation page, locate the E-Way Bill Generation Screen. This is your starting point for generating E-Way Bills.
New Stuff:- How to Display All Data In The Left Lists Selection in Sage X3
Step 2: Utilizing the Filters
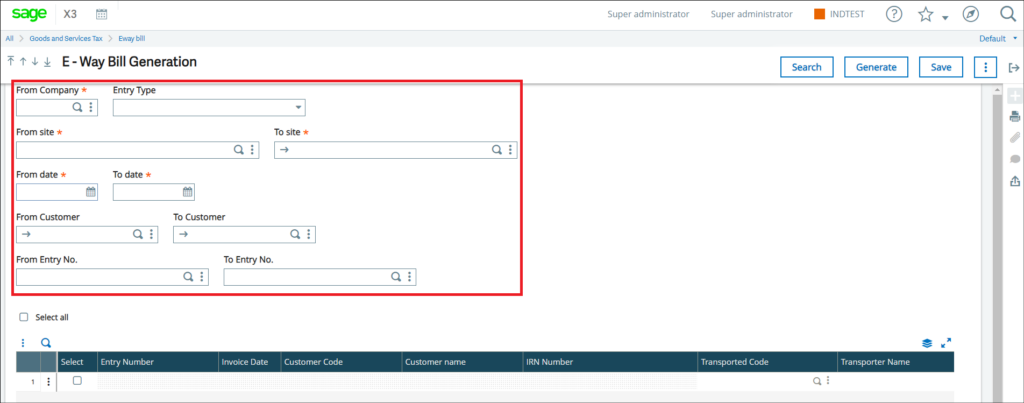
On the E-Way Bill Generation screen, you will see several filters to help you locate the necessary data:
Company
Site
Date
Customer
Entry Type
Entry Number
These filters allow you to refine your search and find the specific entries you need.
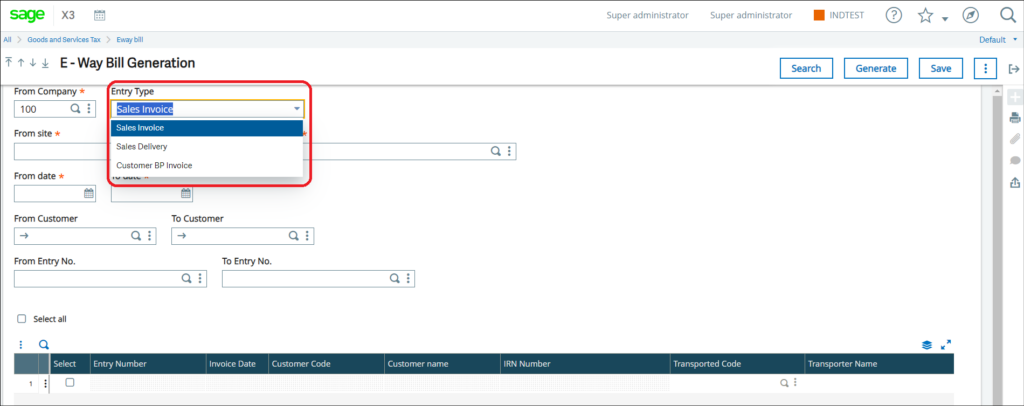
Step 3: Selecting the Entry Type
In the Entry Type filter, you have three options:
Sales Invoice
Sales Delivery
Customer BP Invoice
Choose the appropriate entry type for which you want to generate the E-Way Bill.
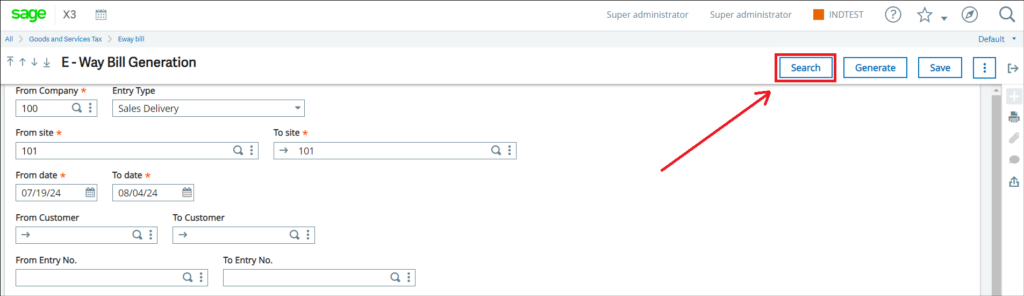
Step 4: Searching for Entries
After selecting the desired filters, click the Search button. The system will fetch and display the entries that match your criteria.
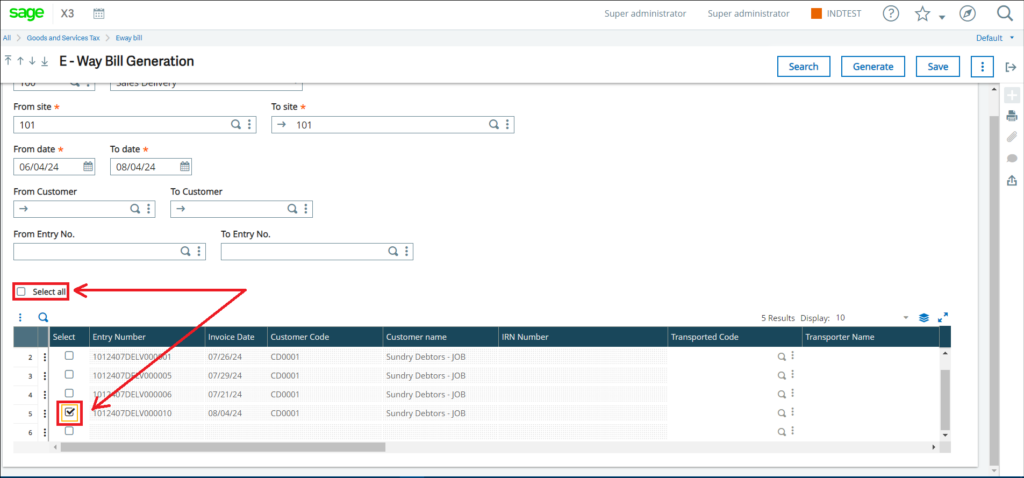
Step 5: Selecting Entries
In the details section, you have the option to Select All entries or select individual entries using the normal select option. This flexibility allows you to manage multiple entries efficiently.
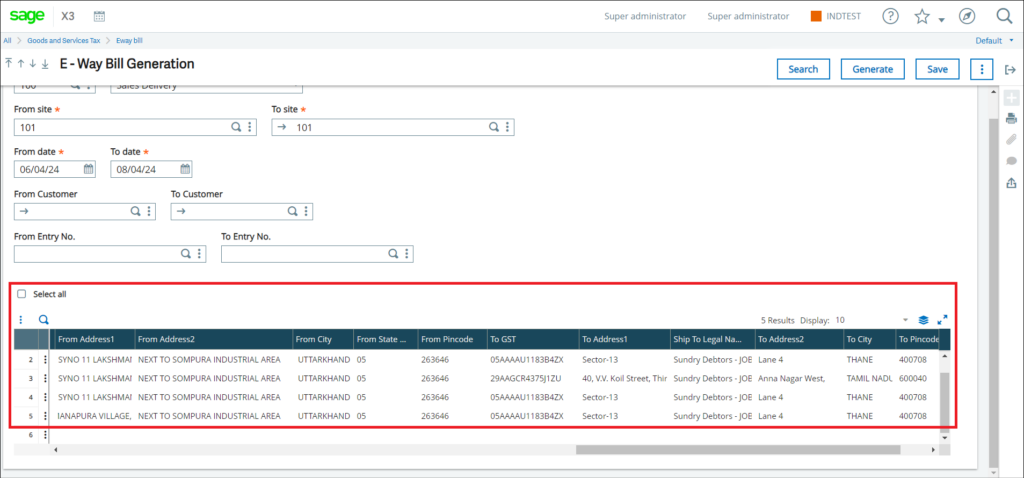
Step 6: Modifying Address Data
Once the entries are selected, you can modify the From and To address data as needed. This is useful for ensuring that all addresses are accurate and up to date.
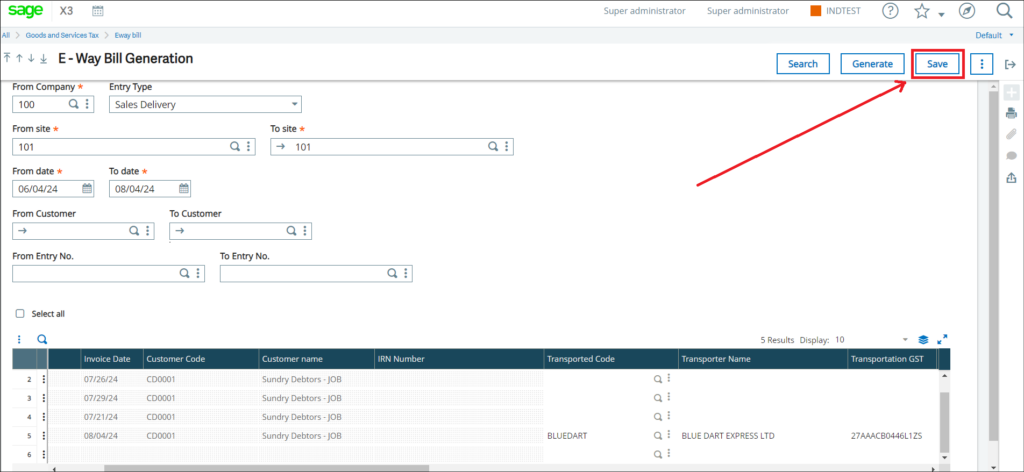
Step 7: Saving the Data
After making the necessary modifications, click the Save button to save your changes.
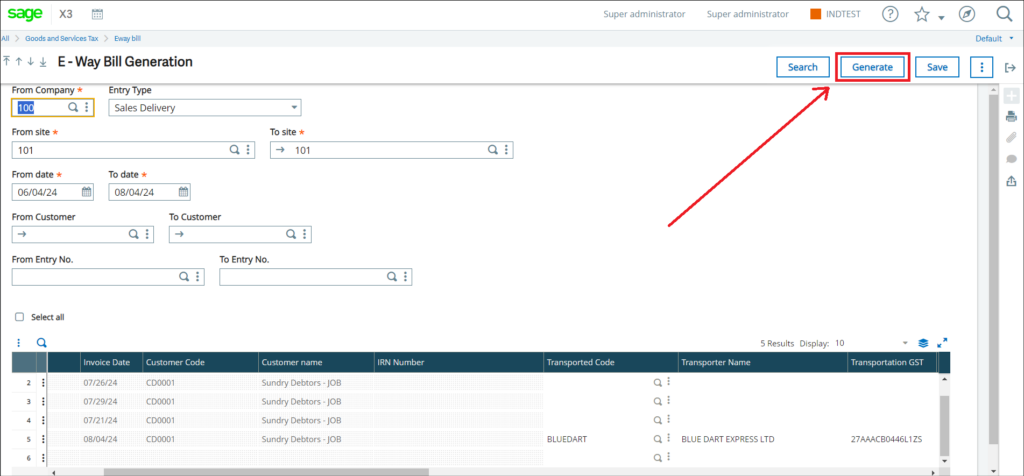
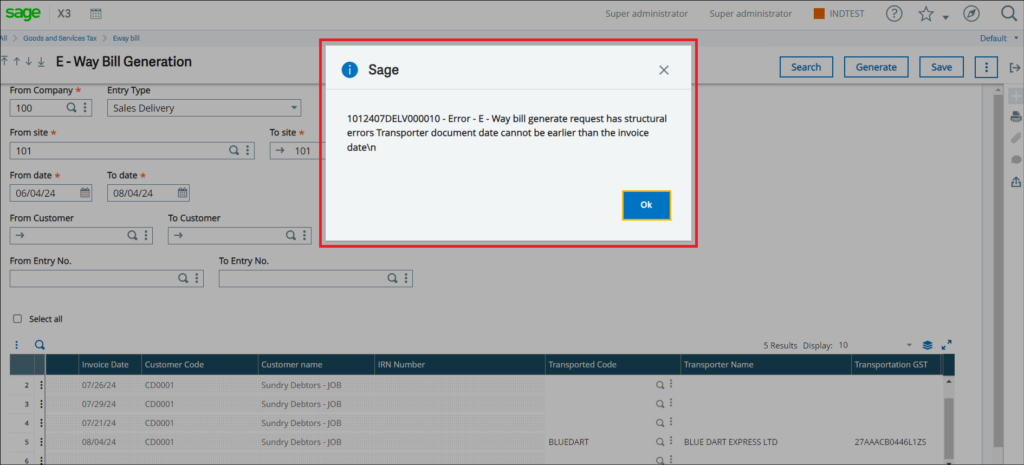
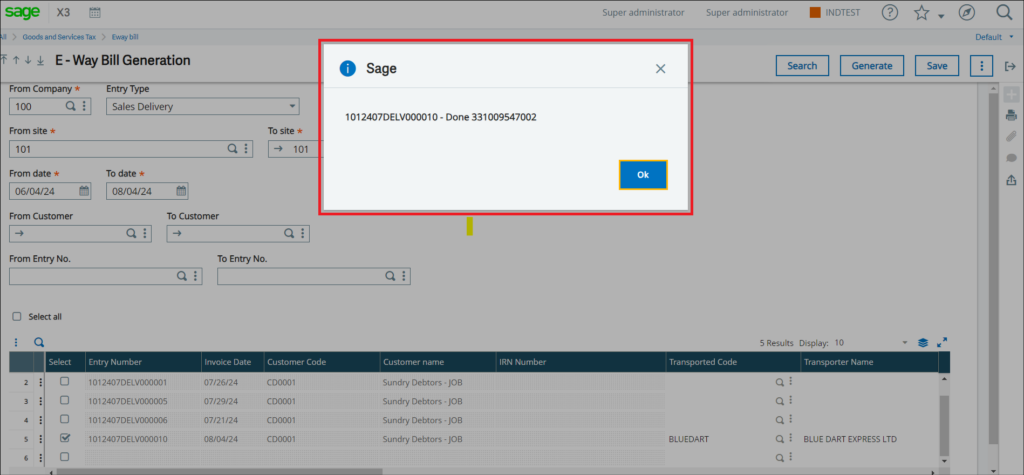
Step 8: Generating the E-Way Bill
Finally, click the Generate button to create the E-Way Bill. The system will process the request and, if successful, display a “Done” message along with the E-Way Bill number. If there are any issues, an error message will be displayed on the E-Way Bill Generation screen and the respective entry screens.
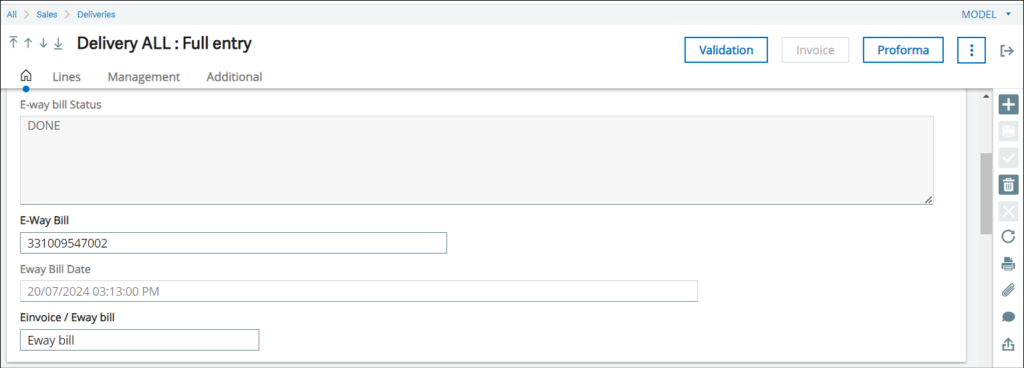
By following these steps, you can efficiently generate E-Way Bills for your sales invoices, sales deliveries, and customer BP invoices using the E-Way Bill Generation screen in Sage X3. This streamlined process ensures compliance with GST regulations and helps maintain accurate records.
[about_us_blog_common]