Before learning how to store images, it’s important to understand the AB0 and ABB data types.
Understanding AB0 and ABB Data Types
Both AB0 and ABB are BLOB (Binary Large Object) fields used to store binary data, such as images, directly in the database. The length of BLOB fields is expressed in powers of 2. For example, if you select a length of 6, the field can store files up to 64 KB (6 length : 2^6 = 64kb).
Steps to Store Images in Sage X3
To store images in Sage X3, follow these steps:
- Add a Field to Store the Image
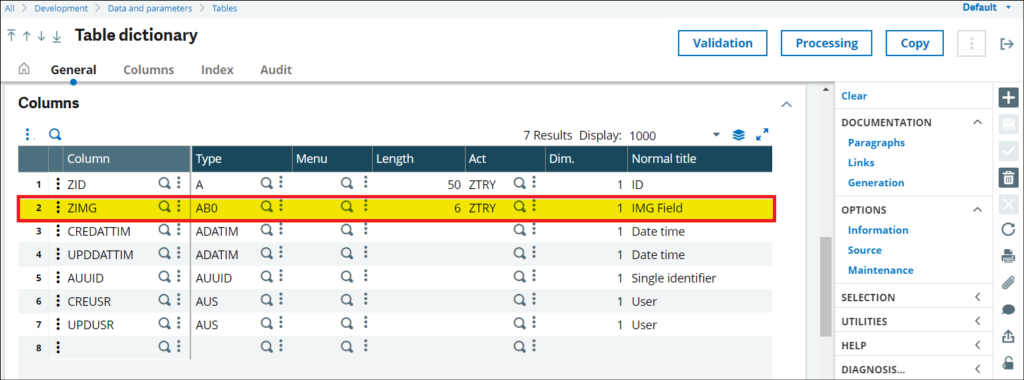
Begin by adding a new Column in the table where you want to store your image. Select the data type AB0 or ABB for the field (as shown in the screenshot below).
New Stuff:- Running Total Fields Feature in Crystal report
- Select the Appropriate Length
Choose the length of the BLOB field based on your expected file size. This length is crucial because it defines the maximum size of the image you can store. For example, choosing a length of 6 allows you to store up to 64 KB.
- Save and Validate the Table
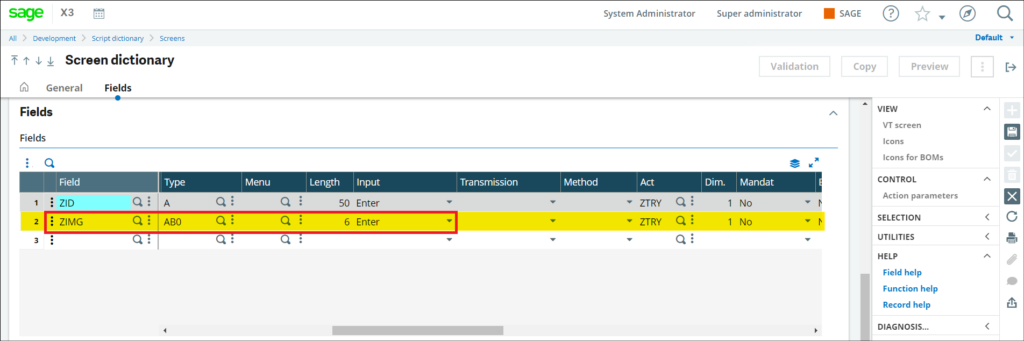
After setting the field and length, save your changes and validate the table to apply the modifications. - Add the Field to the Corresponding Screen
Navigate to the screen associated with your table, and add the same field you just created. Ensure the field length matches the one you set in the table.
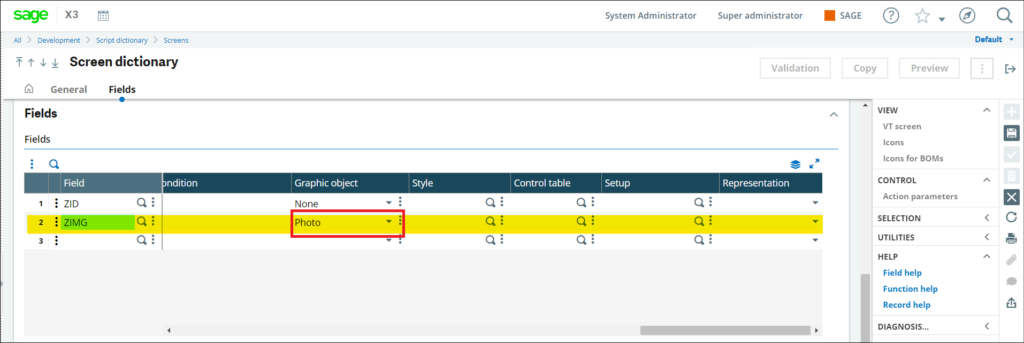
- Configure the Graphic Object
After adding the field to the screen, you need to configure it as a graphic object to handle images. Select Photo as the graphic object type. When configuring the graphic object, you’ll encounter the following parameters:
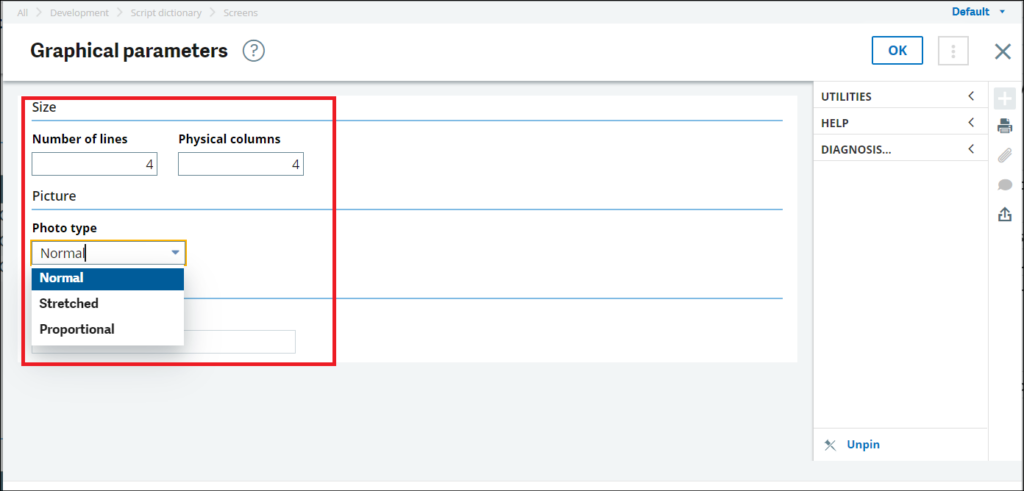
oNumber of Lines (Height): Determines the height of the image box.
oPhysical Columns (Width): Defines the width of the image box.
oPhoto Type: Choose between:
Normal: Displays the image as is.
Stretched: Stretches the image to fit the box.
Proportional: Adjusts the image proportionally to fit the box (as shown in the screenshot below).
Configure these parameters according to your needs and design preferences.
- Save and Validate the Screen
Once the graphic object is configured, save and validate the screen to apply the changes.
- Upload the Image
Now, when you navigate to the screen, you’ll see the option to upload an image file (as shown in the screenshot below). Select your image file, and the system will display a preview in the designated field.

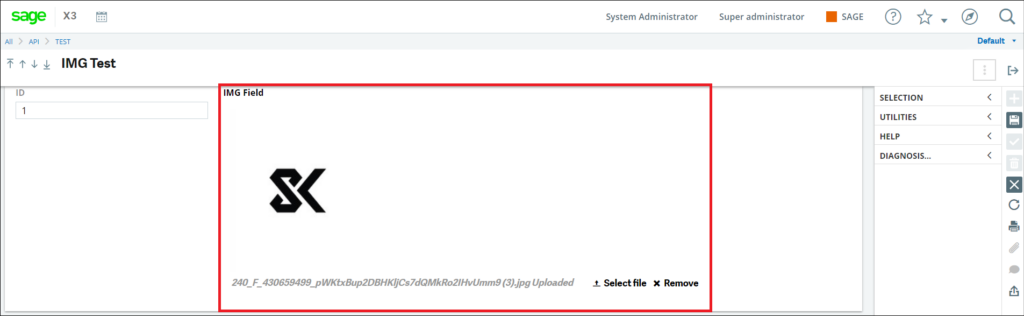
- Save the Image
After previewing the image, hit the Save button to store the image in the database.
Following these steps will allow you to successfully store images in Sage X3 using AB0 or ABB fields. Be sure to select the appropriate length and configuration to meet your requirements.
[about_us_blog_common]