Crystal Reports is a powerful tool that allows users to create customized reports from various data sources. With features like formulas, cross-tab reports, sub-reports, special fields, and conditional formatting, it’s no surprise that Sage X3 supports Crystal Reports to export ERP data as needed.
In this blog, we will guide you through the process of how we helped a client achieve a customized file name for their exported report. Instead of using a predefined report name, the client wanted the exported file name to include the project code and the date of export.
The Scenario: Job Cost Report Customization
For one of our clients, we created a Job Cost Report that provides detailed project information, including:
Project code
Tasks and subtasks
Committed and actual prices
The Requirement: Custom Exported File Name
The client wanted to modify the exported file name so that it would include the Project Code and the Export Date, rather than the default report name.
We were able to achieve this requirement by modifying the exported file name using 4GL script. Here’s how we did it.
How We Achieved the Client’s Requirement
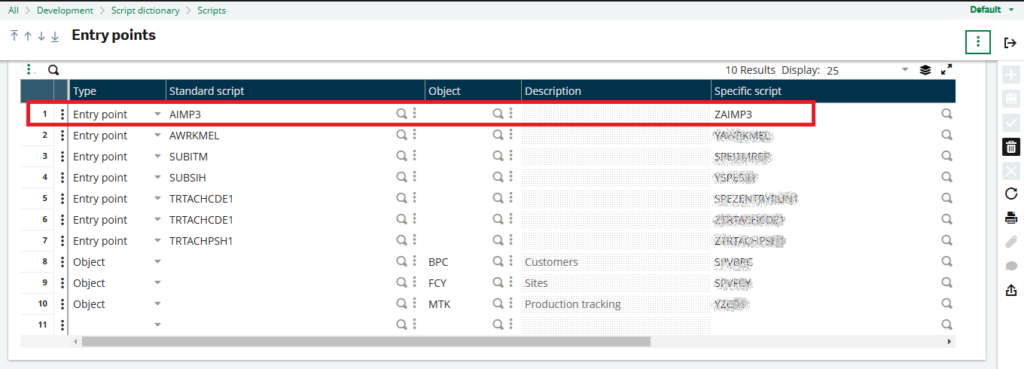
We used a combination of an entry point, the AIMP3 standard script, and a ZAIMP3 specific script to assign a dynamic file name during the report export process. The following sections will walk you through the steps involved:
Step 1: Entry Point with AIMP3 Standard Script
We began by setting up an entry point with the AIMP3 standard script. This entry point is critical for ensuring the customized script runs during the report’s generation process.
New Stuff:- How to Show Multi-Line Text in Sage X3
Step 2: Assigning a Dynamic File Name Using ZAIMP3 Script
In the ZAIMP3 specific script, we wrote the logic to assign a dynamic file name. This logic uses the FICHIER global variable and is executed during the IMPRIME and REPORT actions of the script.
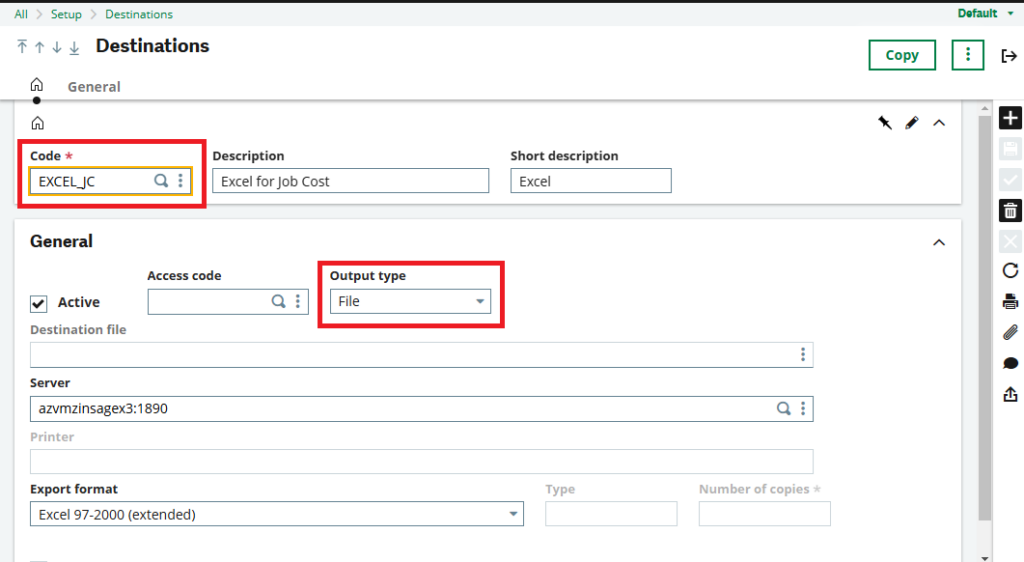
1.IMPRIME Action: The logic here assigns the dynamic file name to the FICHIER global variable and stores the file on the server path.
2.REPORT Action: The script retrieves the report from the server path and sends it to the application for export.
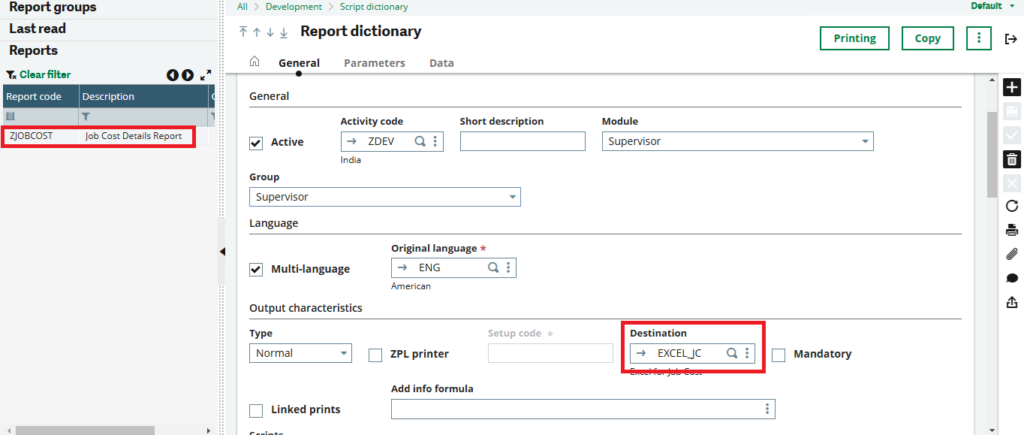
Step 3: Modify Report Code Destination
The AIMP3 entry point triggers while printing the report. Therefore, we needed to modify the report’s destination settings.
Conclusion
By following the above steps and modifying the script logic, we successfully achieved the client’s requirement of dynamically naming the exported report file. The client’s exported report file now includes the Project Code and Export Date, making the process more efficient and user-friendly.